I’ve found that standing water usually stems from three culprits: clogged gutters dumping water near your foundation, compacted soil that won’t absorb anything, or your yard sloping the wrong direction.
Start by cleaning those gutters and extending downspouts at least six feet away.
Then loosen your soil with aeration and add a few inches of compost, which improves water absorption in your lawn.
For stubborn wet spots, French drains or rain gardens provide effective solutions.
Timing and measurements vary depending on your specific yard conditions and the severity of water pooling.
Identify Standing Water in Your Yard

Why is your yard turning into a swamp every time it rains? Standing water usually signals one of a few culprits lurking beneath the surface.
First, check your grading. Walk your property after rainfall to spot those annoying low spots where water pools. If water’s collecting near your house instead of flowing away, you’ve got a drainage problem. Next, dig down about 6 inches and grab some soil. Does it feel heavy and clay-like? Poor soil permeability is preventing water from soaking in properly.
Also consider your water table. If your yard stays perpetually soggy even during dry spells, you might have a high water table situation. Understanding what’s causing your standing water is your first step toward fixing it.
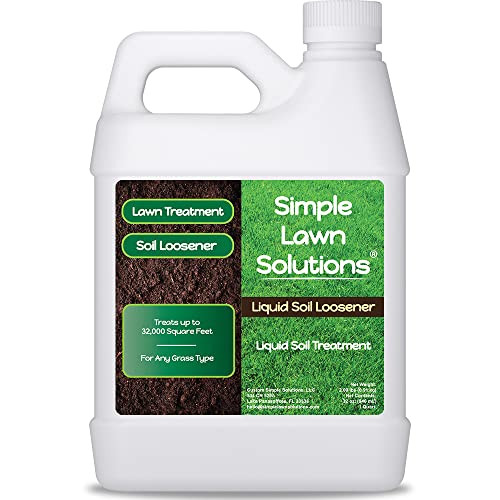
Liquid Soil Loosener: Can be used Alone or with Mechanical or Core Aeration, Aerating and Aerate Tools. Liquid Soil Loosener Conditions Compact Soil. Helps the Downward Movement of Water Allowing Vertical Drainage and Increased Water Infiltration.


🫧【2-in-1 Sprinkler & Bubble Machine】This 2-in-1 standing bubble and sprinkler toy set includes all accessories for quick assembly: 1 main machine, 2 bottles of 180ml ready-made bubble solution, 10 packs of 10ml bubble concentrate (10ml concentrate + 40ml water for bubble production), leak-proof water valve, water pipe adapter, screwdriver and installation manual, packaged in an exquisite gift box. Ideal for kids outdoor play in backyards, gardens, patios and beaches.
Fix Roof and Gutter Drainage First

Now that you’ve spotted where the water’s pooling in your yard, let’s talk about what’s probably sending all that water down there in the first place: your roof. Your gutter drainage system is basically your home’s first defense against soggy foundations. When gutters get clogged with leaves and debris, water overflows like a bathtub that’s been ignored too long. That overflow heads straight toward your foundation, causing standing water prevention to become nearly impossible.
To fix this: clean those gutters regularly, check for rotted fascia boards, and ensure downspout extensions reach at least 4-6 feet away from your house. Assess your roof water flow by watching where water travels during rain. This simple roof and gutter maintenance prevents foundation drainage issues from becoming expensive problems.

STURDY: This gutter downspout extension is made of thick material to make sure it is sturdier than others. It can withstand up to 10 pounds without deformation. The bad weather (such as storm, snow) will not affect or damage it. It can be buried underground

STURDY: This gutter downspout extension is made of thick material to make sure it is sturdier than others. It can withstand up to 10 pounds without deformation. The bad weather (such as storm, snow) will not affect or damage it. It can be buried underground

NOTE: Its size is NOT 4 inches. Pipe Size: Inside Diameter: 2.6 inches; Outside Diameter: 3.1 inches. Before choose this kind of pipe. Please pay attention for this.
Regrade Your Yard to Slope Away From the House

Once you’ve gotten your gutters under control, it’s time to tackle the actual ground beneath your feet. Even perfect gutters can’t help if your yard functions like a bowl holding water. Your yard needs to slope away from your house, with a 6-inch drop within the first 10 feet of your foundation. Gravity does the heavy lifting. Proper grading channels water toward approved outlets like storm drains or French drains instead of pooling near your house.
Hiring a professional landscaper is recommended for this work. They’ll shape terrain correctly, prevent water from getting trapped in walkways, and ensure your soil’s compacted properly so drainage actually works.

Accelerate Decomposition with Ease: The Yard Butler Compost Aerator speeds up composting by improving airflow with a DIY compost aerator that requires no lifting or turning of heavy piles
【Anti-Slip Foot Plate - Penetrate Soil with One Tread】- This manual hand tiller comes with anti-slip foot plate, maximize downward force of treading and penetrate into soil easily. The curved handle and long design reduce twisting effort and back strain, ideal for seniors or anyone with joint strain
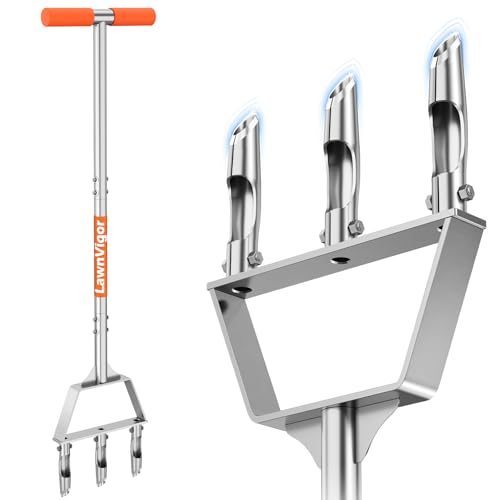
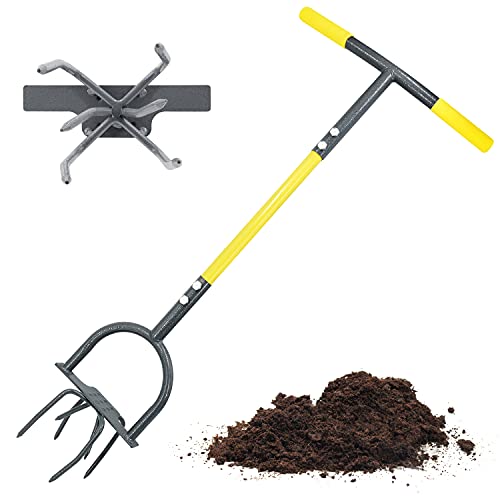
LAWN AERATOR FOR HEALTHIER LAWN GROWTH: Our manual lawn aerators promotes lush, green lawns by delivering essential air, water and nutrients deep into the soils. The lawn air aerator tool ensures healthier grass growth. (Note: Please water dry soil before use and do not rock, twist, or pry the tool side-to-side when it's in the ground.)
Loosen Compacted Soil With Aeration and Dethatching
Even with perfect grading and gutters, your yard still won’t drain well if the soil itself is packed tighter than a gym locker room.
Water infiltration depends on loose, breathable soil. That’s where dethatching and core aeration come in. Dethatching removes that dense layer of dead material blocking water movement, while core aeration punches small holes through compacted soil, creating air pockets that let water flow freely.
| Method | Cost |
|---|---|
| Thatch rake | ~$30 |
| Electric dethatcher | $100+ |
| Professional aeration | $144–$636 |
| DIY aeration | Rental fees vary |
| Soil amendment | $20–$50 |
Combine both treatments for best results. Afterward, amend with compost or aged manure. Organic matter transforms clay-heavy soil into a sponge that absorbs water rather than rejecting it.

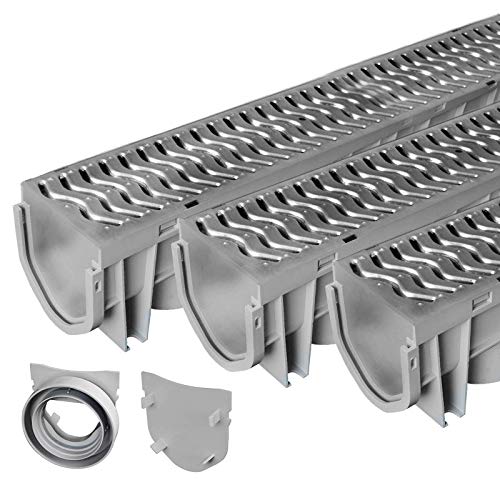
Low-profile Drain System: Dimensions of each channel: 5.9" W x 5.1" H x 39.4" L. Commercial water drainage systems allow safe and efficient drainage for grassed areas, gardens, farms, patio areas, pool sides, office buildings, driveways, or factory interiors. The anti-flotation design prevents floating and doesn’t require staking when setting in concrete.
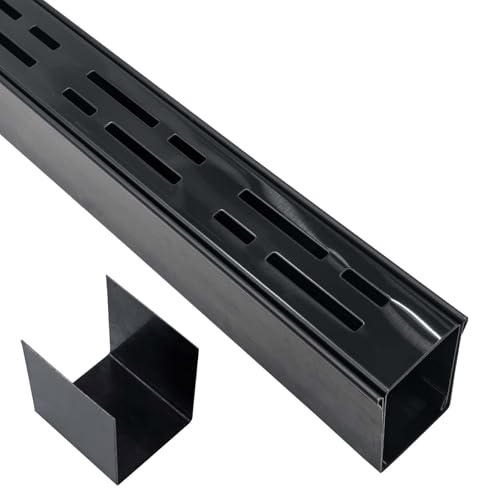
Timely Drainage Of Ground Water: Drainage ditch collects ground water and drains it in time. It is suitable for the renovation and construction of drainage systems such as swimming pools, decks, concrete, paving stones, terraces, sidewalks, garage doors, courtyards, and both sides of houses
Amend Soil With Compost and Topsoil for Better Drainage
What’s the secret ingredient that transforms stubborn clay soil into a water-loving sponge? Compost and topsoil. This approach has proven effective for drainage problems.
Here’s what to do to tackle standing water:
- Mix compost or leaf mold with aged manure for structure improvement
- Spread 2-4 inches of topsoil ($10-$50 per cubic yard) over problem areas
- Layer organic matter to create air pockets that let water move freely
- Break up hardpan so water percolates down instead of pooling on top
Clay soils especially need this treatment. Without amending, they’re basically concrete. Add these amendments after aeration, and you’ll notice water soaking in faster. Your backyard transforms from swampy to solid ground. Your soggy lawn will respond immediately to these changes.

Eco-Friendly Recycled Smart Gravel: Made in the USA from 100% recycled plastics to help reduce environmental waste and plastic pollution

🌱 OPTIMAL DRAINAGE FOR HEALTHIER PLANTS Say goodbye to soggy soil! Our eco-friendly gravel rocks promote healthy drainage, creating a porous layer underneath the soil to protect your plants from overwatering

Install a French Drain for Persistent Wet Spots
If you’ve tried everything else and your yard still looks like a swamp, a French drain might be your solution. It’s basically an underground gutter system that removes water before it can settle in and ruin your lawn. This guide explains what these drains do, breaks down the real costs for both professional installation and DIY approaches, and helps you determine if this solution works for your specific wet spots.

Stable Water-Filled Base Design: Tired of flimsy misters tipping over? Our upgraded base can be filled with water to ensure strong stability and prevents tipping or swaying, even on windy days. No wall mounting or installation required—just set it up, fill the base, and enjoy hands-free cooling wherever you need it
Metal Heavy-duty Structure: Outdoor Water Column The main body made of 304 stainless steel material, with multiple layers of paint protection process on the surface, effectively resisting ultraviolet rays, salt spray, moisture and daily wear, and not easy to fade or rust
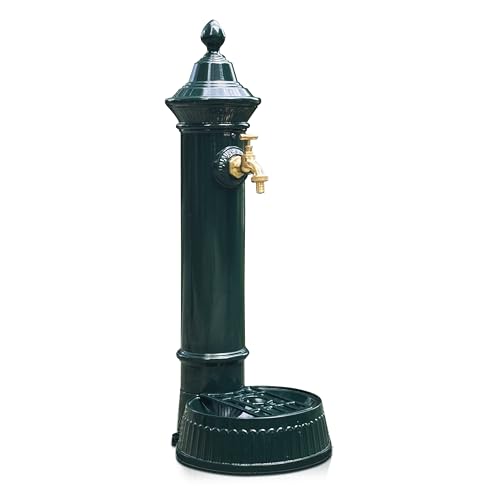
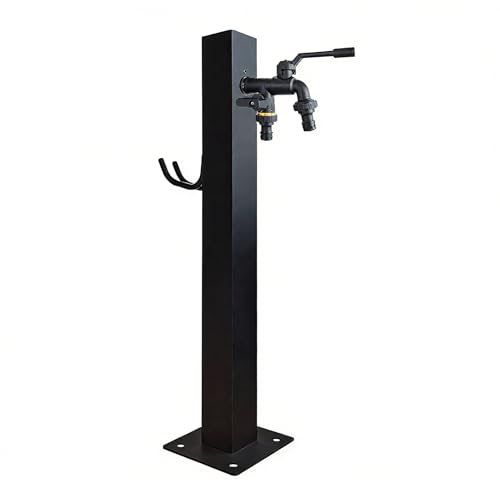
🛡️ Sturdy Cast Aluminum Build Made from premium cast aluminum, this outdoor faucet post resists rust and corrosion while withstanding harsh weather, ensuring long-lasting performance.
What French Drains Do
Here’s where French drains come in. A French drain is basically a gravel trench with a perforated pipe that catches water and whisks it away before it becomes your backyard’s personal swamp.
Here’s how it works:
- Water seeps into the surrounding gravel
- The perforated pipe collects that water from below
- Gravity does the heavy lifting, moving water through the pipe
- Water exits at a drainage point away from your house
Dig a trench 6–8 inches wide (12 inches is better), pack in 18–24 inches of washed gravel, then lay that pipe right on top. This gives your soggy yard an underground escape route. Cap the pipe properly and check local regulations first, as improper installation can flood neighboring properties.
Installation and Cost Breakdown
Now that you understand the mechanics of a French drain, let’s talk about actually getting one installed. Knowing how something works and actually digging a 50-foot trench are two very different tasks.
Here’s the cost breakdown: professional installation runs $1,650 to $12,250, depending on your yard’s characteristics. DIY installation costs roughly $700 if you’re willing to do the work yourself.
The installation process involves digging a 6–8 inch wide gravel-filled trench, laying down 18–24 inches of washed gravel beneath your perforated pipe, then backfilling with excavated soil. The drainage system needs proper slope directing water toward your outlet, whether that’s a storm sewer or dry well.
Hiring professionals saves physical labor and ensures proper drainage installation. If you’re handy and patient, DIY installation can be completed successfully with adequate planning.
When to Choose French Drains
When should you actually bite the bullet and install a French drain instead of just accepting your backyard as a swamp?
Consider a gravel-filled trench when you’re tired of soggy grass, mosquito breeding grounds, or foundation threats. Installation is worthwhile in these situations:
- Persistent wet spots that won’t dry out after rain
- Standing water pooling in the same spots repeatedly
- Foundation damage or basement moisture issues
- Lawn health declining from constant saturation
A French drain tackles these problems directly. You’ll need 18 to 24 inches of washed gravel under the perforated pipe, which channels water toward an outlet like a storm drain or dry well. This system provides an effective drainage path and prevents water from accumulating in your yard.
Build a Rain Garden to Absorb Runoff
I’ve found that a rain garden, basically a shallow planted bed that soaks up runoff like a sponge, can transform those annoying puddles into a thriving garden feature that actually works for you instead of against you. You’ll want to position yours in that low spot where water naturally collects, fill it with soil mixed generously with organic matter (think compost, not just plain dirt), and plant wet-tolerant species that’ll happily sit in moist conditions. The benefit is that you’re getting a decorative solution that costs $7.25 to $27 per square foot depending on your setup, handles drainage without the fussy maintenance of other systems, and gives you a habitat boost for pollinators and beneficial insects.

NOTE: Its size is NOT 4 inches. Pipe Size: Inside Diameter: 2.6 inches; Outside Diameter: 3.1 inches. Before choose this kind of pipe. Please pay attention for this.

【EASY TO INSTALL】 - This Inner diameter 2.6 inches, outer diameter 3 inches gutter downspout extension is easy to bend and keep the shape as you want, and is suitable for downspouts of 2 x 3 inches and 3 x 4 inches. Each pipe is equipped with screws, which can be used to secure the pipe to the downpipe, So don't worry about your pipes being washed away by rainwater.

【Long Enough to Protect Your Foundation】- The rain gutter downspout extensions can effectively divert damaging rainwater & sewage away from your foundations. The downspout extender can be easily extended from 20 to 66 inches. If you connect 2 pipes to 1 long pipe with the mini connector, the length can be up to 127 inch. It helps to prevent the problems of flooding in your home.
Rain Garden Design Basics
Why keep fighting those soggy patches in your yard when you could actually put them to work? A rain garden isn’t just some fancy landscaping trend. It’s your tool against standing water. Here’s what makes a solid design:
- Location matters: Place your rain garden at the low point where water naturally collects
- Infiltration zones: Dig 4-8 inches deep to maximize water absorption into soil
- Water-tolerant plants: Choose native grasses and perennials that thrive in wet conditions
- Drainage layers: Use a mix of soil and mulch to filter water effectively
Think of it as creating a mini wetland that actually wants the water your yard’s been rejecting. Your drainage problems become a beautiful garden feature. This approach solves both functional and aesthetic concerns.
Water Absorption Benefits
Ever notice how your yard stays swampy for days after a rainstorm while your neighbor’s drains perfectly? That’s where a rain garden works its magic. I’ve seen firsthand how these planted beds transform soggy spots into absorption powerhouses. A rain garden acts like your yard’s personal sponge, capturing runoff before it pools anywhere annoying. The secret is soil amendment with organic matter boosts infiltration rates dramatically. When you add compost or mulch to your rain garden’s base, water soaks down instead of sitting around like an unwelcome guest. Your plants love the moisture, your drainage improves, and you’ve got a beautiful garden doing the heavy lifting. This is the simplest solution for standing water problems.
Installation and Maintenance Tips
Ready to build this thing? I’ll walk you through it; it’s totally doable.
First, pick your spot. I always place mine at the lowest point where standing water loves to hang out. Then grade the area and dig a shallow trench about 4-6 inches deep. Here’s what makes the magic happen:
- Select native plants that thrive in wet soil. Daylilies and rushes are my go-to choices.
- Layer mulch and organic matter to boost drainage and infiltration rates.
- Size your rain garden to match expected runoff from your roof or driveway.
- Plan for maintenance by checking soil moisture monthly and removing debris.
Once it’s installed, maintenance is minimal. I spend maybe an hour quarterly weeding and refreshing mulch. Your rain garden will quietly absorb standing water for years, filtering pollutants while you relax.
Add a Dry Well or Sump Pump When Needed
If you’ve tried grading and drainage fixes but water still stubbornly pools in your yard, it’s time to consider more intensive solutions: dry wells and sump pumps.
Dry wells are underground storage tanks about 4 feet by 4 feet that work like underground sponges, slowly infiltrating water into surrounding soil. DIY installation runs $185 to $385, which beats professional costs. Sump pumps actively remove standing water away from problem zones.
| Solution | Best For | Your Wallet |
|---|---|---|
| Dry Well | Clay soils, gradual infiltration | Budget-friendly |
| Sump Pump | Flood-prone areas, active removal | Location-dependent |
| Combined Approach | Hard soils, persistent pooling | Smart investment |
Neither solution works in isolation. You’ll need proper drainage gradients and filtering materials to prevent clogs. In stubborn clay soils, combine dry wells with French drains to achieve effective water management.

【EFFECTIVE MANUAL LAWN AERATOR TOOL】: Walensee spike lawn aerator helps loosen soil and create small channels so air, water, and nutrients can reach grass roots more easily. It is a practical lawn care tool for preparing small lawn areas before seeding, watering, or fertilizing, helping your yard, garden, or patio lawn stay greener and better maintained.

Deep Aeration for Greener Lawns 15 sharp 3.5-inch steel spikes penetrate compacted soil, delivering air/water/nutrients to roots. Loosens thatch and boosts growth for a thicker, healthier yard/garden.

【Preparation Before Aeration】:Before using the Saker lawn aerator, trim the lawn and check soil moisture. Soft soil allows easier penetration and helps the tool deliver optimal aeration results for healthier grass.
Switch to Permeable Surfaces and Water-Absorbing Plants
Why do we keep laying down concrete and asphalt like we’re paving over the planet’s ability to breathe? Permeable surfaces and water-absorbing plants work with nature instead of against it.
Here’s what I’ve discovered about drainage improvement:
- Permeable pavers, gravel, and porous concrete let water seep through instead of pooling ($8.75–$30.50 per square foot)
- Plants like daylilies, hostas, and rushes absorb moisture while looking beautiful
- Stormwater management happens naturally through infiltration, reducing runoff near foundations
- Long-term ROI beats upfront costs when you factor in fewer mold, mildew, and pest problems
Your initial investment is steeper. Standing water disappears. Your yard becomes self-draining, low-maintenance, and resilient.

Double-layer design - This U-shaped gutter features 304 stainless steel grating and composite resin gutters to ensure high load-bearing strength and long-term practicality. It is designed to efficiently handle rainwater and snowmelt, keeping outdoor surfaces dry and safe even after a storm.

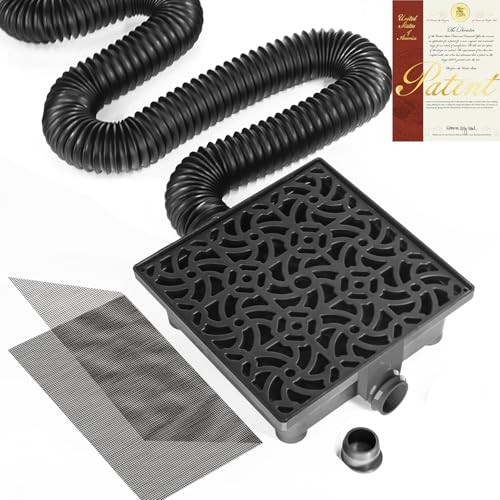
RELEASE WATER AWAY FROM PROPERTY: Capture water upstream and carry it away from structures and poor drainage areas to discharge with the pop-up emitter positioned downstream
Stop Standing Water & Protect Surfaces: Capture and direct runoff away from driveways, patios, garages, and pool areas to help prevent pooling, erosion, and slippery spots—keeping outdoor spaces cleaner, safer, and easier to maintain.