Painting bathroom tiles is a cosmetic refresh, not a permanent solution, but it works if you’re strategic. Skip it on floors and shower surrounds where water and foot traffic will damage the finish.
Instead, focus on walls and backsplashes in decent shape. You’ll need a bonding primer, epoxy paint for wet areas, proper prep work, and patience for the 48–72 hour cure time.
With proper application, you can expect two to three years of acceptable appearance before maintenance becomes necessary.
Decide If Painting Tiles Makes Sense for Your Space

Before you crack open that paint can, painting tiles is like putting a fresh coat of nail polish on a chipped nail. It looks great for a while, but it’s not fixing the actual problem.
Painting works best for vertical surfaces in decent shape, like outdated backsplashes. A painted tile floor creates durability issues. Water-exposed areas need epoxy paint instead of standard interior paint. Your grout lines will still show through, so don’t expect perfection.
This is a temporary solution. Quality prep work and primer for painting matter enormously, but you’re looking at a few years of use, not decades. Skip this if you’ve got significant damage. For quick refreshes on non-traffic walls, this approach can work.

Transform dated countertops: Stone Coat Countertops Bonding Primer & Sealer creates a durable bond on slick surfaces like laminate, tile, granite, quartz, solid surface, and cultured marble, ensuring a strong foundation for epoxy applications.
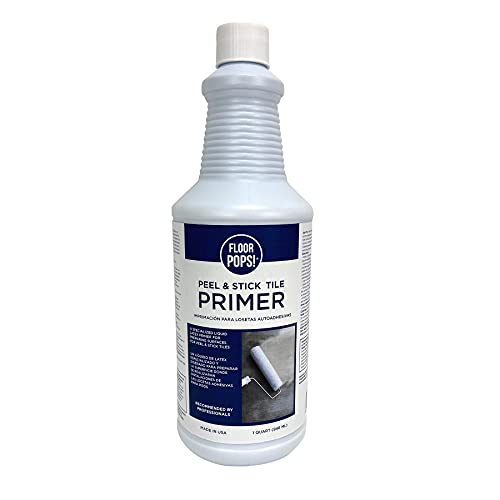
Latex floor primer for FloorPops peel and stick floor tiles

SURFACE PREP KIT ONLY – This is not a paint or refinishing coating. The EZ-Etch Kit is a chemical etching solution that prepares your surface for Bathworks refinishing coatings. Must be used with a Bathworks refinishing kit (sold separately).
When to Paint vs. When to Replace Bathroom Tile

Where you’re painting matters significantly more than most people realize, and it’s the first thing I check before deciding whether painting or replacing makes sense. Vertical walls in low-traffic areas work well for paint and will last years with the right prep. However, if you’re considering your shower floor or that constantly-splashed backsplash zone, you’re applying a temporary solution to a problem that requires actual replacement tiles.

Prepare and paint surface the same day with a tough, with tub and tile’s 2-part epoxy acrylic formula that withstands moisture and resists corrosion

Prepare and paint surface the same day with a tough, 2-part epoxy acrylic formula that withstands moisture and resists corrosion

Prepare and paint surface the same day with a tough, with tub and tile’s 2-part epoxy acrylic formula that withstands moisture and resists corrosion
Assess Your Surface Location
Where exactly are those tiles you’re eyeing? This decision significantly impacts your project outcome. Consider these locations:
- Backsplashes and walls – These surfaces experience minimal water exposure and foot traffic, making them ideal candidates for painting. Standard bonding primer and epoxy paint will last for years when you properly prepare grout and repair the surface first.
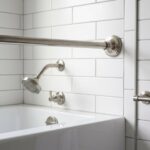
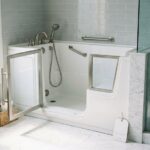
- Shower surrounds – Moisture resistance becomes critical here. You’ll need multi-component epoxy rather than regular paint since water constantly attacks these tiles.
- Floors and shower floors – Skip painting. These high-traffic surfaces sustain damage that paint cannot withstand. Tile replacement provides the only practical long-term solution.
The location determines everything about durability and whether you’re solving the problem or creating temporary results.
Evaluate Long-Term Durability
Now that you’ve figured out where your tiles actually live in your bathroom, painted tile isn’t forever. Durability depends heavily on prep quality and your coating choice. On bathroom walls, you’re looking at roughly 2 years of decent wear with regular cleaning. Shower floors require different treatment. High-traffic, wet surfaces need serious muscle like epoxy, not standard paint. If your tiles are cracked or significantly damaged, skip painting altogether and replace them. This is the long-term move. Vertical surfaces in good condition can be painted as a cost-efficient interim solution while you save for replacement. Match your method to your space for the best results.
What You’ll Need to Paint Bathroom Tiles: Complete Supplies List

Before you crack open a paint can, gather the right tools for this project. Showing up without proper supplies is like trying to fix a leaky faucet with a hammer.
What you actually need:
- Primers and paints: Grab a bonding primer (INSL-X STIX works great), then specialty tile paint in water-based, low-VOC formulas that’ll stick around for years.
- Prep supplies: All-purpose cleaner, degreaser, TSP for stubborn grime, sandpaper (220 grit), and masking tape to protect everything you don’t want painted.
- Application tools: A 3/8 inch nap roller, 1.5–2 inch angled brush, and grout repair putty knife for those rough spots.
Don’t skip the optional topcoat. Polyurethane adds significant durability in moisture-heavy bathrooms.

10x Stronger Than Steel, Zero Shrinkage: Military-grade 100% solids epoxy bonds permanently to concrete, resisting cracks, peeling, and hot tire pickup - no more stains or tire marks ruining your garage.

Durable 2-Part Epoxy Formula – Provides a long-lasting, professional-grade finish for garage floors, workshops, and basements. More resilient than traditional 1-part epoxy paints.

Sanding Discs Drill Polishing Kit: This complete set comes with 120PCS 3-inch sandpapers in 12 grits from 60 to 10000, supporting wet sanding for rough grinding to mirror polishing. Equipped with 25pcs sanding sleeves ,2pcs sanding drum,backing plates, sanding pads and wool-like polishing pads, it seamlessly connects grinding and polishing for all-around surface refinishing
Clean and Degrease Tile Thoroughly for Paint Adhesion
Why does your bathroom tile feel slippery even when it’s dry? Soap scum and grime create this effect, and both are paint job obstacles.
Cleaning is crucial for making paint actually stick. Grab a soft-bristle brush and some all-purpose cleaner like Krud Kutter, then scrub those tiles and grout lines until they’re genuinely clean. For stubborn grime, TSP is your heavy hitter. After degreasing, rinse everything thoroughly to eliminate residue. This step is not optional.
If your surfaces aren’t completely dry, primer and paint won’t bond properly. This results in peeling, chipping, and wasted effort.
Take time with this prep work. Surface preparation determines whether your painted tiles look professional or deteriorate quickly.

Regular Tiles Need Glue? - No tools, no grout, no pros. Peel and stick tiles refresh walls instantly.


Material:Made of PVC composite laminate, anti-scratch, high impact, color fadeless, more durable and stronger than other plastic self-adhesive tiles. Glossy/Poished surface finishing with realistic ceramic look, high waterproof and stain-resistant performance, protect the walls from splash and oil.
Fill Grout Gaps and Patch Cracked Tiles
Ever notice how your tiles look like they’ve got tiny canyons running between them. Those grout gaps need attention before you paint.
- Fill grout holes with grout paste using a putty knife, smoothing it flush with the surrounding grout. This is similar to frosting a cake, but messier.
- Patch cracked tiles with paintable acrylic caulk (skip 100% silicone; it won’t take paint). Sand the repair smooth so it blends in naturally.
- Know when to replace significantly damaged tiles instead of patching minor stuff. Sometimes replacement prevents recoating problems.
After repairs, rinse everything thoroughly, then apply a bonding primer like INSL-X STIX. This priming step is crucial because it makes your paint adhere properly and last longer.

TOUGH 2-COAT EPOXY FINISH – Not ordinary tub paint, this bathtub refinishing kit uses a 2-coat, two-part epoxy system to create a thicker, tougher finish on tubs, tile, sinks, and showers. The cured surface is hard, glossy, and non-porous, with long-lasting durability that resists peeling, chipping, scuffing, and everyday wear.

LONG-LASTING SOLUTION FOR BATHROOM & KITCHEN – Refresh wall and floor tiles with a durable epoxy paint designed for bathrooms, kitchens, showers, and high-use areas. Ideal bathroom tile paint for ceramic tile paint applications, shower tile paint updates, and bathroom tile cover up projects. Creates a hard-wearing, waterproof surface for reliable everyday performance

FIBERGLASS REPAIR KIT - Repairs chips, scratches, dents, worns and holes . Works on fiberglass, acrylic, ceramic, porcelain, gel-coat, enamelled steel and enamelled cast iron
Sand the Tile to Strip the Glossy Finish
Glossy tile resists paint something fierce. That’s why I grab my 220-grit sandpaper and dull the surface. This sanding step is crucial prep work; it roughens up the tile glaze just enough to boost adhesion. You’re not trying to destroy anything, just creating enough texture for paint to grip.
After sanding, I wipe everything down with water and a tack cloth to remove particles. Repaired areas get extra attention so they blend seamlessly with surrounding tile. If your tile glaze is heavily damaged though, skip the sanding and replace it instead.

【Sophisticated Marble Design】:Transform your space with these peel and stick wall tiles featuring a sophisticated marble-inspired design (not real marble tiles). Perfect for enhancing washroom walls, kitchen backsplashes, or accent walls, these tiles deliver a high-end look without the high cost.(Not suitable for use on floors and in high humidity shower rooms.)
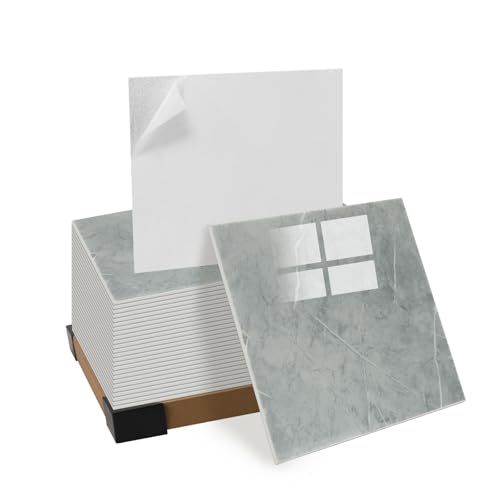
【Clean Marble Aesthetic】Give your space a quick upgrade with these peel and stick wall panels. They have the elegant look of real marble—without the high cost or heavy weight. Unlike complicated patterns that take time to match and can waste materials, our simple, clean design makes it easy to line everything up, giving you a modern look that lasts.

Chic Marble Look: Give your home a bold, modern update with our Charcoal Gray 11.8" x 11.8" Peel and Stick Marble Wall Tiles. Featuring a deep gray base with subtle, natural marble veins, these tiles create a sophisticated, contemporary look that enhances any bathroom, kitchen, or living room. Perfect for shower walls, backsplashes, and accent areas, the soft veining adds a touch of elegance and contrast.
Prime With a Bonding Primer (This Step Makes or Breaks It)
Prime With a Bonding Primer (This Step Makes or Breaks It)
Most DIY painters slip up here by skipping this step or rushing through it, only to watch their beautiful paint job peel off like sunburned skin. This is your make-or-break moment.
I always reach for INSL-X Stix as my bonding primer. It’s the most effective option available. Here’s what you need to do:
- Apply 1-2 coats, brushing that primer directly into grout lines and edges where water loves to sneak
- Give each primer coat around 4 hours to dry completely. Don’t rush this part
- Remember grout absorbs like crazy, so it’ll probably need that second coat
This bonding primer creates adhesion where glossy tile naturally resists paint. Skip it, and you’re basically painting over ice. Without proper primer application, your paint will fail prematurely.

Prepare and paint surface the same day with a tough, with tub and tile’s 2-part epoxy acrylic formula that withstands moisture and resists corrosion

Ideal for updating outdated flooring at a fraction of the cost of replacement and adheres without stripping, sanding or priming
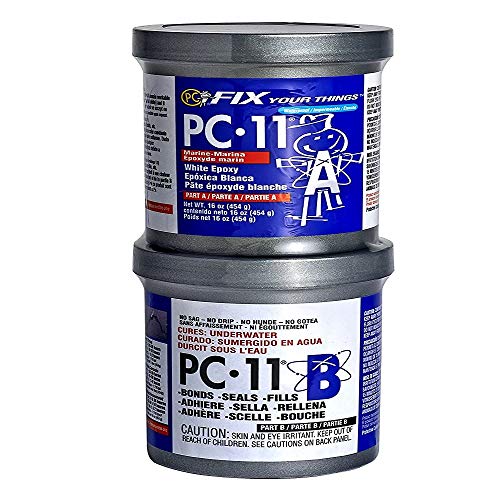
Two-part marine epoxy adhesive paste bonds materials in dry, wet, and underwater environments
Pick Bathroom Tile Paint: Acrylic, Epoxy, and Sealant Options
Once that primer’s locked in, you’re ready for the paint itself. Not all tile paints are created equal.
Standard acrylics won’t work. For shower and floor tiles, you’ll want either epoxy paint or a durable tile coating. Epoxy provides superior durability for bathroom environments. Brands like Aura Bath deliver solid performance with matte finishes that hide imperfections.
For shower and floor tiles, epoxy paint or durable tile coating outperforms standard acrylics in bathroom environments.
For floors especially, use a floor-specific system like Rust-Oleum Home Floor Coating. It resists moisture and withstands heavy traffic.
Don’t forget your sealant either. Use paintable acrylic latex caulk around edges; pure silicone won’t bond properly with your primer. This combination prevents water penetration and maintains a finished appearance.

【High-Gloss Finish】Creates a sleek, reflective surface that instantly upgrades the appearance of worn or outdated floors and brightens interior spaces.

10x Stronger Than Steel, Zero Shrinkage: Military-grade 100% solids epoxy bonds permanently to concrete, resisting cracks, peeling, and hot tire pickup - no more stains or tire marks ruining your garage.

10x Stronger Than Steel, Zero Shrinkage: Military-grade 100% solids epoxy bonds permanently to concrete, resisting cracks, peeling, and hot tire pickup - no more stains or tire marks ruining your garage.
Roll On Two Coats of Tile Paint for Even Coverage
Ready to paint those tiles. This is where the real work happens.
I’m breaking this down into three key steps:
- Grab your tools right. Use a 3/8 nap roller for flat tile surfaces and a 1.5–2 inch angled brush for edges and grout lines. Don’t overload that roller, or you’ll end up with paint bleeding everywhere like a leaky faucet.
- Apply your first coat of base color evenly across everything. Let it dry for about six hours before round two. Patience here prevents mistakes later.
- Roll on that second coat for flawless coverage. Then comes the difficult part: don’t touch anything for several days while your tile paint cures fully.
1.4 Times Coverage Area - Come in a pack of 10 sheets of self-adhesive tiles, 12" X 12" each, which can cover 40% more area than 10"x10" tile does.
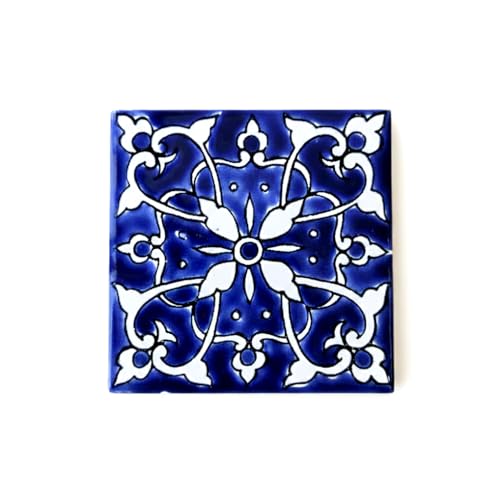
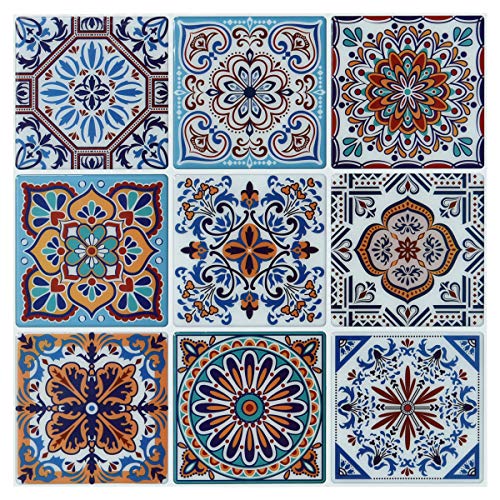
Authentic Artisan Craftsmanship: Each 4x4 inch tile is individually hand-painted, ensuring that no two pieces are exactly alike—bringing a soulful, bespoke feel to your home.

【Construction Kit】Our all-inclusive tub and tile refinishing kit provides essential tools for both beginners and experienced individuals. With user-friendly design and easy operation, our bathtub kit enables anyone to successfully complete construction projects for home improvement or commercial purposes.
Cut in Edges and Grout Lines With a Brush
This is where the magic happens, and where most people mess up if they’re not careful. Grab a 1.5 to 2 inch angled brush and paint those edges around your fixtures and along the grout lines before you roll the main areas. Use light, controlled strokes to keep that paint exactly where it belongs. Wipe away any drips with a wet rag immediately so the color doesn’t bleed into your grout lines like watercolor paint gone wrong.

WATERPROOF & HUMIDITY RESISTANT PROTECTION:Seals shower, pool tile and bathroom tiles against leaks. This reliable pool tile grout features flexible formula prevents cracks in hot/cold weather.

100% Odorless & Zero VOC for Safe Indoor Application ArmoGlaze is a fume-free, non-toxic refinishing solution for small shower bases (2x2 and 3x3 ft.). Its zero-VOC formula makes it safe to use, making it great for homes with children, pets, and sensitive people. There are no harsh chemical smells.

400ml Epoxy Grout, Easy to apply, no hurry and no mess. Advanced dual tube design, No need for a mixer to premix, just need a dual-tubes epoxy gun to do the job. !!!NOTE: The dual-tubes caulking gun and tools are NOT included!!!
Brush Selection and Technique
Why do so many people skip the edges and just hope nobody notices. Those corners look tiny and intimidating, yet they’re where your work either succeeds or fails visibly.
Let me break down what I’ve learned about brush selection and technique:
- Grab a nylon/polyester brush for grout lines. These bristles grip paint perfectly and won’t shed like cheap brushes do.
- Use a stencil brush when working edges and corners. It’s shorter and stiffer, giving you control a regular brush can’t match.
- Pair your brushwork with a 3/8 inch nap roller for the flat wall areas once you’ve finished cutting in.
This combo keeps your stencil technique clean and prevents the messy bleed-under situation that ruins everything. Investing five extra minutes here eliminates frustration later.
Precision Application Methods
How do you keep paint from bleeding all over your grout lines and edges like some kind of tile crime scene? Precision comes down to your brush and roller technique. Grab a 1.5–2 inch angled brush and carefully cut in edges first. This defines those grout lines before rolling. Tape your stencil in place and stamp paint along faucets, shower heads, and corners where rollers can’t reach. Brush first, roll second. This order prevents disasters. Keep a wet rag nearby because mistakes happen fast. When paint bleeds outside your intended area, wipe immediately. Stencil application takes patience, but that edge precision transforms your tile painting from sloppy to seriously sharp.
Roll Large Walls and Flat Surfaces for Speed and Consistency
Once you’re ready to paint, grab yourself a mohair mini roller (the 4–6.5 inch kind) for those big wall stretches. Here’s how to tackle this:
- Work in 4×4 foot areas systematically, starting from your far wall and moving outward. This prevents lap marks.
- Brush your edges and corners first with that angled 1.5–2 inch brush, then roll everything else. It’s like framing a picture before filling it in.
- Keep your roller lightly loaded with base color. Too much paint creates runny edges.
After your properly primed surface gets two coats, you’ll have that long-lasting finish you need.
Wait 48–72 Hours Before Showering or Heavy Traffic
After you’ve finished painting, patience is essential. You must wait a solid 48–72 hours for your primer and top coats to cure properly, or you’ll risk ruining all that hard work with scuffing and peeling. During this waiting period, treat those painted tiles carefully; avoid stepping on them or setting anything down that could dent the surface while it’s still soft. Once you hit that 72-hour mark, don’t assume you’re finished. Check your paint’s specific instructions, skip the steam cleaning and scrubbing for now, and give it even more time if your bathroom’s humidity is high, since moisture can seriously interfere with how the coating sets.
Curing Time Guidelines
Patience is your best friend right now. That final coat of paint needs serious downtime before it meets water.
Here’s your curing time roadmap:
- 12 hours between coats – Don’t rush this. Each layer needs to dry completely before the next one goes on.
- 3 days minimum after your final coat – Before any water exposure touches those paint tiles, wait the full 72 hours. This is equivalent to allowing a baked good to cool completely; premature exposure ruins the finish.
- Gradual use after full cure – Start with quick showers, then work up to normal bathroom habits.
Waiting is necessary. Skipping this curing time results in having to redo the whole project.
Avoiding Premature Use
Most people get impatient at this stage. I’ve seen it happen: someone finishes painting their shower tiles, and 24 hours later, they’re itching to test out their handiwork. Don’t do that.
Your final coat dry time isn’t a suggestion. You need to wait a solid 48–72 hours before any water exposure hits those painted tiles. Think of it like concrete drying; it looks solid way before it actually is.
During this multi-day drying window, avoid stepping on treated areas too. Heavy traffic causes indentations and scuffing that will wreck your adhesion. Waiting is annoying when you’re excited about your bathroom refresh, but skipping this curing time basically guarantees your beautiful paint job won’t last.
Clean Painted Tiles Safely: Avoid Abrasive Scrubbers
Why do people assume that scrubbing painted tiles like they’re cleaning a cast-iron skillet is the way to go. We’re conditioned to scrub hard, but painted tiles aren’t built for that punishment.
What actually works:
- Use dish soap diluted 50/50 with water and a microfiber rag — this combo cleans without creating micro-wounds that wreck your finish
- Avoid harsh cleaners and abrasive scrubbers entirely — they compromise paint adhesion and shorten your tile’s lifespan
- Rinse with a damp microfiber cloth to remove soap residue and prevent dulling
For stubborn mold, bleach can be used sparingly, but regular use wears down that protective coating. Gentle care preserves your painted tiles’ appearance and durability for years.
Expect 2–3 Years of Durability With Proper Care
Painted bathroom tiles won’t last forever, but you can expect 2–3 years of durability when you follow through with maintenance. The key is straightforward: treat your painted tiles like a car’s paint job, where regular gentle cleaning and keeping moisture at bay make all the difference in longevity. Your prep work and paint choice (such as Aura Bath & Spa for steamy bathrooms) determine whether you’ll need repainting in two years or three, making it worth getting right the first time.
Longevity Factors and Timeline
How long will your freshly painted tiles actually hold up? The answer depends on your approach and maintenance.
Here’s what works:
- Use quality products from the start: A bonding primer like INSL-X STIX paired with epoxy finish or specialized tile paints beats basic interior paint every single time. You’re investing now to avoid redoing this later.
- Respect the curing period: Those 3–7 days (full cure hits 30 days) aren’t suggestions. They’re essential. Keep water away, or you’ll watch your hard work bubble up.
- Maintain gently: Skip abrasive scrubs. Soft cleaners preserve everything beautifully.
Location matters too. Shower floors won’t last as long as backsplashes. Expect 2–3 years with proper care before touch-ups become necessary.
Maintenance for Extended Life
So you’ve painted your tiles and resisted the urge to touch them for a full month. Congratulations on completing the preparation phase. Now comes the essential work: keeping that finish pristine.
Painted tiles require careful maintenance. Skip the aggressive scrubbing, which creates micro-wounds that reduce durability significantly. Instead, use a microfiber cloth and mild cleaners. Your finish will last considerably longer with this approach.
| Area | Best Approach |
|---|---|
| Shower walls | Epoxy or Aqua finishes resist mildew |
| High-moisture zones | Re-coat annually for protection |
| Regular walls | Gentle microfiber cleaning works great |
| Damaged grout | Repair before painting matters enormously |
Maintenance works like preventative medicine; small consistent effort prevents expensive repairs later.