I’ll walk you through anchoring your shed so it doesn’t become a tumbling disaster.
Start by evaluating your soil and foundation type, then check local codes. Don’t skip this step.
Pick the right anchors, gather your tools, and level that ground with a 4-foot level.
Drive anchors 18–24 inches deep, connect your straps snugly, then give everything a good shake test.
After storms, tighten things back up.
Each step keeps your shed in place and prevents weather-related structural damage.
Step 1: Evaluate Your Foundation and Soil Type for Anchoring

Before you drive anchors into the ground, you need to understand what you’re working with.
Start by checking your foundation type: concrete slab, bare ground, or existing deck. Each demands a different anchoring method. Next, dig into your soil type. Is it clay, sandy, rocky, or loamy. Soil strength directly affects your anchor performance. Test the ground yourself with a shovel.
Don’t skip local codes. They are requirements, not suggestions. Check manufacturer guidelines and verify required anchor depths and counts. Finally, assess drainage and levelness. Water pooling creates structural problems that will require costly repairs.
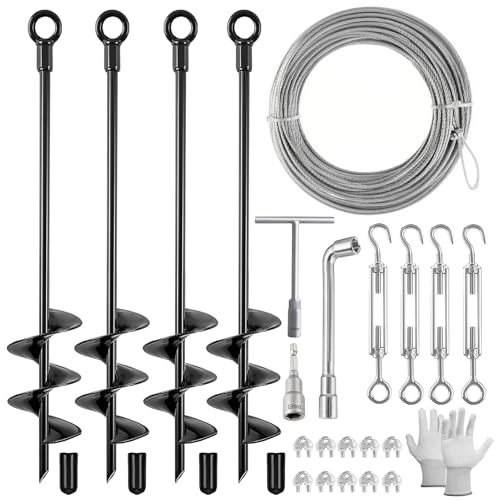
Complete Shed Anchor Kit: Includes 4 heavy-duty 18" ground anchors with removable eyes, 50 ft galvanized steel cable, 10 rope clamps, 4 adjustable turnbuckles,1 drill adapter, clamp wrench, T-handle wrench and gloves for anchoring outdoor structures

Fully Welded 2" Wide Spiral Blade: Different from other common ground anchors, our trampoline anchors spiral blade is fully welded, which is more durable. The earth anchor suitable for many kinds of soil, hard clay, Sandy soil, grass, sand, snow.

Package: Includes 2 heavy-duty 30" ground anchors, 2 L-shaped brackets, 2 M8 U-clamps (with 2 lock nuts), 2 U-channel pipe clamps, 2 hex bolts (for screwing into the ground anchors), 8 M8 screws, 1 drill, 1 removable round head
Step 2: Check Local Codes Before You Start

Before you grab those anchors and start digging, checking your local codes is non-negotiable. Your city or county building department has specific rules about which anchoring methods work in your area, what your foundation type needs to support, and whether you’re in a hurricane zone that demands extra-heavy-duty equipment. Finding out you installed everything wrong after the work is done is far worse than discovering code requirements beforehand.

Country Of Origin: United States

Complete Heavy-Duty Ground Anchor Kit: Comes with 4×18″ ground anchors, 50 ft of galvanized cable, bolt-type clamps, extra-wide tree straps, drill adapter, T-Socket & clamp wrench—all you need to secure sheds, mobile home, tents, trampolines, and canopies
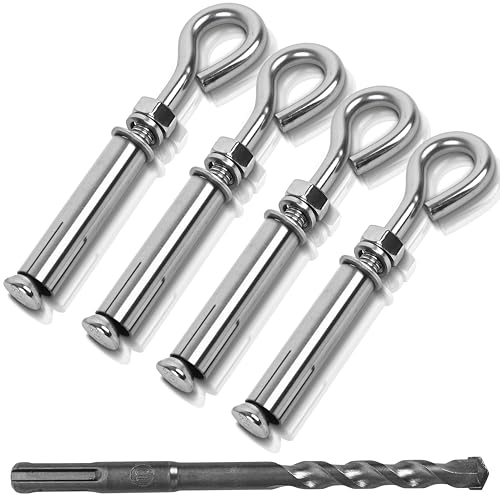
Expansion Eyebolt Size:M6x90mm(1/4" X 3-1/2"), they can approximately hold 128lb/90KG weight,Working Load: 128 lbs. Broken Load: 320 lbs
Local Regulation Requirements
Why do you need to check local codes before you even think about driving the first anchor into the ground? Skipping this step creates structural instability, similar to building on inadequate soil preparation.
Your local building departments have specific anchoring requirements that vary by region. You’ll need permits in many areas, and obtaining them upfront prevents costly corrections and delays later. Check your county or municipal building department for code references tailored to your location.
These codes spell out everything: whether you need concrete footings, how far apart anchors go, and frost line depths specific to your area. Some areas have hurricane provisions that are mandatory. Document everything you find. Keep those code references accessible. If an inspector shows up, you’ll want proof you followed the rules.
Foundation Type Assessment
Once you’ve got your local codes locked down, you need to figure out what you’re actually anchoring your shed to.
Your foundation type makes all the difference. Are you building on a concrete slab or bare soil? The choice between these options significantly changes your anchoring strategy.
Here’s what you need to evaluate:
- Concrete slab foundation – requires concrete anchors bolted directly into the pad
- Bare soil – needs soil anchors or augers driven deep into the earth
- Existing structure – check if you’re building near other foundations that affect local codes
Once you determine your foundation type, you’ll know exactly which anchoring method works. Skipping this step leads to costly problems later. Your foundation type determines what materials you’ll need and whether your setup passes inspection.
Step 3: Choose the Right Anchor Type for Your Shed

How do you know which anchor is right for your shed? Think of anchor types as different tools for different jobs.
If you’ve got a concrete slab, concrete anchors or bolts are your go-to. They grip that solid surface like a vice. Got bare soil instead? Ground anchors (auger anchors) spiral into the earth, resisting uplift perfectly. For larger sheds, penetrator anchors are effective solutions. They basically replace footings and might need an impact wrench to install.
For asphalt or temporary builds, smaller penetrator anchors with L-brackets work well on those surfaces. Spacing them correctly so they don’t interfere with each other underground is critical. Each anchor type transfers load differently, so matching yours to your foundation ensures your shed stays secure in all weather conditions.

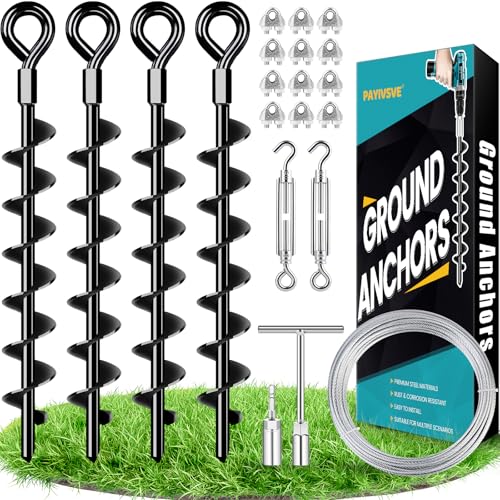
Long-Lasting Reliability: Our trampoline stakes are made from premium metal with a 360° spiral precision-welded to the shaft; coated with black paint to resist rust, these solidly cast anchors are designed to endure various weather conditions

Heavy-Duty&Wind Resistance: The trampoline anchors made of solid steel with coating, feature spiral blade design for maximum soil grip, withstand harsh weather, including high winds/hurricane/typhoon, ensuring long-lasting security for outdoor facilities

Heavy-Duty Ground Anchors: The 26 inch extended-length mobile home anchors screw deep into the soil to provide superior grip and stability. Designed to withstand high winds, storms, and harsh weather, they help keep outdoor structures firmly secured
Step 4: What Tools Do You Actually Need?
Look, I’m not gonna sugarcoat it. Anchoring a shed properly means you’ll need both hand tools and power equipment. I learned this the hard way when I tried using just a wrench and my own two arms. My arms lost.
You’ll want essential hand tools like wrenches, a level, and a tape measure for the careful setup work. You’ll also need power equipment like a drill, impact driver, and possibly an auger if you’re going the ground anchor route. Think of it as assembling your personal shed-anchoring pit crew.
Most of these tools are things you probably already have lying around or can borrow from a neighbor, so you don’t need to break the bank before you even start digging.

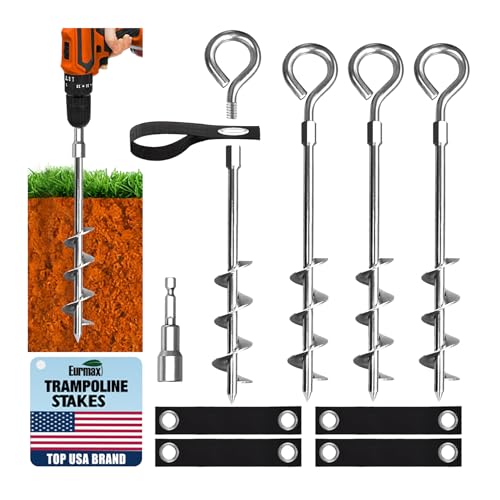
COMPLETE KIT – ANCHORS WITH RATCHET STRAPS: Includes 4 pcs 18 inch ground anchors and 4 pcs 12 ft ratchet tie down straps, giving you everything needed to secure outdoor setups without extra tools or complicated hardware.

Value Pack: The shed anchor kit includes 4 heavy-duty 18-inch ground anchors, a 50 FT x 1/8" galvanized cable, 10 rope clamps, 4 eye & eye turnbuckles, 4 M8 carabiners, 1 drill adapter, and 2 wrenches for easy installation

Fully Welded 2.7" Wide Spiral Blades: Different from other common ground anchors, our 18" trampoline anchors spiral blade is fully welded, which is more durable. The earth anchor suitable for many kinds of soil, hard clay, Sandy soil, grass, sand, snow.
Essential Hand Tools Required
Before you start wrestling your shed into submission, you’ll want to gather the right gear. Don’t show up with just a hammer and hope.
I learned this the hard way. You’ll need:
- A drill and impact driver for fastening everything together without your arm falling off
- A level to make sure your shed isn’t leaning like it’s had too much coffee
- Wrenches and a bolts-and-ratchet combo for tightening connections securely
Skipping quality tools means your shed won’t stay put. A tape measure helps you nail precise measurements, and a torque wrench ensures bolts are tight enough, not so tight you strip them. Investing in decent equipment now prevents costly mistakes and structural failures later.
Power Equipment And Machinery
Why do hand tools alone leave your shed wobbling like a newborn foal? Because you need serious power equipment to lock everything down properly.
A quality drill with the right bits creates clean holes for your ground anchors. You’ll want an impact driver too; it makes securing bolts easier than manual methods. For ground anchors, grab your power auger or a drive rod depending on soil conditions. Manual digging becomes inefficient quickly.
Finally, invest in a torque wrench. This tool is essential and ensures your fasteners tighten to exact specifications, preventing loosening over time. You’re not just anchoring a shed; you’re establishing a structure with genuine security and stability.
Step 5: Prepare Your Shed Site and Level the Ground
How solid’s your foundation going to be if you’re building on quicksand?
Shed site preparation makes or breaks everything. Before I even think about anchors, I level the ground completely across the entire footprint. No bumps, no slopes. Uneven ground shifts like crazy, and your anchors will fail.
Here’s what I do:
- Clear all debris and vegetation down to bare earth for a truly stable foundation
- Spread 2-4 inches of gravel base to boost drainage and prevent water pooling underneath
- Check levelness with a 4-foot level, adjusting soil until it’s flat
I pick well-drained spots away from downspouts. Water deteriorates sheds faster than almost any other factor. A gravel base prevents moisture damage and extends your shed’s lifespan significantly. Takes me an afternoon, saves me years of repairs.
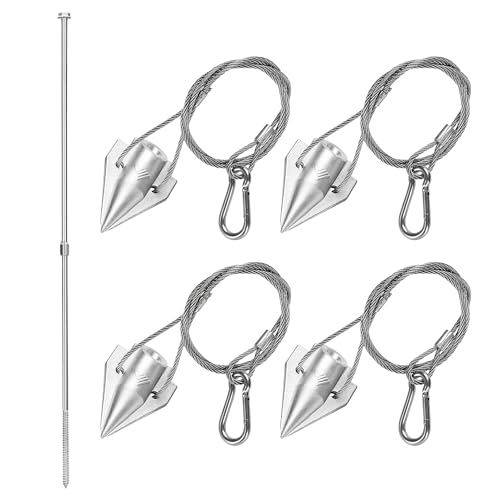
EASY TO INSTALL: Use the included installation driving rod to put these in.

All-in-One Ground Anchor Kit: Includes 4 earth anchors, 50 ft galvanized wire, 16 rope clamps, 2 turnbuckles, 1 driving rod, and 1 clamp wrench—ready for multi-point outdoor tie-down projects

PACKAGING: Shed anchor kit include 12 earth anchor cable stakes, 1 drive rod. Our cable ground anchors are 1/6 galvanised steel cables that have more stronger pulling than 1/8 cable earth anchors
Step 6: Drive Anchors to the Recommended Depth
Now that your ground’s prepped, it’s time to drive those anchors deep. Shallow anchors will fail when wind hits. You’ll want to drive each anchor to 18–24 inches deep, ensuring firm embedding in stable soil. I grab my impact wrench and get to work, pushing straight down with consistent pressure. The right installation tool makes all the difference, whether you’re using an impact wrench, PTO, or auger.
| Anchor Type | Depth | Soil Stability | Resistance |
|---|---|---|---|
| Standard | 18–24 in. | Firm | Minimal |
| Rocky soil | 20–24 in. | Variable | Moderate |
| Clay | 18–20 in. | Excellent | Low |
| Sandy | 22–24 in. | Weak | High |
Space your anchors so soil cones don’t overlap. Overlapping soil cones will reduce your hold-down strength.

Value Pack: The shed anchor kit includes 4 heavy-duty 18-inch ground anchors, a 50 FT x 1/8" galvanized cable, 10 rope clamps, 4 eye & eye turnbuckles, 4 M8 carabiners, 1 drill adapter, and 2 wrenches for easy installation

Heavy-Duty & Weather-Resistant: Built from solid steel with a reinforced spiral weld, these ground anchors are resistant to bending, the surface is treated with a protective coating, making them can withstand various weather conditions such as high winds

Upgraded 18-Inch Ground Anchors: The extended 18-inch ground anchor penetrates deeper into thick soil. 1.58-inch spiral blade, tightly welded to the rod and with sharp tip, can penetrate through compact soil, sand, or grass for secure anchoring
Step 7: Connect Anchor Straps Until Snug
With your anchors buried deep and solid, it’s time to connect them to your shed. Anchors doing their job underground won’t matter if they’re not linked to the structure sitting on top.
Anchors buried deep mean nothing without proper connection to your shed’s structure above.
I thread each strap through the anchor eye or bracket, then attach it to the corresponding base point. These steps keep the tensioning process organized:
- Loop straps gradually with a ratchet, ensuring firm seating without warping the wood
- Check that all straps are evenly tightened to prevent lopsided load distribution
- Perform a gentle shake test to confirm stability once tensioning’s complete
Tighten the straps incrementally, checking your progress as you go. You’re building stability, not strangling your shed. Even tension across all points prevents unnecessary stress on the structure and ensures it stays secure.

Standard Shape: The anchor bolt is L-shaped with male threads so a nut and washer can be attached easily and effortlessly

<b>Material:</b> Our Wedge Anchors Are Made Of High Quality Carbon Steel And Are Galvanized To Make The Wedge Anchors Much More Resistant To Rust.
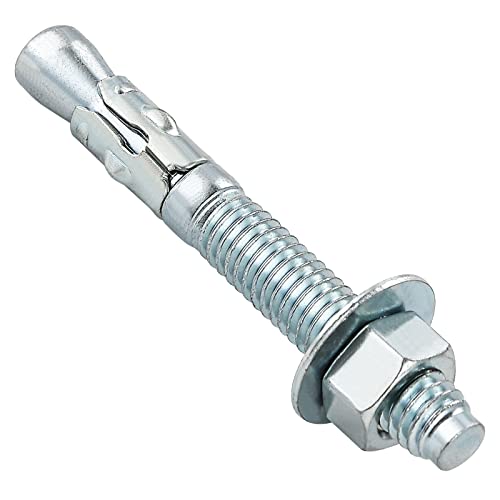
<b>Material:</b> Our Wedge Anchors Are Made Of High Quality Carbon Steel And Are Galvanized To Make The Wedge Anchors Much More Resistant To Rust.
Step 8: Give Your Shed a Shake Test
Time to put your anchoring work to the test. Start by testing your corner anchors first, as they’re your shed’s foundation. Give it a gentle shake, checking for any wiggle at the connections. If something feels loose, tighten those straps or bolts immediately and recheck your screw anchors’ depths.
Next, test mid-span areas to confirm even resistance. Grab your level and verify the shed stayed square during all this. Sheds can shift slightly, so this step is crucial.
After severe weather or seasonal changes, repeat this shake test. This ensures your shed maintains structural stability over time.

Dimesion And Package: Includes 4 x 18 inch Ground Anchors, 4 x 13 inch Straps, 1 x T-wrench and 1 x Drill Adapter, 4 x Gasket, 4 xRubber Rdge Guards .Whether manual installation with a T-type wrench or a drill machine/impact wrench, easy to install, also easy to removal and can be reused for a long time.

Durability and Weather Resistance: Our ground anchors are made from high-quality solid steel with coatings, ensuring they are durable for long-term use and can withstand various weather conditions such as high wind, can be used as mobile home anchors
Choose American. Choose Certainty. Eurmax Canopy is North America’s #1 factory store, stocking all canopies, accessories, and patio umbrellas right here in the U.S.
Step 9: Check Anchors After Weather Events and Tighten as Needed
Because Mother Nature tests your work, you’ll want to inspect your anchors after any serious storm, high winds, or seasonal shifts. Think of it as a post-game review for your shed’s stability.
After weather events, check everything systematically:
- Inspect each anchor and strap for looseness, damage, or bending; replace compromised components immediately
- Re-tighten ratchet straps and cable ties to factory-threshold tensions to restore original hold-down force
- Check anchor depths and soil cones to ensure no soil movement has reduced strength; re-drive or reposition as needed
Maintenance documentation matters. Write down dates and observations. You’re building a regular inspection schedule that keeps your shed grounded. This creates a maintenance record that tracks your shed’s condition over time. When you tighten those anchors back to spec after weather events, you prevent wind damage and structural failure.

COMPLETE ANCHORING SOLUTION: The shed anchor kit includes 4 pcs 18" heavy duty ground anchors, 16 FT galvanized cable 3/16 inch, 10 rope clamps, 1 drill adapter, 1 T-handle wrench. This ground anchors offers exceptional stability and security
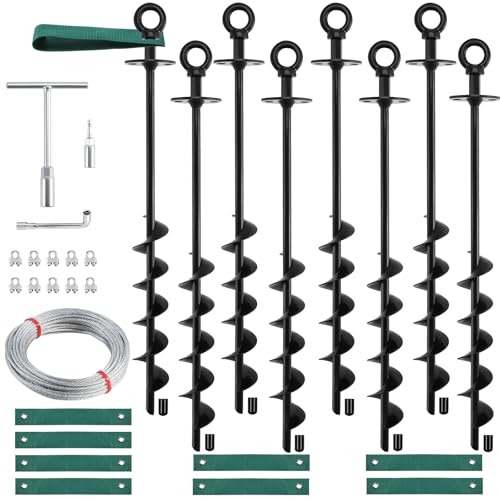
Complete Heavy-Duty Ground Anchor Kit: Comes with 8×18″ ground anchors, 50 ft of galvanized cable, bolt-type clamps, extra-wide tree straps, drill adapter, T-Socket & clamp wrench—all you need to secure sheds, mobile home, tents, trampolines, and canopies
EXCELLENT GRIP & STABILITY: Ground anchors are designed with full spiral blades to penetrate deep into the soil, providing strong friction and stability even in harsh conditions, withstanding wind speeds of 75MPH.
Step 10: When to Hire a Shed Anchoring Professional
Look, if you’re dealing with a tricky foundation type, such as rocky soil or a spot near the coast where hurricanes are a regular occurrence, you should consider calling in a professional instead of doing this yourself. They have the heavy equipment and expertise to handle complex situations that will exceed what a DIY approach can manage, plus they’ll ensure everything meets local codes so you won’t face citations from inspectors or structural failure in high winds. Getting a free quote takes only about 20 minutes on the phone and could prevent your shed from being displaced during the next storm.

✅ Won't budge, even in high winds - : Every steel shed has anchor pressure relief that has been tested in HIGH WINDS at 1000 lbs per drilled anchor - which means they will hold any anything - making them ideal ground anchors, swing anchors, standing anchors, playset anchors, or as anchor drill bits.

Removable Eyelet for Quick Installation: Unlike fixed-eyelet anchors that require manual twisting, this ground anchor features a removable eyelet that inserts into a socket. Simply attach your drill, drive it into the ground, and remove the eyelet—saving time and effort on every installation.

Multifunctional Anchor: The U-shaped clip part can fix steel pipes, either horizontally or vertically. The screw of the accessory can be screwed into the wooden bottom for shed, fence.
Complex Installation Scenarios
When should you call in the pros instead of going solo? Some situations demand professional shed anchoring expertise. Consider professional help in these scenarios:
- Tricky terrain or hurricane zones: If you’re dealing with clay soil, slopes, or live where wind resistance matters seriously, professionals assess conditions and recommend concrete footings or cable anchors that provide adequate hold.
- Heavy or oversized sheds: Moving a 12×16 structure safely requires professional expertise. Professional shed installers handle positioning with precision.
- Uncertain building codes: Local regulations vary widely. Professionals ensure compliance, protecting your warranty and avoiding costly mistakes.
Getting a free quote costs nothing. A professional assessment provides concrete assurance that your shed installation meets local requirements and withstands environmental conditions specific to your location.
Professional Expertise Benefits
Shed anchor installation works well if you have decent soil, calm weather patterns, and an 8×10 structure on level ground. Most property owners don’t have those ideal conditions.
Professional expertise offers significant advantages. A shed anchoring pro handles site assessment, selects the right anchors (cabled, penetrator, or ground types), and ensures compliance with local codes. They identify problems you’d miss and know exactly how to tension those straps so your shed stays secure during storms.
DIY anchoring jobs frequently fail, resulting in property damage, warranty issues, and unnecessary complications. Professionals provide free quotes and execute the entire process correctly. Hiring experts eliminates frustration and delivers reliable results.