A jelly roll rug is a coiled fabric tube, similar to a cinnamon roll shape. You take 40 colorful cotton strips from a jelly roll bundle, wrap them around batting, then coil the whole thing into an oval shape. No advanced quilting skills are required. You’ll end up with a finished rug around 30 by 44 inches that’s sturdy and durable. The following sections explain the specific steps for construction.
What Is a Jelly Roll Rug?

A jelly roll rug is what happens when you take a bundle of colorful fabric strips—a jelly roll consists of 40 fabric strips, each 2.5 inches wide—and transform them into a cozy, functional rug that sits flat on your floor without curling up like a potato chip. You wrap these strips around batting to create a fabric-wrapped tube, then coil it into an oval shape. The finished jelly roll rug measures around 30 by 44 inches, making it suitable for bedrooms or living rooms. It’s a DIY project that turns precut fabric into something useful and beautiful. No complicated patterns or overwhelming techniques are required; just creative, practical crafting.

42 Strips - fabric jelly rolls for quilting include 14 prints, 3 strips (2.5 inch x 44 inch) per print | Total 42 pieces per roll

★Variety Pack of 20 Stunning Prints | 2 Pieces of Each Pattern (2.5" x 44") | 40 Strips Per Bundle: Each jelly roll fabric comes with 40 exquisitely designed strips, and featured with vibrant colors, crisp prints, and ultra-softness for any quilting and crafting projects, from toys and bags to home decoration. Always bring a touch of timeless elegance and heartfelt generosity into your creations.

Roll Up (Jelly Roll) includes 40 2.5-inch by 44-inch strips. The purple jelly rolls fabric are perfectly cut and ready to use, which makes quilting projects so much easier and faster.
How Many Jelly Rolls Do You Need?

You need just one jelly roll to make this entire rug. One roll gives you enough 2½-inch strips to build a full 30 x 44 inch finished size. The math works out perfectly since you’re wrapping those strips around batting pieces and spiraling them from an 8-inch center oval outward, so there’s zero waste and no second roll required. This project minimizes material usage while maximizing the finished product.

[HANDMADE CONSTRUCTION]: Expertly hand-woven by skilled artisans for a richly textured appearance and artisanal quality; each rug features unique color variations and natural...
Single Roll Sufficiency
Ever wonder if one jelly roll is actually enough to make a whole rug. It absolutely is. I’ve made this project myself, and one jelly roll delivers everything you need. You’ll use those 2.5-inch fabric strips to wrap around batting, building your oval from the center outward. The magic is that you won’t waste anything. Even batting scraps find their way into the layers, maximizing what you’ve got. The finished rug measures about 30 by 44 inches, which works well for most spaces. No hunting down multiple rolls or playing inventory Tetris. Just grab one jelly roll, roll up your sleeves, and you’re ready to create something impressive. This design eliminates the need for multiple fabric sources.
Strip Yardage Requirements
How much fabric do you actually need. One jelly roll supplies everything you need for a complete rug.
A single jelly roll contains:
- Pre-cut 2½-inch fabric strips (your building blocks)
- Enough yardage to finish a 30 x 44-inch rug
- Multiple coordinating prints that work together seamlessly
- No hunting through your stash for matching fabrics
What makes jelly rolls efficient is their design. You’re not wasting time piecing together random scraps or calculating yardage conversions. Everything arrives ready to use. One roll gives you roughly 40 strips, which is precisely what you’ll need to layer, zigzag, and build that oval rug.
Finished Size and Design Options

The beauty of a jelly roll rug is that you’ve got built-in flexibility. Your finished rug will land right around 30 by 44 inches, which is the sweet spot for a cozy accent piece that doesn’t overwhelm your living room. Want something bigger. You can make them at roughly 3 by 4 feet using two batting rolls and one jelly roll instead. The design practically creates itself since you’re working with pre-cut strips with no complicated pattern planning required. You can keep it simple with a classic oval, or get creative with how you layer things. The rug size adapts to what you need, whether you’re tucking it beside a bed or anchoring a reading nook. This project is difficult to mess up.

Package Includes: You will receive 3 rolls of 2 1/2 inch width fleece batting strips, the total length is 150yards(each one is 50 yards length) which is long enough for your quilting or craft projects

PURE 100% COTTON - NO POLYESTER, NO BLENDS: Natural cotton fibers breathe, hold shape through repeated washing, and feel soft underfoot - so your finished rug is something you're genuinely proud to display

【Extra Accessories】Package include 3 roll jelly roll batting strip, with extra scissors and mini tape measure, more convenient to use, and more value.
Essential Materials for Your Jelly Roll Rug Project
Before you begin spiraling fabric strips, gather what you’ll need sitting next to your sewing machine.
You’re looking at a jelly roll, those precut 2.5-inch fabric strips, plus two packages of batting to give your rug structure and substance. Here’s your shopping list:
- One jelly roll of fabric strips (approximately 2.5 inches wide)
- Two packages of precut batting (2.5 inches wide, about 50 yards total)
- Coordinating cotton thread that will hold everything together through washings
- Clips to wrangle those layers while you’re stitching
Grab your sewing machine with extra bobbins loaded and ready, an iron for pressing, and an extension table. These tools will make the work significantly easier.

Use the HONEYSEW Jelly Roll Fabric Tube Maker to simplify the Tube Making process.

Package Contents: include 2 rolls of quilting batting, with a total length of 100 yards (50 yards per roll). Each batting for quilting measuring 2 1/4 inches in width works great for 2 1/2 quilting fabric strips, providing ample material for most craft projects
Fabric Roll Rug Maker Tool: Our fabric tube maker is a for making fabric roll rugs, no pinning or extra ironing, can fold fabric and batting directly, reducing the frustration of manual folding and cutting, making the sewing process fun again
Batting and Thread for Your Jelly Roll Rug
Now that you’ve got your fabric strips ready to go, let’s talk about what will hold this whole thing together. Your batting and thread are the essential components of your rug. For batting, reach for cotton or cotton blend options; skip wool because it will cause problems. Use two precut batting pieces that are 2.5 inches wide to get the desired thickness. As for thread, grab a coordinating cotton or poly-cotton blend that will withstand wear and tear. Lighter-weight thread prevents puckers that make your rug look uneven. Match it to your fabric colors for best results. These choices directly affect the quality of your finished rug, determining whether your strips properly hold together and create a durable final product.

Anti-Slip: Made of high-quality material with strong grip, it will keep the rug in place and avoid clumping and slipping during daily use or when children or pets play

Our primary tufting cloth has a wide range of uses. You will receive a tufting fabric black color, large tufting cloth and sized 72x40 inch. With black rug backing, non-slip tufting cloth and backing you can make or repair your carpet, or you can use our tufting black cloth for handicrafts, home decoration, carpets and etc. Just use your imagination to make your own DIY stuff!

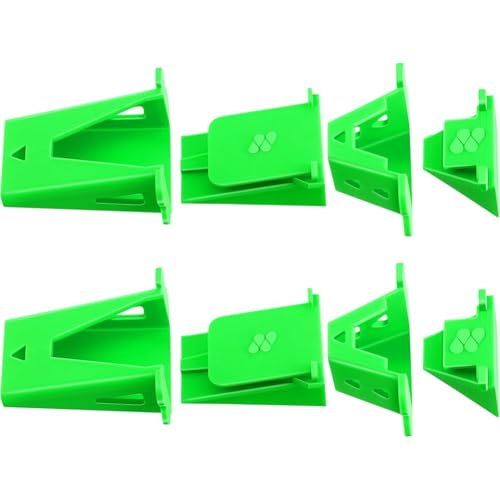
Secure & Made with sturdy rubber, these strips tighten fabric without scratching and ensure use.
Preparing Your Fabric Strips
Your jelly roll’s individual 2.5-inch strips need some attention before they can become the star of your rug.
Joining strips together requires more than just tossing them in a pile. Follow these preparation steps:
- Press seams open after joining strips together to keep everything flat and smooth
- Check that your long strip lies without bunching or twisting
- Measure twice to ensure consistent width throughout
- Inspect for any loose threads that’ll drive you crazy later
This prep work is essential. When you press those seams open, your fabric won’t bunch up when you wrap it around the batting. A flat, smooth foundation prevents wrinkles and puckering that can create an uneven surface in the finished rug.


★Variety Pack of 20 Stunning Prints | 2 Pieces of Each Pattern (2.5" x 44") | 40 Strips Per Bundle: Each jelly roll fabric comes with 40 exquisitely designed strips, and featured with vibrant colors, crisp prints, and ultra-softness for any quilting and crafting projects, from toys and bags to home decoration. Always bring a touch of timeless elegance and heartfelt generosity into your creations.

🧵 WIDE AND LONG FABRIC STRIPS – 20 UNIQUE VINTAGE PRINTS | 2 STRIP (2.5 INCH x 40 INCH) PER PRINT | TOTAL 40 PIECES PER ROLL – This charming roll includes 40 precut fabric strips, each with a different soft-toned floral or geometric design. With extra length and generous width, these strips offer convenience and creative flexibility for quilting, patchwork, and more.
Wrap Your Batting Strips
The real magic happens when you sandwich that batting between your fabric strips. Place batting on the center of your jelly roll fabric’s wrong side, then fold both fabric edges toward the middle. Fold the whole piece in half again. This tucks those raw edges inside like a cozy burrito.
These wraps become your rug’s building blocks. Each one is a little quilted sandwich that will stay perfectly flat and sturdy. You’re basically creating cushioned strips that will form your rug’s structure.
The folding and pressing method is straightforward. No complicated techniques are required. Just fold, press, and you’ve got wrapped batting pieces ready for assembly. This process is simple and satisfying.
Start Your Jelly Roll Rug in the Center
I’m going to show you the secret that makes this whole project work: starting in the middle with your batting core. You’ll wrap about 8 inches of fabric-covered batting (think of it like a tiny fabric burrito) and fold those edges over twice to hide all the messy cut parts, then hit it with a zigzag stitch to lock everything down. This center foundation is where your entire rug grows from, so you need to make sure it lies flat before you start spiraling those layers outward.

Premium Material: Jelly batting roll strips are made from a high-quality cotton and polyester blend for softness, comfort, and durability. Cotton blend jelly batting roll strips resist fraying and breaking, making them durable and ideal for quilting

【Save Your Cutting Time】This jelly roll rug batting will save you hours of cutting strips and makes your jellyroll rug making projects more easier.

SAVING YOUR CUTTING TIME: CODOHI Jelly Roll Batting Strips for Rugs will help you to save hours of cutting strips and makes your jelly roll rug making projects more easier and faster
Creating The Center Core
Starting from the middle is the smartest approach for keeping your rug flat. The center start method prevents the annoying cupping that happens when you spiral outward.
Follow these steps:
- Wrap an 8-inch section of batting with your jelly roll fabric
- Fold that strip back and zigzag to create an oval foundation
- Arrange roughly 15 covered batting pieces into a large U shape
- Press edges smooth so they stay flat from day one
This core becomes your rug’s anchor. You’ll build outward from this oval, adding more batting as you go. Think of it as creating a solid base camp before climbing the mountain. When your rug doesn’t cup, you’ll see the value of this foundation method.
Batting Foundation Setup
Now that you’ve got your center core locked down, it’s time to build the batting foundation that’ll keep your rug from cupping like a sad taco. I start with an 8-inch section of fabric-wrapped batting in the center as your anchor. Then I layer additional batting pieces around it, creating a large U shape that’ll eventually become your oval rug. Fold those fabric edges toward the batting and hide them inside. This batting foundation setup keeps everything neat and secure. I stitch down the center to lock the layers together, preventing any movement. A perfectly flat rug that actually lies down requires this approach. No puckering, no lifting at the edges.
Build the Oval Shape of Your Rug
Transform a pile of batting scraps into an intentional design rather than randomly placed fabric.
Start by forming a large U-shape from about 15 covered batting pieces. This becomes your oval rug foundation. Follow this process:
- Curve the ends gently to maintain that smooth oval outline
- Nest the corners as you sew to keep everything sitting flat
- Use the biggest zigzag stitch along edges, joining pieces in one continuous oval
- Press with steam periodically to prevent waviness and curling
The key to success is easing extra fabric at the ends without forcing it. Coax the fabric into cooperation rather than demanding obedience. This approach produces a flat, properly formed oval rug.
Zigzag Stitching for Structure
What holds this whole rug together? The zigzag stitch serves as your structural foundation. I use the biggest zigzag stitch my machine offers, joining those fabric-covered batting pieces into one continuous oval. The process is visually satisfying to watch.
The critical requirement is precision. I cannot sew randomly and expect quality results. Multiple bobbins must be ready because continuous stitching runs around the entire rug’s perimeter. One break disrupts the workflow and compromises the seam.
The zigzag stitched edges provide both function and durability. They prevent unraveling by gripping fabric and batting together, creating a structure that resists puckering and shifting. This stitch pattern delivers the structural integrity that allows the rug to last.
Manage Fabric Bulk to Prevent Puckering
Once you’ve got those zigzag stitches holding everything together, you’ve won half the battle. Fabric bulk creates puckering that compromises the finished product.
Once zigzag stitches secure your work, you’ve conquered half the challenge. Fabric bulk creates puckering that compromises the finished product.
Here’s how to keep things flat:
- Ease outside fabric gently instead of pulling tight, especially along curves and the ends
- Use a quilting extension table to keep your bed flat while assembling
- Press periodically with steam to reduce waviness and stabilize all that bulk
- Watch for “mountains and valleys,” then add gentle gathers on the inside while keeping edges smooth
The key is easing rather than forcing the fabric. When you work with the material instead of against it, your rug will remain flat and professional-looking.
Pressing and Flattening Techniques
Once you’ve wrestled your fabric bulk under control, pressing becomes your hidden advantage against the inevitable waviness and cupping that’ll sneak up on you. Press after every couple of rows with steam applied afterward. This approach keeps those edges flat instead of letting them morph into mountains and valleys that create dimensional distortion. Spending five minutes with a steam iron prevents the need to spend hours later trying to flatten a quilt that has developed waves.
Steam Pressing Methods
Why does your rug start looking like a rumpled bedsheet the moment you finish a few rows? Welcome to the jelly roll rug reality. Steam pressing is your secret weapon against waviness and cupping.
Here’s how I keep mine looking sharp:
- Press every couple of rows to maintain flatness as your rug grows
- Use steam after completion to smooth out those stubborn ridges
- Keep your sewing machine extension table nearby so your bed stays flat during assembly
- Target the edges specifically to ensure they lie flat and don’t cup upward
Steam pressing works like a spa treatment for fabric. The heat relaxes the material while you gently flatten everything back into submission. Investing five minutes in periodic steam pressing prevents waviness from becoming a significant problem later on.
Preventing Rug Waviness
Steam pressing gets you halfway there, but your rug will still fight you. Preventing waviness requires constant vigilance throughout the entire process.
| Technique | When to Use | Result |
|---|---|---|
| Steam press | After each round | Flattens fabric |
| Zigzag stitch | Continuous oval | Prevents curling |
| Monitor bulk | While growing | Catches problems early |
| Tuck gathers | As you assemble | Keeps edges straight |
I press after completing each round, keeping my extension table flat. I watch for those pesky “mountains and valleys.” they’ll sneak up on you. When I notice bulk building, I tuck extra gathers inside the strip immediately. Easing the outside fabric without lifting edges prevents curvature and puckers. Periodic pressing maintains flatness throughout assembly. This approach eliminates the waviness that appears in hastily assembled rugs by addressing problems as they develop rather than after completion.
Maintaining Flatness Throughout
The real secret to keeping your jelly roll rug flat is staying on top of things as you go. Wrestling with mountains and valleys in projects teaches this lesson quickly.
What actually works:
- Press every couple of rows with steam to squash waviness before it gets stubborn
- Use a sewing machine extension table to keep everything supported and level
- Check for bumps and bulk as you stitch, fixing them immediately
- Zigzag continuously around strips, pressing periodically to prevent curling
The key is not pulling tight. Ease that outside fabric gently instead. Think of it like coaxing a toddler rather than dragging a mule. Your rug stays flat because you’ve managed the tension throughout the process, and the results reflect that consistent care.
Washing and Caring for Your Rug
How do you keep your jelly roll rug looking fresh and fabulous. Your rug’s fabric-wrapped batting loves a good bath. Just toss it in the washing machine and let it air-dry completely. After washing, steam-press your rug to flatten out any waviness. Think of it like ironing wrinkles from your favorite shirt, except significantly more satisfying. Pressing makes a noticeable difference in how polished everything looks. Since your rug uses cotton thread and cotton-blend batting, it handles washing beautifully. If you’re placing it on tile or wood floors, grab some washable gripper backing to keep it from sliding around.
Adding Non-Slip Backing
I’ve learned that adding non-slip backing to your jelly roll rug keeps it from sliding around on floors. Washable gripper backing works well because it withstands washing and air-drying while keeping your rug stable on tile or wood without needing reapplication. Apply the backing after you finish the rug so everything stays flat and grips properly from the start.
Non-Slip Backing Options
Why do jelly roll rugs seem to develop a mind of their own on tile and wood floors? They slip, slide, and basically turn your floor into an ice rink. Non-slip backing solves this problem.
Washable gripper backings are effective solutions. They’re applied directly to your rug’s underside and actually grip surfaces. What you should know:
- Washable backings survive machine washing without losing their grip
- Non-slip properties prevent shifting in high-traffic areas
- Backings must be compatible with fabric-wrapped batting
- Air-drying maintains the backing’s effectiveness
When selecting backing, ensure it will withstand your laundry routine. A quality non-slip backing keeps your jelly roll rug in place, whether you walk across it daily or host movie nights. The rug stays secure without slipping.
Installation And Safety
Getting that non-slip backing onto your jelly roll rug is one of the smartest moves you’ll make for floor safety. Rugs without proper backing slide easily, creating both a tripping hazard and potential property damage. Home Techpro offers washable gripper backings that remain effective after cleaning your rug. Apply the backing evenly across the entire underside with no gaps. Bare spots allow the rug to shift and move underfoot. This backing is especially important in kitchens and entryways where foot traffic is heavy. After washing and air-drying, your backing maintains its grip. Installing proper non-slip backing prevents accidents and keeps your rug stable and secure.
Try Different Shapes and Sizes
Jelly roll rugs don’t have to be one-size-fits-all creations. Your jelly roll rug becomes whatever you want it to be.
Jelly roll rugs don’t have to be one-size-fits-all. Your creation becomes whatever you want it to be.
Want something bigger? Just add more rounds. Need a different shape? Go oval, rounded rectangle, or get creative. Here’s what I adjust:
- Number of batting pieces – More rounds mean a larger footprint
- Fabric strip length – Longer strips stretch your design further
- Edge trimming – Shape as you sew for custom dimensions
- Starting center size – Bigger middles create different proportions
You’re in control of every decision. A standard jelly roll gives you roughly 30 x 44 inches, but that’s just your starting point. I’ve stretched mine, shrunk mine, and experimented endlessly. Your rug’s personality depends entirely on your choices.