
You can reupholster a kitchen chair seat in an afternoon with basic tools, but most people staple the corners first and end up with creases they can’t fix without tearing the whole thing back off.
The four anchor staples go in the center of each side while the corners stay loose, and you work outward from there with the fabric pulled taut.
If the old cover is stained or the padding underneath has compressed, strip it down to the seat base before you cut new fabric.
1. Remove the Seat and Old Cover
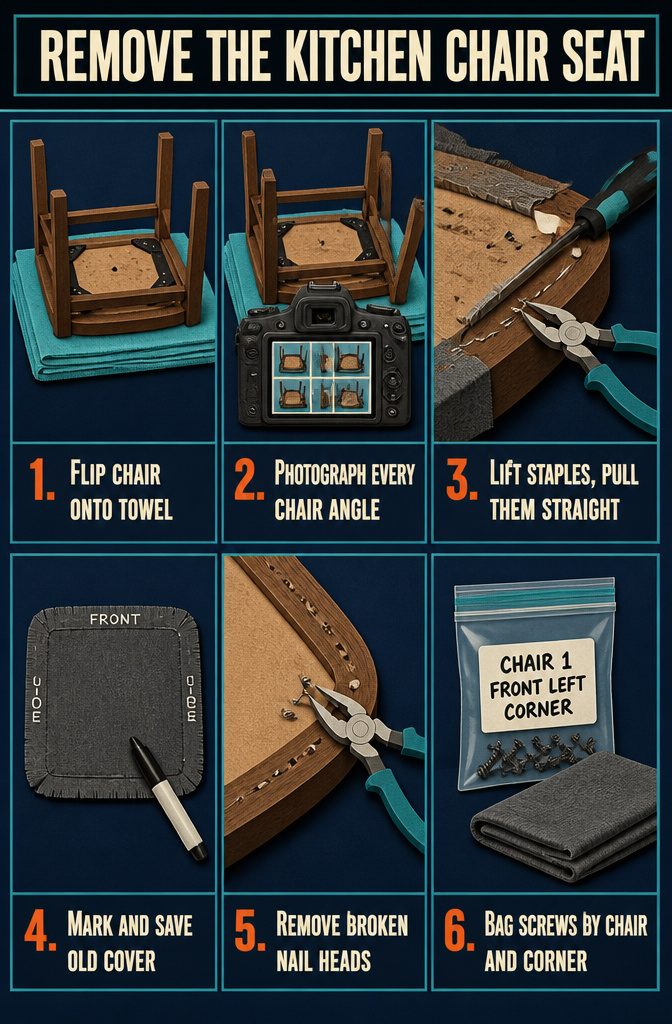
- Flip the chair upside down on a towel to protect both the chair and your work surface, then locate the screws underneath the seat. Remove them with a screwdriver and drop each set into a labeled baggie — note which chair and which corner they came from. If you’re doing a full set, those labels save you from playing screw roulette during reassembly.
- Photograph every angle before you start pulling anything apart: top, underside, corners, how the fabric wraps. You’ll reference these shots when you position the new cover.
- Work a flathead screwdriver under each staple to lift it, then grip it with pliers and pull straight out. Move slowly around the edge so the old fabric comes off in one piece rather than in scraps.
- Mark the front and sides of the old cover with a marker. It becomes your cutting pattern for the new fabric, so keep it intact.
- Check for any nail heads that broke off during removal and pull them out with pliers. Getting every staple out now prevents interference when you staple the new fabric down.
2. Check the Frame and Seat Base Before You Cut Fabric
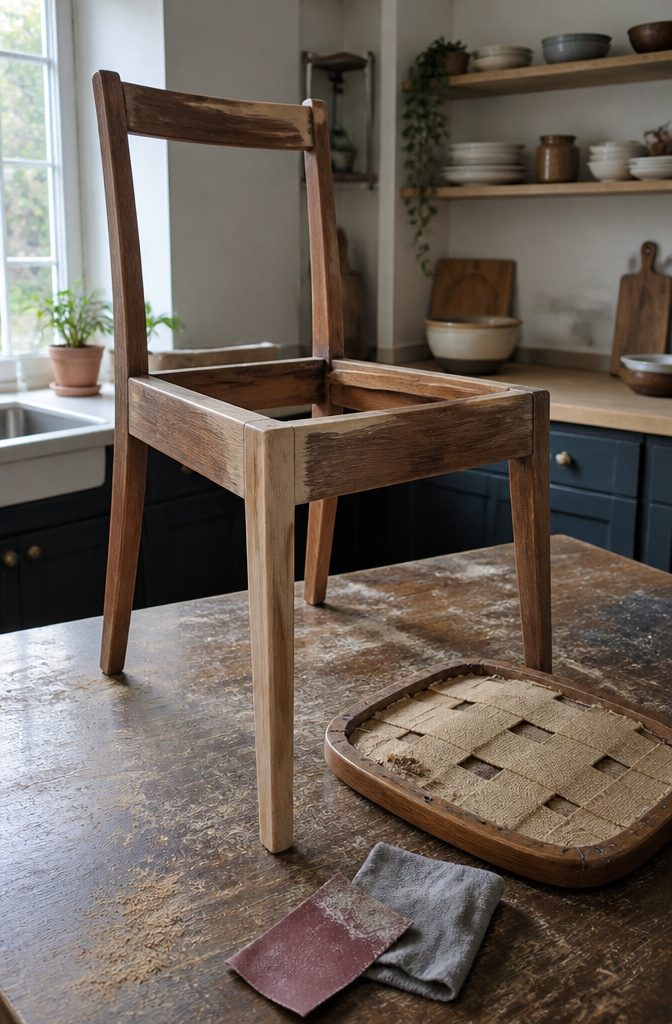
With the seat off, test the frame for anything that will undermine the work you’re about to put in. Tighten loose screws and reglue wobbly joints before you cut fabric or staple anything down.
A frame that shifts will work the new upholstery loose faster than wear alone, and if a joint fails after the fabric is on, you’ll be taking it all apart again to fix what you could have caught now.
If the seat base uses webbing instead of solid wood, check for sag. Replace any webbing that has stretched or come loose — new fabric over failing support just delays the problem.
For exposed wood that needs attention, sand off the old finish with 100 grit sandpaper, wipe the dust away with a damp towel, let it dry, and apply stain.
An electric sander makes quick work of a set. Touch-ups can wait until the end, but refinishing the whole frame goes faster now, before reassembly adds obstacles.
3. Replace or Prepare the Padding
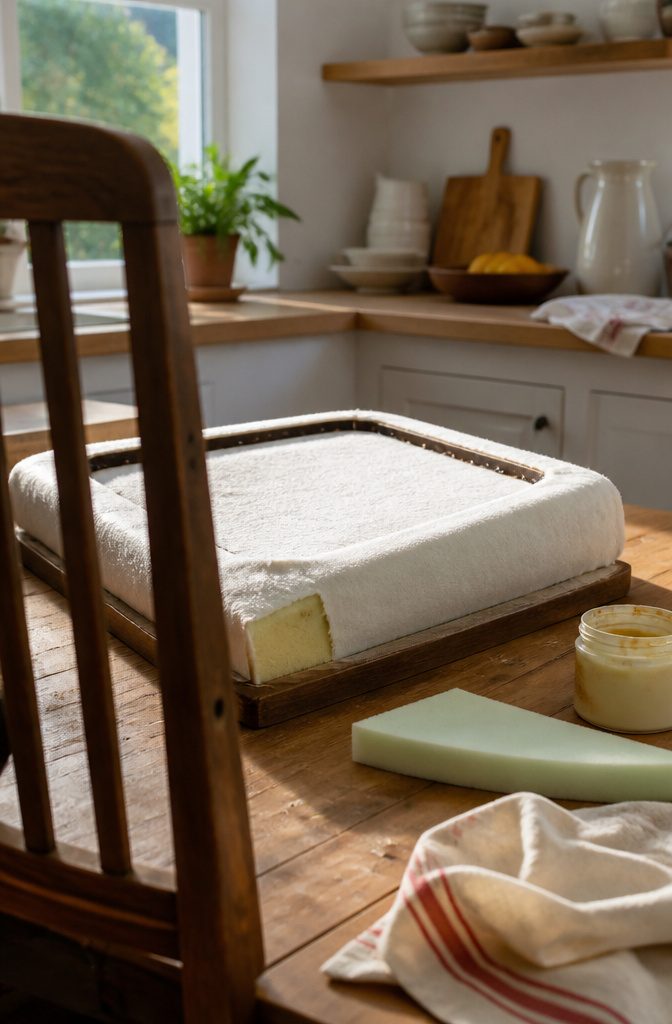
I lay the slip seat face-down on the foam and trace a line half an inch wider than the frame if the seat rests on top of the chair’s edge.
That half-inch gets compressed when the fabric wraps around, softening the edge instead of leaving a hard corner.
If the seat drops into a channel, I cut the foam flush with the frame. High-density foam 2 to 3 inches thick restores comfort in most dining chairs; the type specified in one walkthrough runs 2 inches thick with 2.6 density and 45-pound compression.
A foam saw or electric carving knife cuts cleanly when the blade gets a light coat of silicone spray first.
Foam adhesive holds the padding to the seat base while I work. If the seat has webbing over a hole, the foam attaches to the underside of that webbing—a small amount of adhesive on both surfaces, pressed down gently.
I wrap Dacron batting over the foam and down the sides next; that layer rounds the profile and smooths out any foam texture before the fabric goes on.
4. Measure and Cut the New Fabric
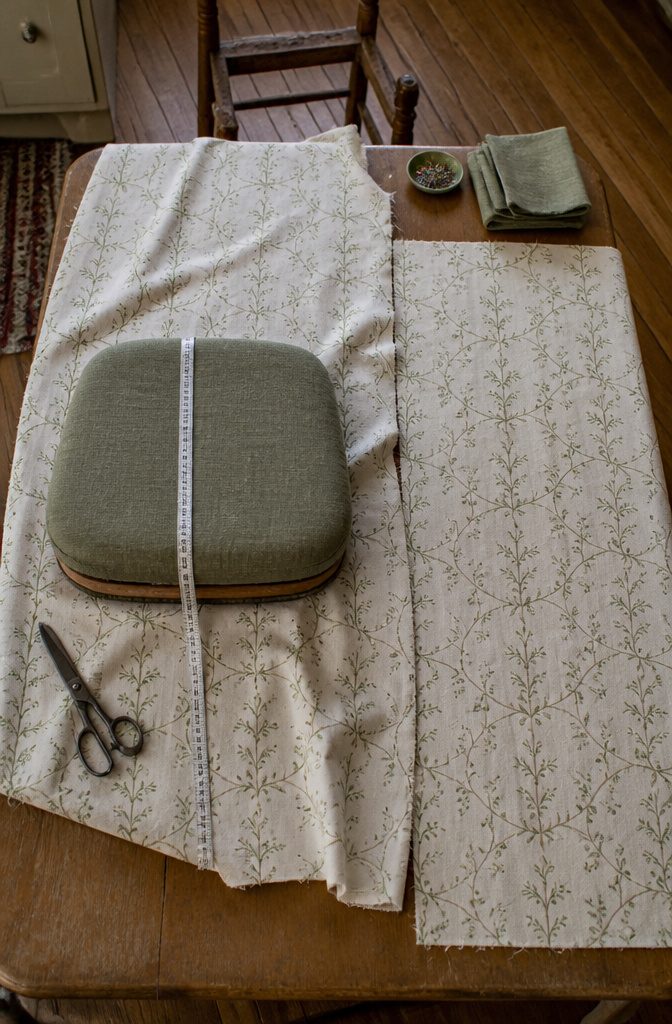
- Measure the seat front to back and side to side, running the tape over the top of the cushion down to the bottom edge of the seat board. Add 6 to 8 inches to each dimension so you have fabric to pull and staple underneath.
- A seat measuring 19 inches each way needs a piece about 26 inches square. Chairs in a set rarely match exactly, so measure each one.
- For patterned fabric, check which direction the print runs before you cut. If several chairs share one design, confirm it faces front to back on every piece.
- Lay the old cover face down on the new fabric and pin it in place, or place the seat upside down directly on the material. Cut around it with 3 to 4 inches extra on all sides.
- Cut larger than you think you need. You can trim bulk later, but short fabric will not reach far enough to staple securely.
5. Position the Layers and Attach the Fabric
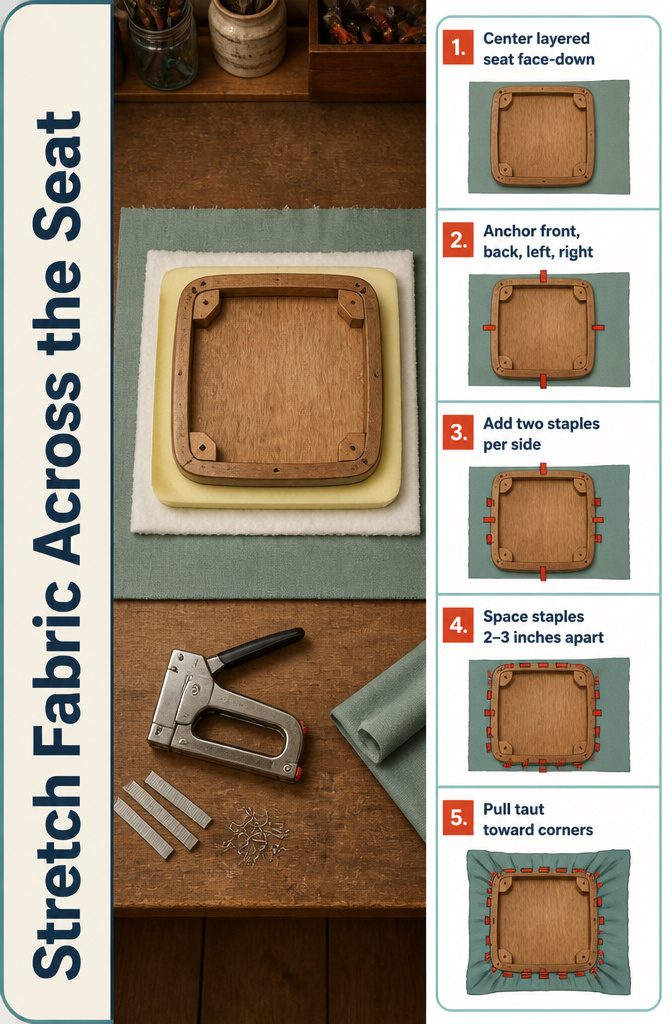
- Center the seat face-down on the fabric, batting and foam already layered beneath. Adjust until the pattern or weave runs front to back and the material sits evenly on all sides.
- Pull the fabric taut across the center of the front edge and fire one staple into the underside. Pull to the back center and staple there. Repeat on the left and right sides. Those four anchors hold tension while you work outward.
- Add two more staples on each side of the first, spacing them 2 to 3 inches apart, still working the centers before you touch the corners. Check the top surface after each side: wrinkles mean the pull was uneven, and now is when you fix it.
- Continue stapling from the center toward the corners, maintaining tension as you go. If the fabric loosens or puckers, pull that staple and reset it tighter. The underside does not need to look perfect, but slack there telegraphs wrinkles on top.
6. Shape and Secure the Corners
Shape and Secure the Corners
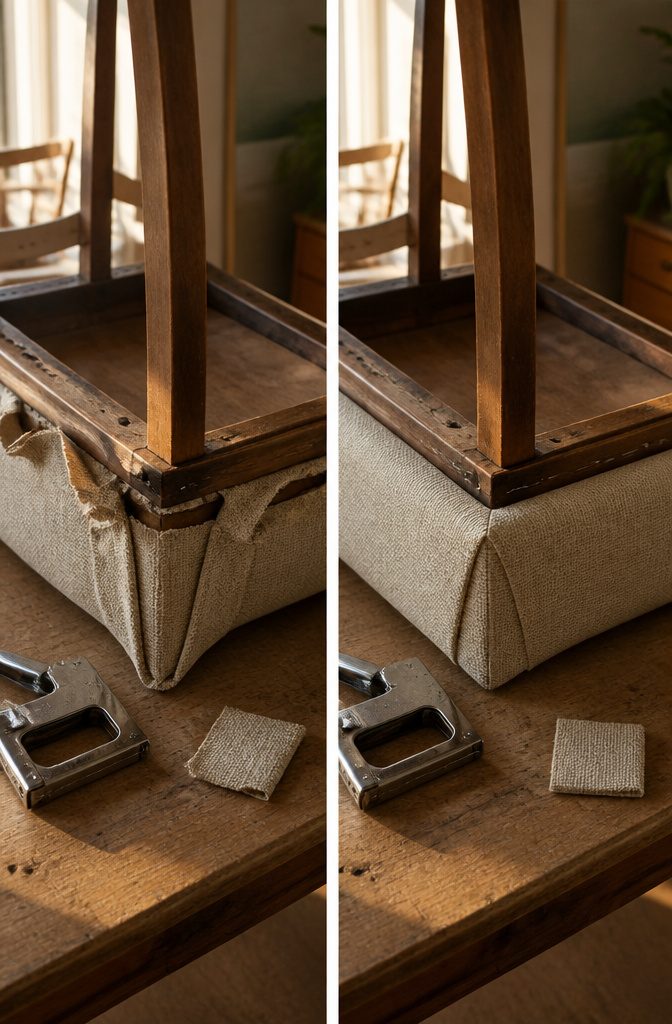
Corners come last, after the sides are stapled.
Trying to lock them in first leaves creases you cannot fix without pulling everything back out. Pull the fabric straight down from each corner toward the center of the seat and place a staple right at the point.
Then fold the excess on each side into a neat pleat, keep the top smooth, and staple again along the fold. If a corner bunches or sits crooked, pull the staples and redo it before moving on.
For sharp right-angled corners, one pleat on each side works better than gathering the fabric in multiple folds.
Staple close to the edge of the seat base, then trim the waste fabric inside the pleat so you can fold it flat without bulk. Leave about half an inch beyond the staples when you trim.
Aim for neat and consistent, not magazine-perfect. You will be the only person who notices any small difference between corners, and the chair will still look finished.
7. Finish the Underside and Reattach the Seat
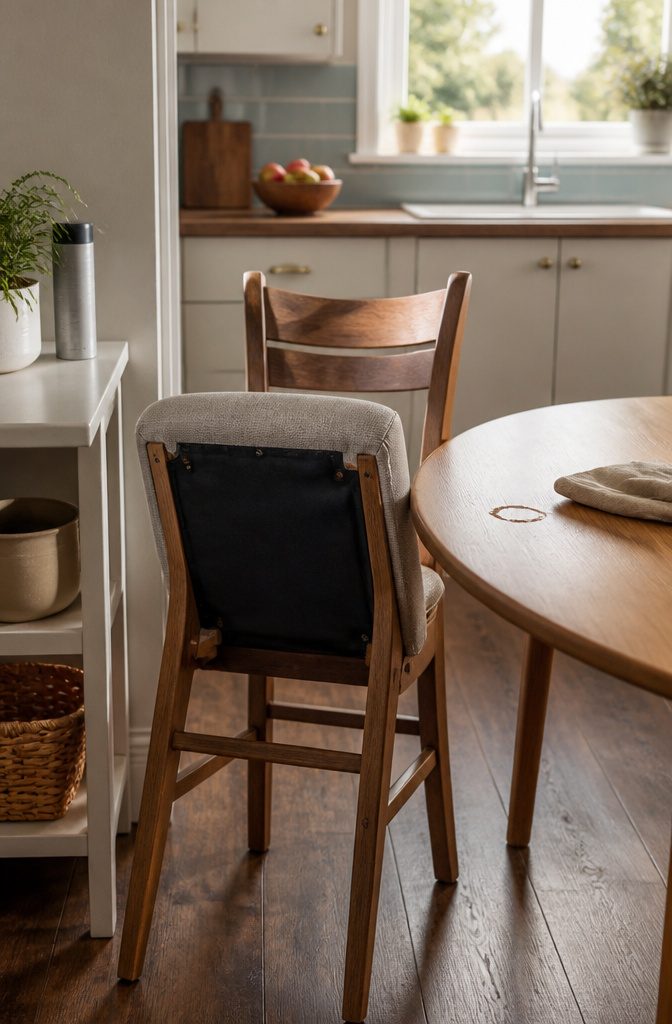
- Cut a piece of black cambric slightly smaller than the seat base and staple it over the raw edges underneath. This dust cover hides the staples and gives a finished look — the fabric sits right over everything you just fastened.
- Push a screwdriver or your finger through the cambric at each screw hole location so the holes line up with the frame.
- Set the upholstered seat back on the chair frame and drive the original screws into their labeled positions. The screws you saved at the start go right back where they came from.
- Spray the fabric lightly with Scotchgard or another upholstery protector. Hold the can about six inches back and cover the entire surface in even passes.
- Let the spray dry completely before you sit on the chair — usually an hour or two depending on humidity. The protector needs that time to bond with the fibers, and sitting too soon leaves marks.
8. Handle Upholstered Backs if Present
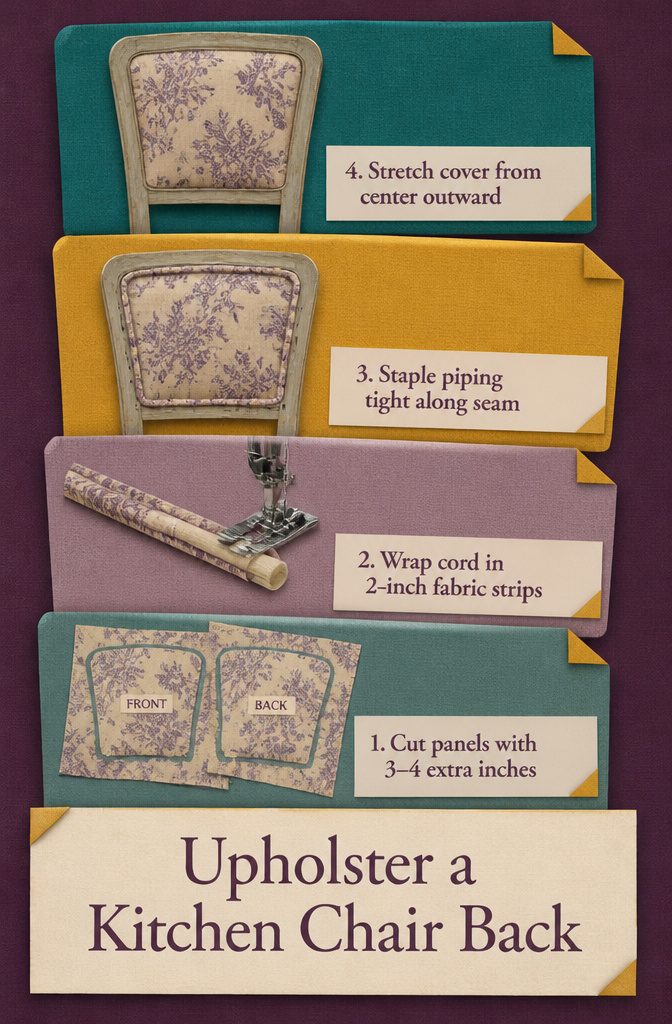
- Use the old back panels as templates. Pull the original fabric off the chair back, label each piece for front and back, then lay them flat on your new fabric and cut around them with 3 to 4 inches extra on all sides.
- Cut 2-inch-wide strips for piping, fold them around the cord, and sew close to the cord using a zipper foot. Reuse the original cord if it still looks clean and holds its shape.
- Staple the piping to the frame first, pulling it tight along the seam line so it sits flat without gaps.
- Fit the new back cover over the piping, pull the fabric taut from the center outward, and staple it to the frame the same way you did the seat.
Tools and Materials You Need
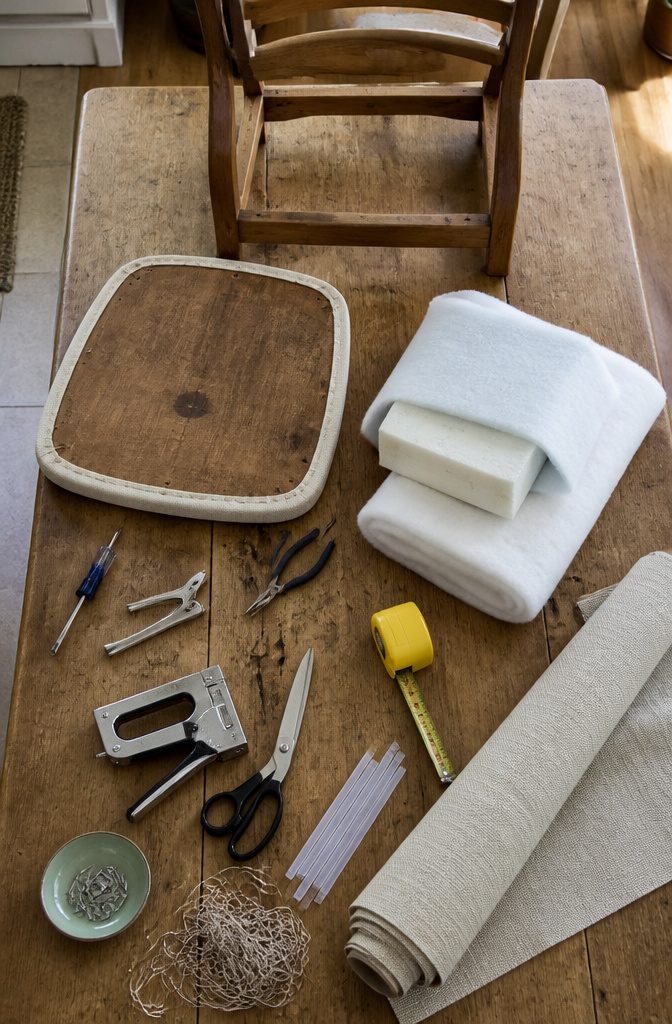
You can reupholster a kitchen chair seat with just a handful of basic tools and a few materials. Most of what you need is probably already in your toolbox.
Tools:
- Flathead screwdriver to unscrew and detach the seat from the chair frame
- Staple remover to lift old staples without damaging the wood
- Needle-nose pliers to pull out any stubborn or deeply embedded staples
- Staple gun loaded with 3/8-inch or ½-inch staples to attach the new fabric
- Fabric scissors or shears for cutting your upholstery fabric
- Tape measure to size the fabric and foam correctly
Materials:
- New upholstery fabric in the yardage you need (usually ½ to 1 yard per seat)
- High-density foam, ideally 2.6-inch density if you’re replacing the cushion
- 1-ounce bonded Dacron batting to wrap over the foam
- Hot glue sticks if you need to secure foam edges
Optional additions like protective gloves or eye protection help if you’re pulling a lot of old staples, but the core list above covers the job.
Choosing Fabric That Holds Up
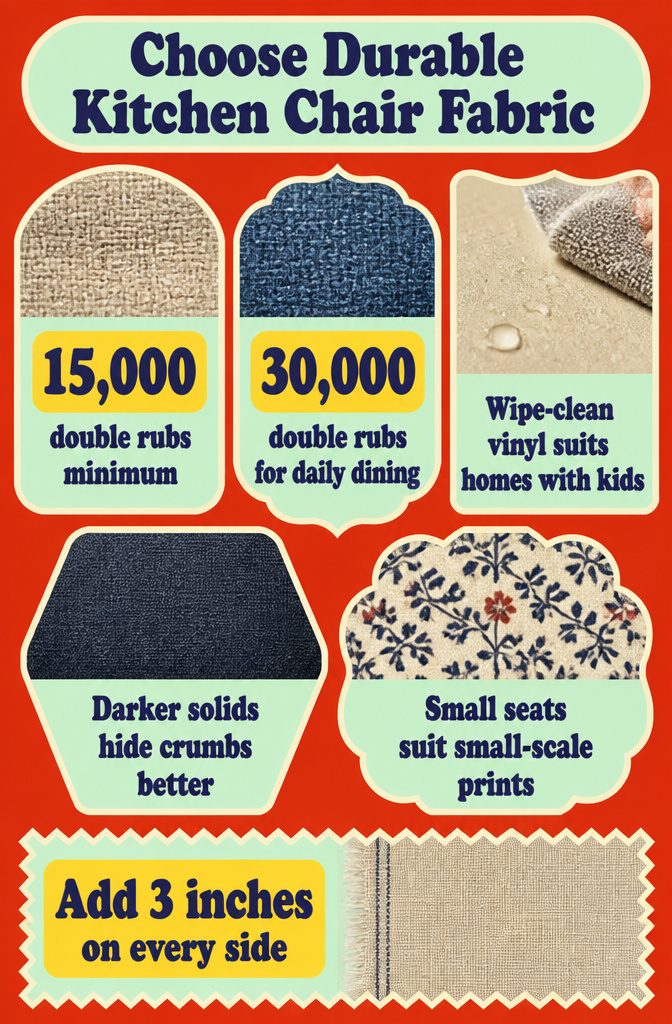
The seat surface takes sliding, shifting weight three times a day, so fabric rated for at least 15,000 double rubs is the floor for a chair you actually use.
That number comes from the Wyzenbeek test, where a machine rubs the material back and forth until it wears.
Performance lines from Crypton, Revolution Fabrics, InsideOut and Sunbrella are built so spills sit on the surface long enough to wipe up instead of soaking through.
For a dining room chair you use every day for eating, you want to look for something that’s ideally 30,000 double rubs or higher, or at least above 15,000.
Tight synthetic weaves outlast loose natural ones, and darker solids hide crumbs better than pale fabric. Wipe-clean vinyl is the practical pick for homes with kids.
Pattern scale matters on a small seat. Simple shapes take a small-scale print; curves and pleats call for a solid so the folds don’t chop up the design.
To figure yardage, measure the seat at its widest points and add three inches on all sides for pull and stapling room. Cut along the straight grain so the weave stays square under tension.
Whether to Upholster Over the Existing Cover
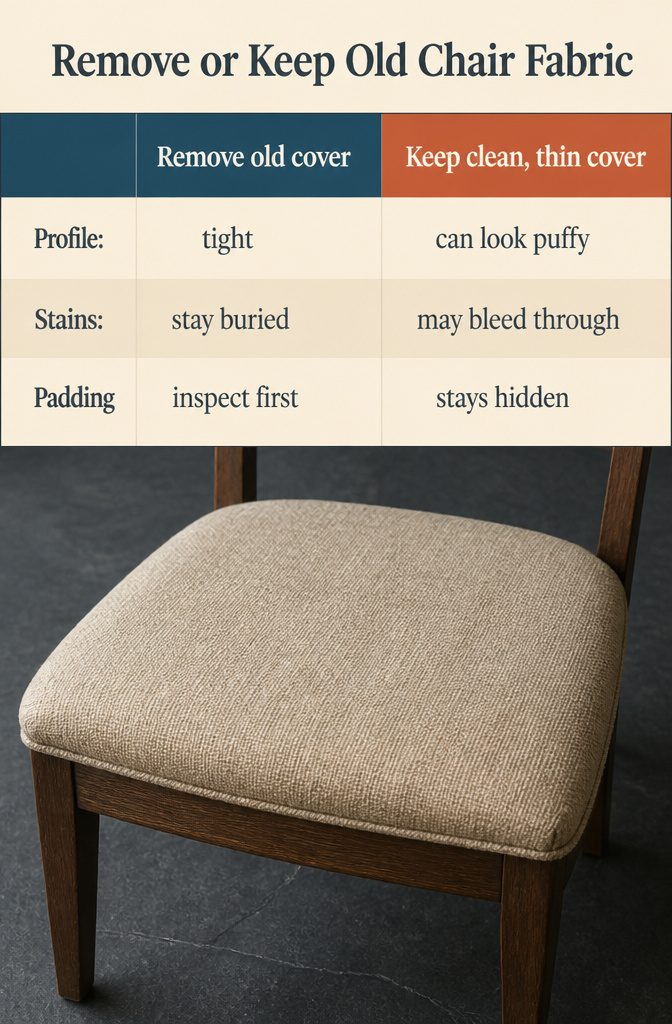
Removing the old fabric keeps the profile tight and makes sure stains stay buried.
A single existing layer can stay in place if the original cover is clean and thin, but bulky old padding or visible stains are worth stripping off.
I’ve read too many accounts of grease marks bleeding through a fresh layer to skip that step when the chair has seen real use.
The extra thickness matters more than it sounds like it would. Stacking fabric adds bulk at the edges where the seat meets the frame, and the chair ends up looking puffy or sitting higher than it did.
If the original upholstery is only a few years old and you know the frame underneath is solid, a slipcover gives you the update without the takedown.
But for a proper reupholster, pulling the old cover off gives you a flat start and a chance to see what the padding actually looks like before you commit to new fabric over it.
Frequently Asked Questions
Can I reupholster a chair myself?
Yes.
Drop-in seats are beginner-friendly since they need only hand tools and a staple gun, with no sewing required. Once you’ve handled a basic seat, spring-seat or tufted chairs make a good next project.
What is the easiest way to reupholster a chair?
Start with a dining chair that has a slip seat, the removable padded platform you can detach from the frame. This style has a gentler learning curve than chairs where the upholstery attaches directly to the frame.
Can you reupholster over existing fabric?
Removing the old fabric keeps the profile tight and prevents stains from bleeding through. A single existing layer can stay in place if it’s clean and thin, but bulky old padding or visible stains are worth stripping off.
How do I choose a new fabric?
Look for fabric rated for at least 15,000 double rubs, ideally 30,000 or higher for a dining chair used daily. Tight synthetic weaves outlast loose natural ones, and darker solids hide crumbs better than pale fabric.
How much fabric is needed to reupholster a chair?
Measure the seat at its widest points and add 6 to 8 inches to each dimension for pull and stapling room. A seat measuring 19 inches each way needs a piece about 26 inches square, which works out to about half a yard.
How much is it to reupholster kitchen chairs?
A DIY job costs only materials: fabric, foam, batting, staples, and cambric. A shop adds labor, which usually makes up the largest share of the price, and chair size and frame repairs move the total.
What are common reupholstering mistakes?
Trying to lock corners in first leaves creases you cannot fix without pulling everything back out. Corners come last, after the sides are stapled, and if the fabric loosens or puckers, pull that staple and reset it tighter right away.
Is learning to upholster hard?
If you’re comfortable using a staple gun and screwdriver, you’re probably a good candidate. You’ll need to set aside time to watch videos or take a class, and research and purchase upholstery fabric for your project.