
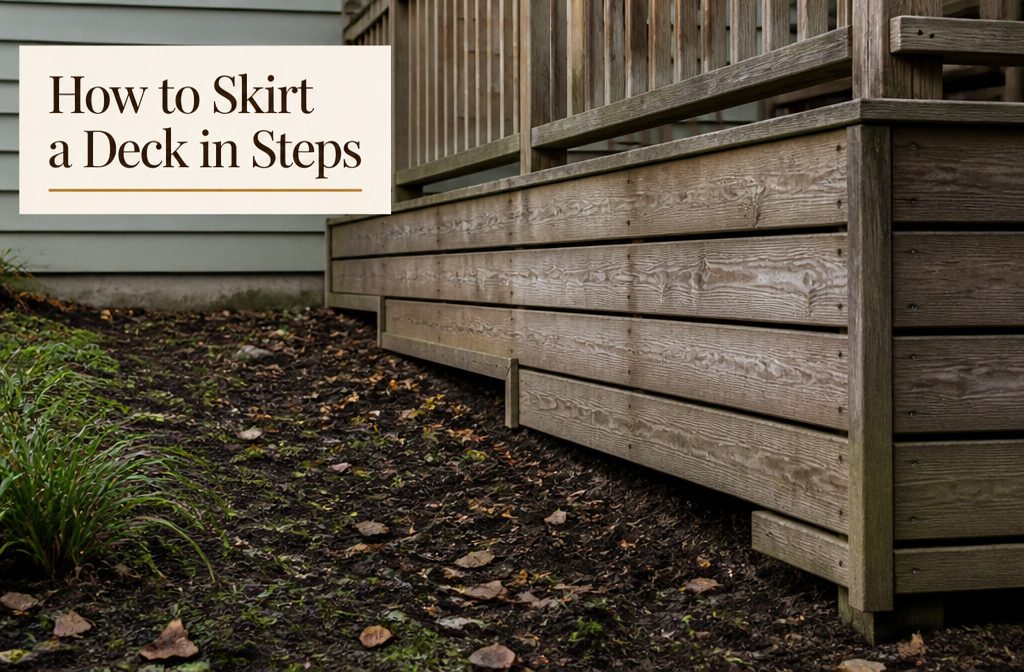
Deck skirting takes a weekend and runs $2 to $60 per linear foot installed, but most of that range comes down to material.
The part people get wrong is the bottom edge: it has to follow the ground’s slope rather than cut level, or you end up with gaps that look unfinished or boards that sit in dirt and rot.
You need a 2×4 support strip fastened to the posts at grade and 2 inches of clearance below the last board to keep water splash off the wood.
1. Choose Your Skirting Material and Design
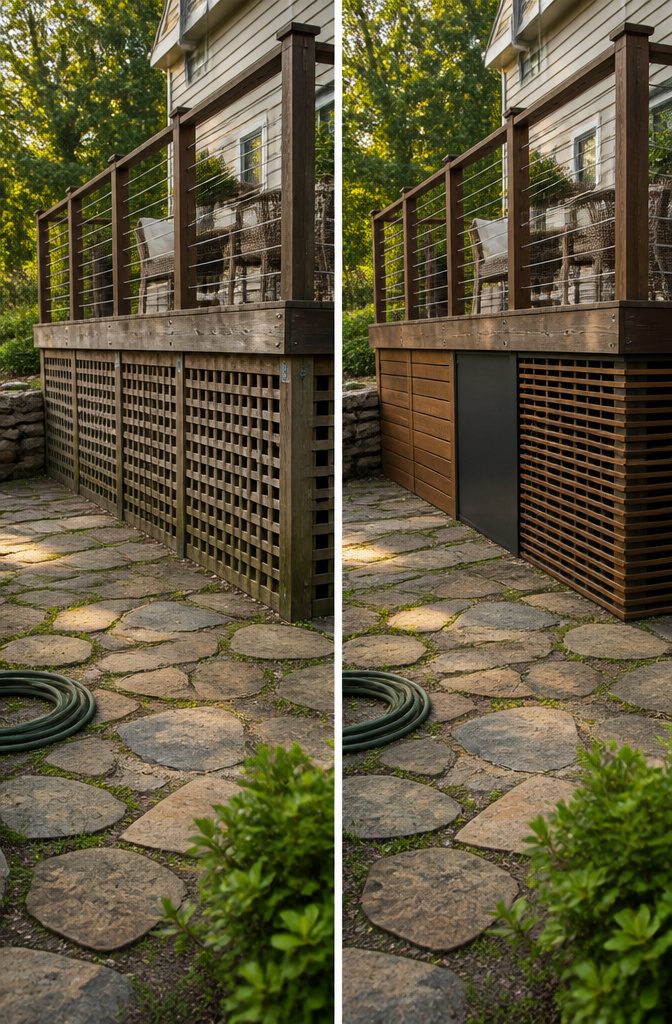
The material you choose changes what the deck looks like, how often you need to work on it, and how much air moves through.
Wood boards give you clean horizontal lines and take paint or stain, but you have to seal them every few years to keep water from getting in.
Lattice panels, whether wood or vinyl, let air through and are easy to install, though wood lattice needs the same maintenance as solid boards.
Composite and vinyl skirting look similar to wood but never need staining, which makes them a practical pick if you want the project finished for good.
Stone or brick veneer gives a permanent look that pairs well with traditional architecture, and metal panels work for modern builds where you want sharp geometry and minimal upkeep.
Living plants soften the edge but take ongoing care and do not block the space completely.
Professional installation for deck skirting runs $2 to $60 per linear foot depending on what you choose. Wire mesh costs the least but does not hide anything underneath, so it only works if concealment does not matter.
When you are deciding, think about your home’s architecture, how much maintenance you are willing to handle, whether you need ventilation under the deck, and how you will get to utilities or storage below.
Pressure-treated lumber, composite, and vinyl all last, but composite and vinyl save you the yearly sealing work that wood requires.
2. Plan Support Framing and Access Points
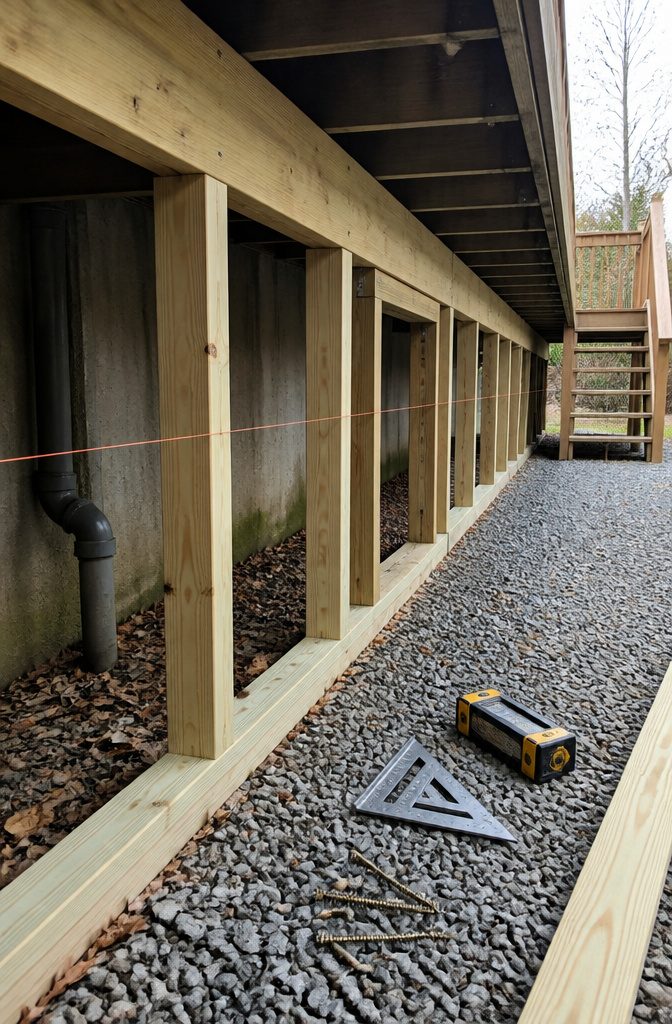
The skirt panels fasten to the deck face board at the top and to a horizontal PT 2×4 strip laid along the ground at the bottom.
If your posts run all the way down, you can screw that bottom support directly to the face of each post. When posts stop at the deck frame, you need blocking every 4 feet to give the 2×4 something to bite into.
Cut PT 2×4 pieces to span from the underside of the decking down to ground level, stand them vertical against the back of the face board or rim joist, and screw them in place.
The bottom support runs parallel to the rim joist so it stays level. A string level and chalk line mark the height on each post or block, then you fasten the horizontal 2×4 to those marks with screws.
Before you cut any panels, plan for access. A gate or removable panel makes sense wherever you have storage bins, a sump pump, or utilities that need servicing.
Also line up your board joints with the stairs and plan cuts around spigots so the seams look intentional rather than patched.
3. Install and Align the Boards or Panels
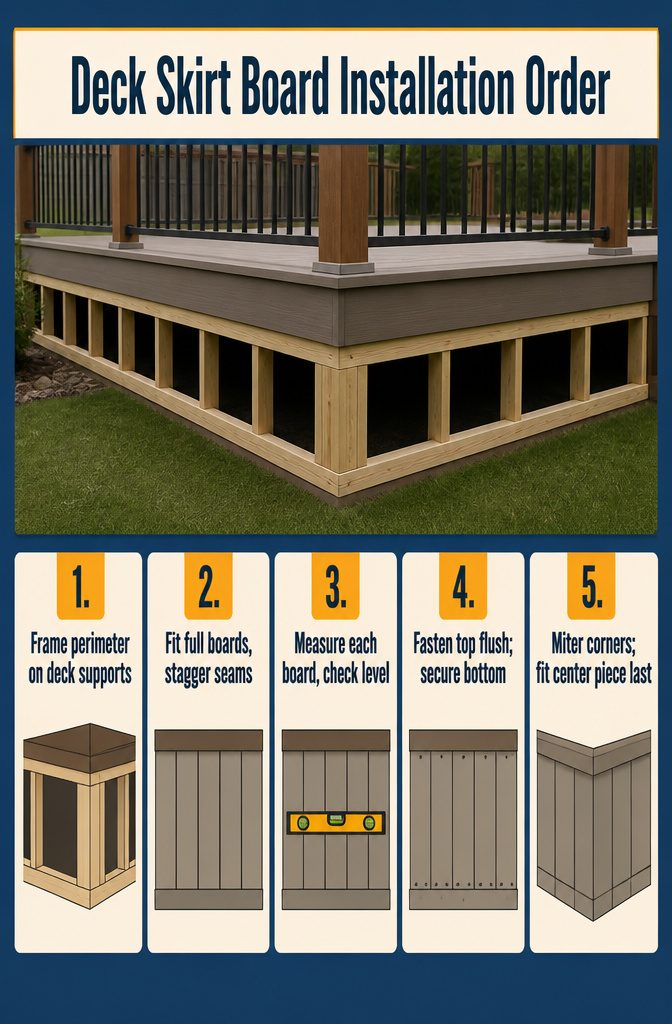
- Build a frame using the existing deck supports so the vertical boards have something to attach to. Space the studs evenly around the perimeter.
- Cut your first boards to length and work from each end toward the center. Full-length pieces go first. When a board meets a stud, cut it flush and start the next row with a short piece followed by a long one — staggered seams look intentional rather than patched.
- Measure down from the deck’s top edge for each board rather than using spacers, since boards vary slightly in width. Check level before fastening anything.
- Fasten the top edge flush with the deck’s bottom trim, then secure the bottom edge to the lower support. Use nails or screws, whichever your frame material calls for.
- For corners, cut sections to fit each deck face and miter the joints. The center piece on long runs gets cut last to fit whatever gap remains.
4. Fit the Skirt to Slopes and Ground Level
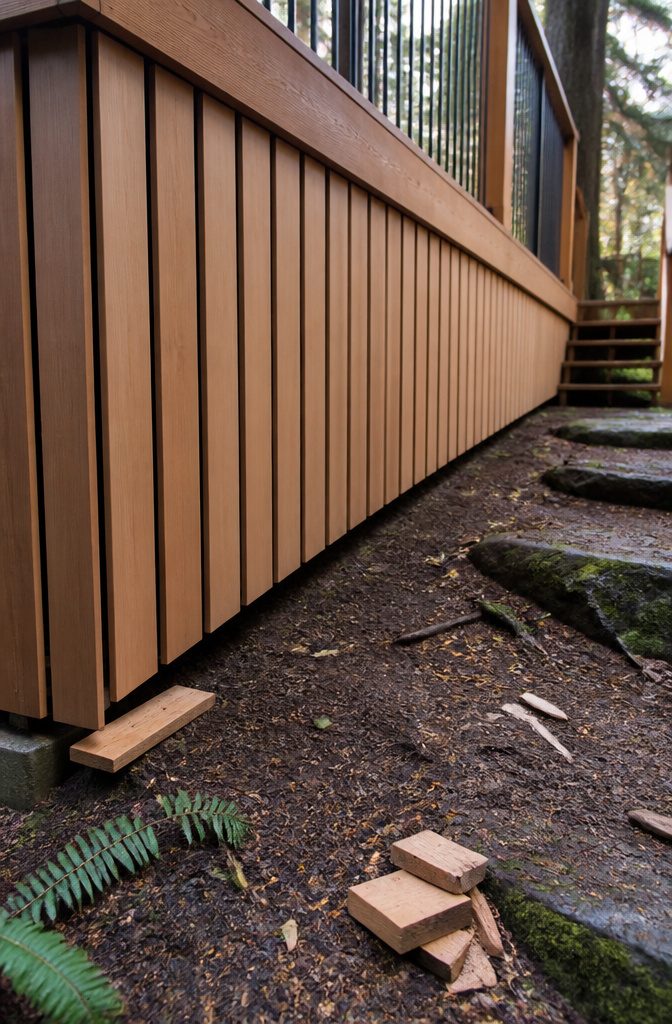
The bottom board follows the slope of the ground rather than fighting it.
I taper each piece to match the grade and leave roughly 2 inches between the last board and ground, which keeps the wood clear of splash and rot without leaving a gap wide enough to look unfinished.
A ¾-inch clearance above grade is the minimum most framers hold to, and I set that height with a scrap piece of 1×4 laid flat as a spacer while I mark the cut.
Side-by-side boards need at least a ¼-inch gap between them for airflow and seasonal movement. I maintain that spacing all the way down, keeping the vertical lines parallel even as the bottom edge angles to follow the hill.
Sloped sections and the area under stairs take more measuring and more test fits before a board goes on permanently, but the principle stays the same: level verticals, tapered bottoms, and that 2-inch breathing room at grade.
5. Finish and Protect the Wood
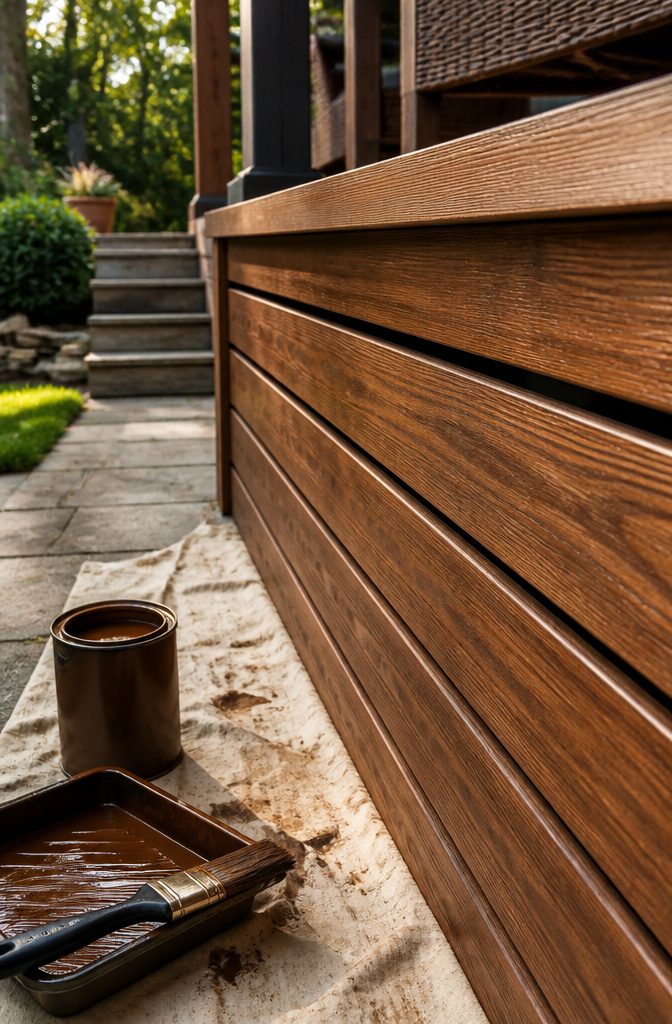
Once the skirting is up, wood needs a finish or it grays and splits. Exterior stain or paint keeps moisture out and buys you years before you’re back out there with a brush.
Paint gives opaque color and hides grain completely. Stain soaks in, shows the wood, and oil-based formulas last longer than water-based ones, though they take a few days to dry.
One move that saves touch-up time is spray-painting treated framing studs black before you attach the boards.
The dark gaps disappear, and you’re not fussing with a small brush later. If you stain the whole deck at once, do it after the skirting goes on so the finish matches in one pass.
Skip the power washer before staining, though. It shreds the wood fibers and the stain won’t hold.
Wood skirting won’t be one and done. Plan to restain and reseal it every few years, more often if the deck faces weather head-on.
Airflow and Moisture Control Below the Deck
Airflow and Moisture Control Below the Deck
Water from rain or cleaning gets under a deck, and without somewhere to go it sits there.
Trapped moisture causes wood rot, mold, and mildew, and composite decking and the joists underneath take the same damage. Proper airflow solves that by keeping the space dry enough that moisture never lingers long enough to rot anything.
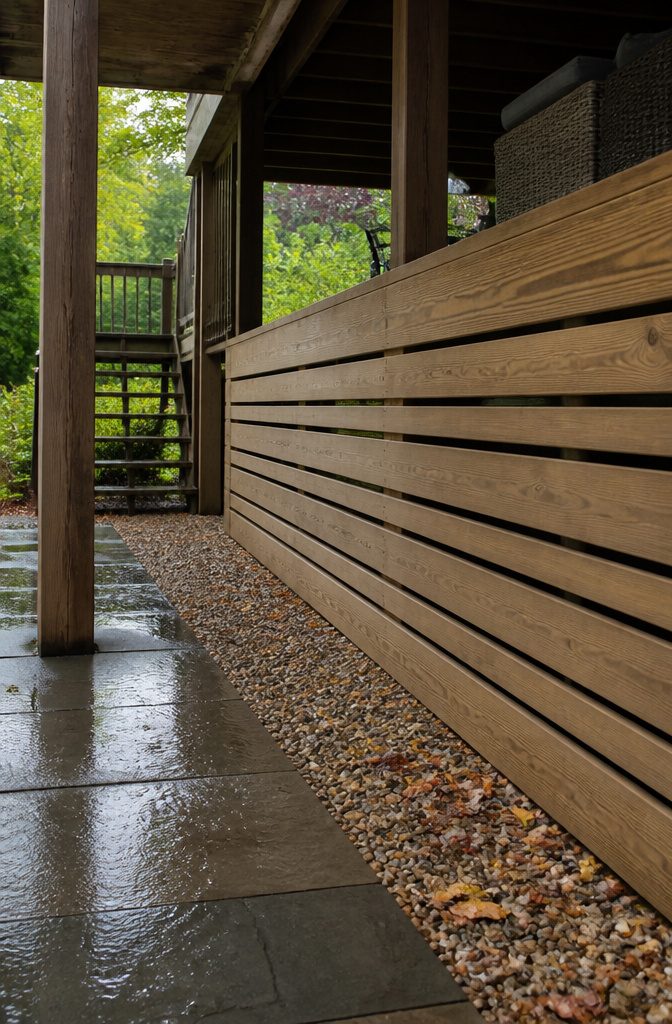
Skirting needs ventilation built in.
Solid panels that close off all four sides turn the area into a damp box. Wire mesh permits airflow easily but leaves everything under the deck visible, which defeats the point of skirting in the first place.
Most other materials work if you leave gaps between boards or add vent panels at intervals. A dry space also discourages insects and rodents, which prefer stagnant, damp areas to nest in.
Build an Access Door for Storage or Utilities
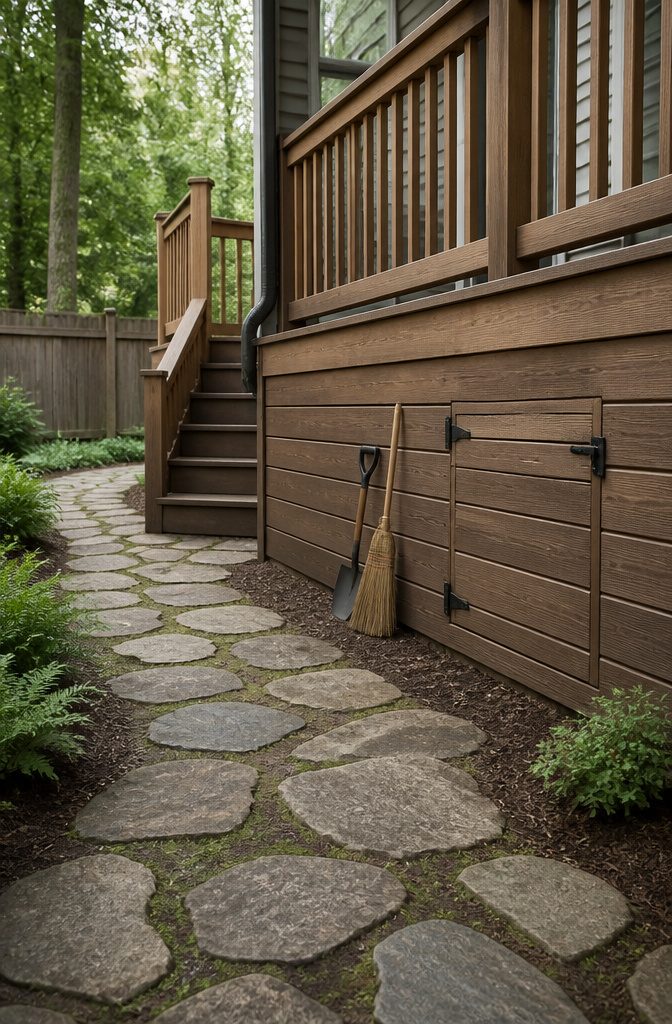
An access opening turns the space under your deck into something you can actually use. I framed mine as a hinged panel using fence gate hardware — the kind made for outdoor gates, not the lightweight stuff sold for interior doors.
The fence hardware holds up to weather and repeated use without binding or rusting out in two seasons.
The panel itself gets a 2×4 frame with a diagonal brace running from the bottom hinge corner to the upper latch corner.
That diagonal keeps the gate square and spreads the weight across both hinges so the panel does not sag.
Face the frame with whatever boards you used for the rest of the skirting so the closed panel reads as part of the wall.
Cut the bottom edge to match the skirt height on either side. If you are storing yard tools or seasonal items underneath, a 3-foot-wide opening is wide enough to move things in and out without scraping your knuckles.
If the skirting blocks a water shutoff valve, an electrical outlet, or hot tub access, the panel goes there whether storage matters or not.
Frequently Asked Questions
How much does it cost to install deck skirting?
Professional installation costs $2 to $60 per linear foot depending on the material you choose. Wire mesh sits at the low end but leaves everything visible, while stone veneer and metal panels cost more but require little to no maintenance over time.
What is the cheapest way to close in under a deck?
Wire mesh is the least expensive option and keeps animals out while allowing airflow. The downside is that it does not conceal anything underneath, so it only works if hiding storage or utilities does not matter.
Does deck skirting need ventilation?
Yes.
Trapped moisture causes wood rot, mold, and mildew in both the skirting and the joists above. Leaving gaps between boards or adding vent panels at intervals keeps the space dry enough that water never sits long enough to cause damage.
What is deck skirting?
Deck skirting covers the open space beneath a deck. It keeps out pests and debris, hides storage or utilities, and can turn the area into usable space when paired with an access door.
What is the best material for deck skirting?
Composite and vinyl last without yearly sealing, which makes them practical if you want the project finished for good.
Wood boards take stain or paint well but need resealing every few years, and stone or brick veneer pairs with traditional architecture for a permanent look.
How do you install deck skirting panels?
Fasten the top edge to the deck face board and the bottom edge to a horizontal 2×4 laid along the ground.
Cut panels to length working from each end toward the center, leave a ¼-inch gap between boards for airflow, and check level before securing anything.