
A landscape curb four to six inches wide and six inches tall costs $150 to $200 in materials for a 25- to 30-foot run and takes four to six hours of active work spread across a day or two.
Most curbs fail because the builder skipped the compacted gravel base or poured directly onto loose dirt that shifts with rain.
The difference between a curb that lasts 15 years and one that cracks in two comes down to that 4-inch layer of crushed stone beneath the concrete, tamped firm before you pour.
1. Mark the Curb Path and Call for Utility Checks
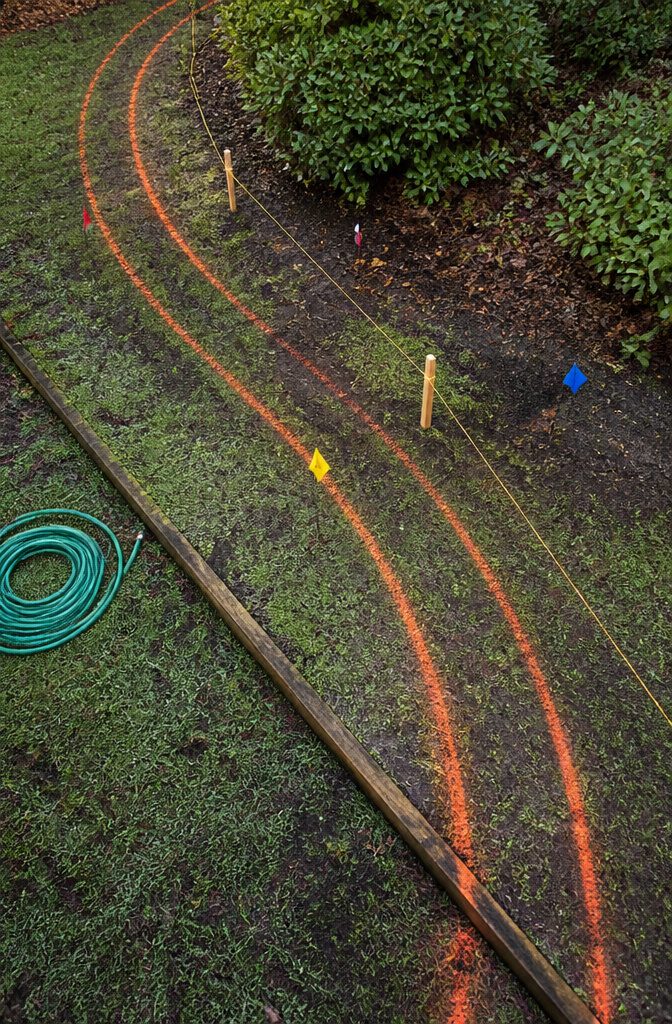
Start by marking the full route of the curb with spray paint, stakes, or a string line stretched tight between stakes. The string line keeps straight runs straight; spray paint alone works for curves or freeform borders.
Standard landscape curbs run 6 inches wide, though you can adjust that width to fit your project. Mark the paint lines wide enough to show where you need to excavate, so the whole path is visible before you dig.
Before you break ground, call your local utility-marking service and have all underground lines flagged.
Even if you believe you know where lines run, the call protects you from fines and prevents you from cutting through fiber, gas, or electric buried in the yard.
The marking crew visits free, and you wait a few days for them to finish. Once the flags are down, you dig.
2. Dig the Trench and Prepare the Base
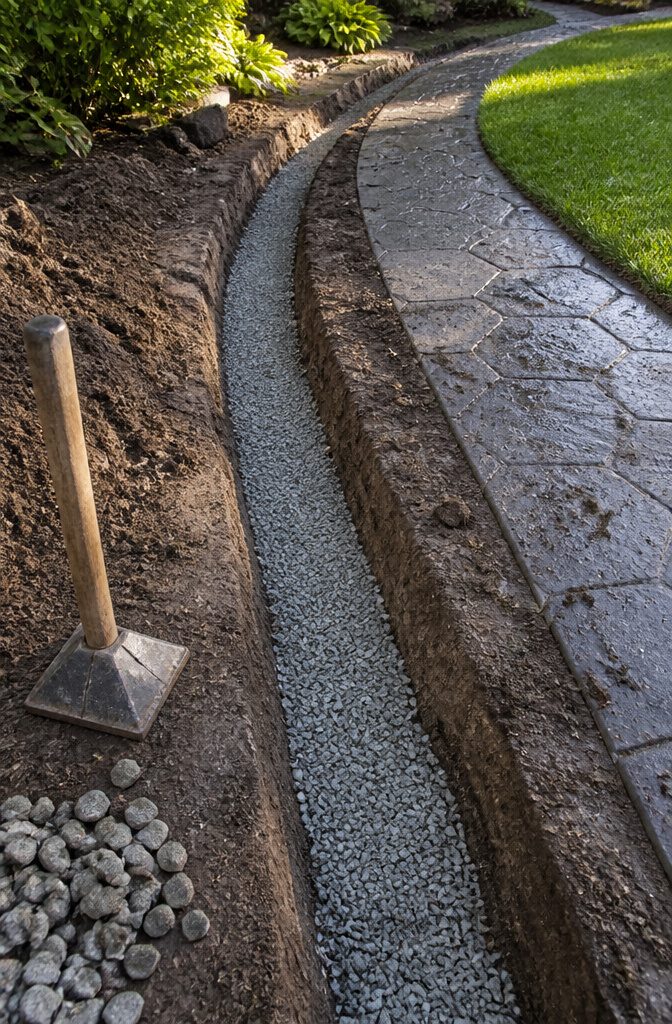
Dig down approximately 8 inches where the curb will sit. That depth leaves room for a 4-inch gravel layer beneath the concrete and positions the finished curb at or just above grade.
Some jobs get by with 4 to 5 inches of excavation if the soil is stable and the curb sits shallow, a few inches below the surrounding surface.
Either way, dig the trench 6 inches wide to match the curb width, adding a couple of inches on each side if you are installing forms.
Compact the bare soil with a hand tamp before adding base material. A 4-inch layer of #57 Stone or CR6 crushed stone goes in next, tamped firm with a hand tool or mechanical compactor.
Road base works too. This gravel layer drains water away from the underside of the curb and prevents settling that leads to cracks.
Skip it and the concrete sits on loose dirt that shifts, especially after rain. The base preparation decides whether the curb holds its line or sags and fractures within a season.
3. Build and Brace the Forms
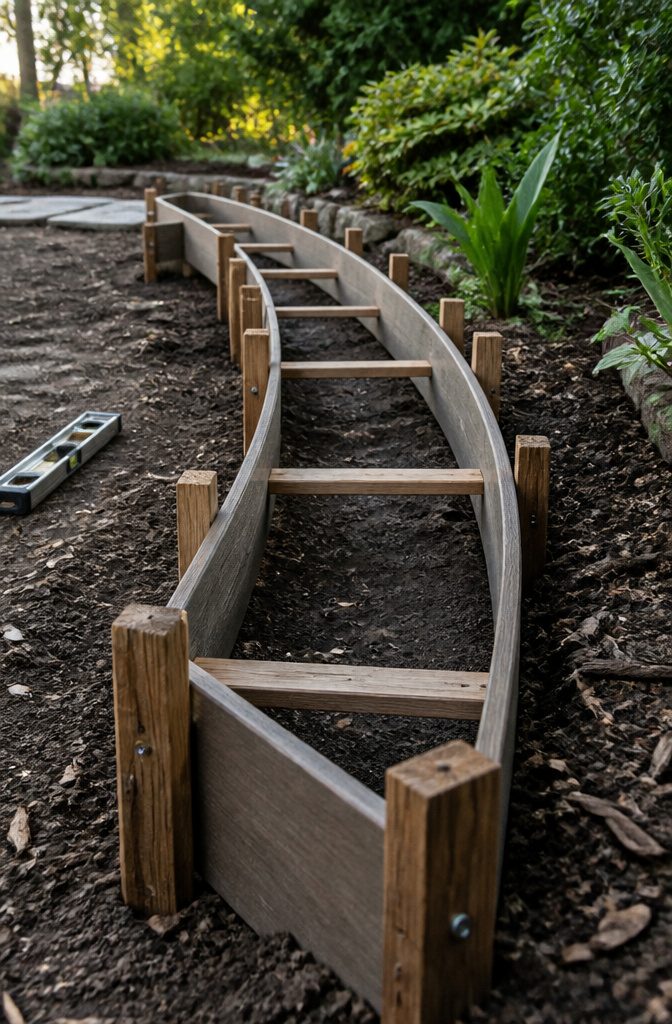
The form holds the concrete in place while it sets, so the material you pick and how you stake it decides whether the curb stays straight or bulges.
Composite siding boards work for moderate curves — they flex enough to follow the line but hold their shape under the weight of wet concrete.
For tighter bends, switch to ¼-inch plywood; thinner than that and it won’t hold position. Straight runs can use 2×4s or hardboard.
Set the top edge of each form exactly where you want the finished surface — that becomes the top of your curb.
Use short blocks of scrap wood as spacers between the two sides to keep the width consistent, usually 4 to 6 inches depending on your design. Level the forms as you go so the curb doesn’t tilt.
Drive stakes every 12 to 18 inches on the outside of each form, at least 12 inches long for a form that’s 6 to 8 inches deep. Shorter stakes work for shallower curbs, but you need enough depth to anchor against the pour.
Attach the form boards to the stakes with nails or screws — screws make teardown easier. The stakes keep the forms from shifting when concrete hits them.
4. Mix the Concrete to the Right Consistency
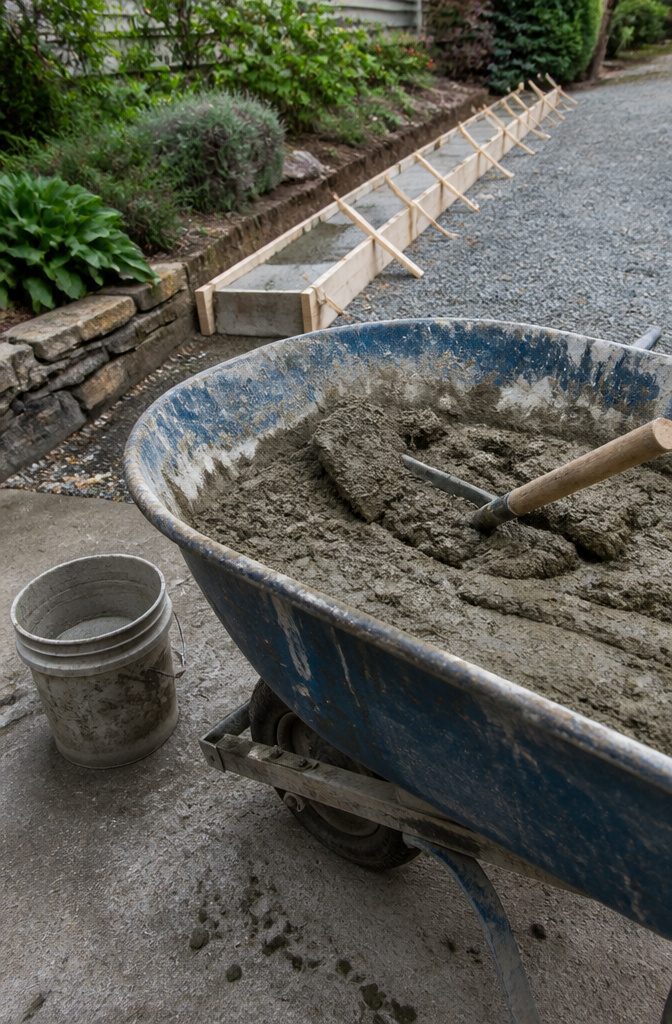
I mix bagged concrete in a wheelbarrow to thick oatmeal consistency—it needs to hold shape without being runny, thicker than pancake batter but not stiff enough that you can’t work it into the forms.
Some people describe the right texture as cake batter, but I find that reads too thin; you want it just slightly wetter than what you might picture as workable, which makes it easier to settle into corners and release air without losing strength.
For a small curb, hand mixing works fine and keeps the job affordable, though it takes muscle.
Larger projects justify renting a mixer or ordering a 3,500–4,000 PSI truck mix, but delivered concrete often comes with minimum volumes that leave you with expensive waste on a 25-foot border.
If you mix your own from scratch instead of bagged product, a 3:1 to 4:1 sand-to-Portland-cement ratio without aggregate smooths finishing and eliminates the gravel that fights your trowel on edges.
5. Fill, Settle, and Screed the Forms
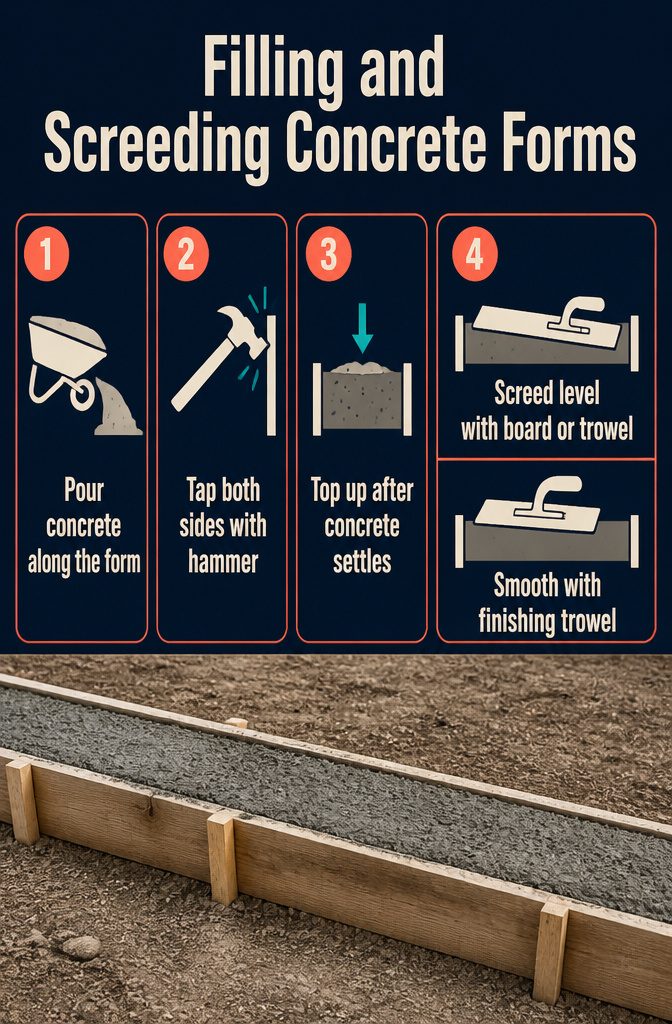
Fill, Settle, and Screed the Forms
Once the concrete is mixed, you can pour it directly from a wheelbarrow or shovel it in one scoop at a time.
Work along the form until it’s filled to the top. Tap the outside of the forms with a hammer as you go to knock trapped air bubbles loose and let the concrete settle into every corner.
Do it on both sides, all the way down the length of the curb. If you skip this step, you’ll end up with pitted, uneven edges where air stayed trapped.
The tapping will cause the concrete to drop slightly below the top of your forms. You can add more concrete to bring it back up, or let it settle where it lands.
Next, run a board or trowel along the top edge of the forms to screed the surface flat. That first pass gets you level; a finishing trowel smooths it out from there.
6. Finish the Surface and Cut Control Joints
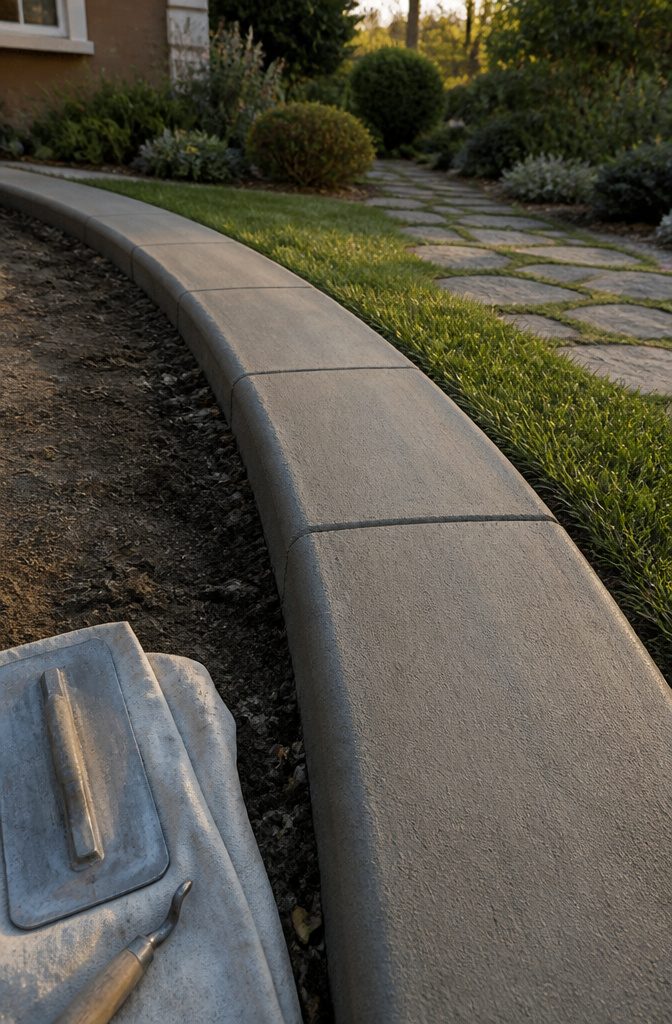
Once the concrete is screeded level, I smooth the surface with a float or trowel to remove marks and get an even finish.
Then I run an edging tool along both sides where the concrete meets the forms, working it back and forth until the edges are rounded and smooth. The edger keeps sharp corners from chipping later.
Concrete will crack.
Control joints let me decide where. I mark intervals along the curb and use a grooving trowel to press a shallow groove into the surface at each mark.
That groove creates a weak point, and when the slab eventually cracks from ground movement or temperature swings, it follows the groove instead of wandering across the face.
Sources suggest joints every 4 feet, every 7 to 8 feet, or every 8 to 10 feet. I put mine at 4-foot spacing on shorter runs and widen it to 8 feet on longer curbs where fewer cuts keep the line cleaner.
Some builders skip the groover and saw-cut joints a day or two later with a masonry blade set to maximum depth, about 2.5 inches, cutting about 3 feet apart.
Either method works. The timing matters more: groove while the concrete is firm but not hard, or saw after it has set.
7. Cure, Strip the Forms, and Backfill
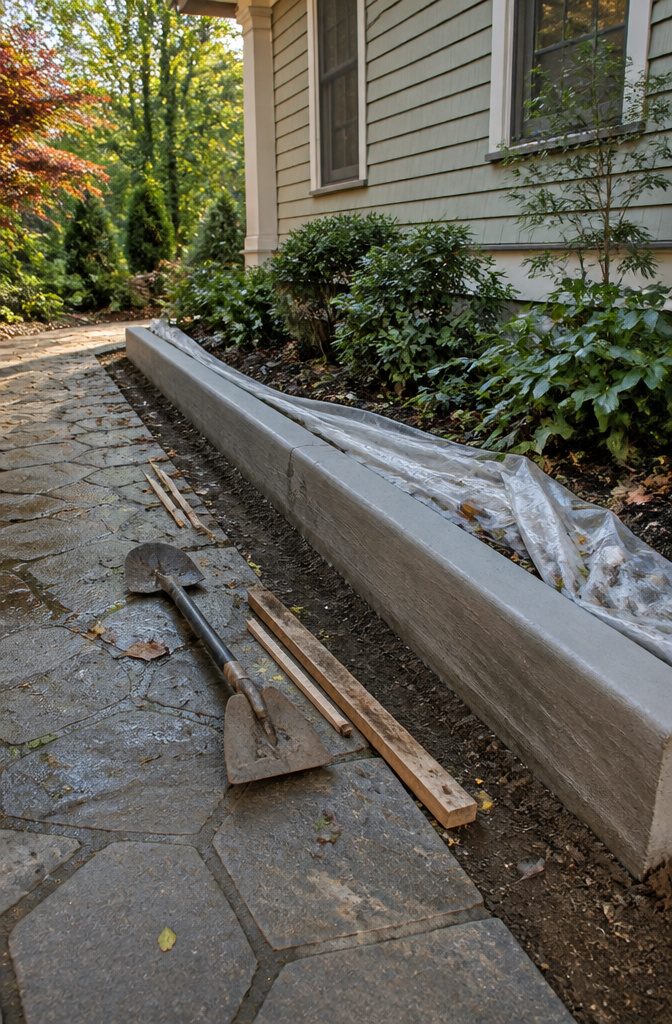
The forms can come off the morning after you pour if you kept the mix thick, though I usually leave them a full day to be safe.
Four days if you want to be really conservative and the weather has been cool.
Either way, use a pry bar to lever the wood away from the face without gouging the concrete, and pull the stakes straight up once the pressure is off.
Walk the length and check for spalling or divots where an air pocket sat against the form.
Mix a palm-sized batch of the same concrete, work it into the damaged spot, and smooth it flush with the rest of the curb.
Once that patch hardens, backfill dirt against the front face and you’re done with the structural work.
The curb is walkable within a day, but full strength takes 28 days.
If you poured a specialty mix, follow the manufacturer’s curing schedule. For standard bagged concrete, keep the surface damp under plastic sheeting for seven days if you’re in a position to spray it daily.
Most residential curbs skip the moist cure and turn out fine; the difference shows up in commercial work where cracking means liability.
Curb Dimensions That Work for Landscape Borders
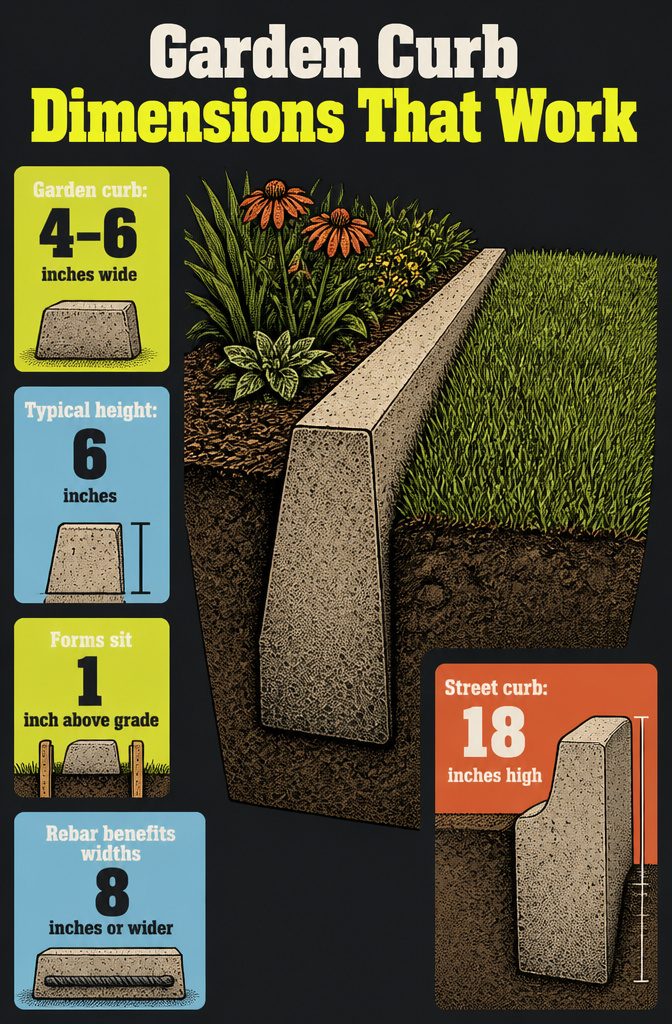
The curb you build should match the job it needs to do, and landscape borders tend to run narrower and shorter than what you see at a street edge.
A four-to-six-inch-wide curb, six inches tall, handles most garden bed edging and lawn separation without wasting concrete or digging deeper than you want to.
I’ve seen curbs as narrow as four inches work fine when they sit mostly above grade with just a few inches buried for stability.
Width matters more as the curb gets taller. Anything eight inches wide or wider benefits from rebar running the length of the pour; below that, the concrete usually holds without it.
Forms typically sit about an inch above ground level so the finished curb stands proud enough to stop mulch and redirect water.
A sloped back face, rising from four inches in front to six inches behind, gives you more concrete where it anchors into soil without needing a wider trench at the front.
Street curbs run much larger because they take vehicle weight and need deeper frost protection, often six inches at the top, nine at the base, and eighteen inches high with a full foot underground.
That scale makes no sense for a flower bed.
Cost and Materials for a 25–30-Foot Curb
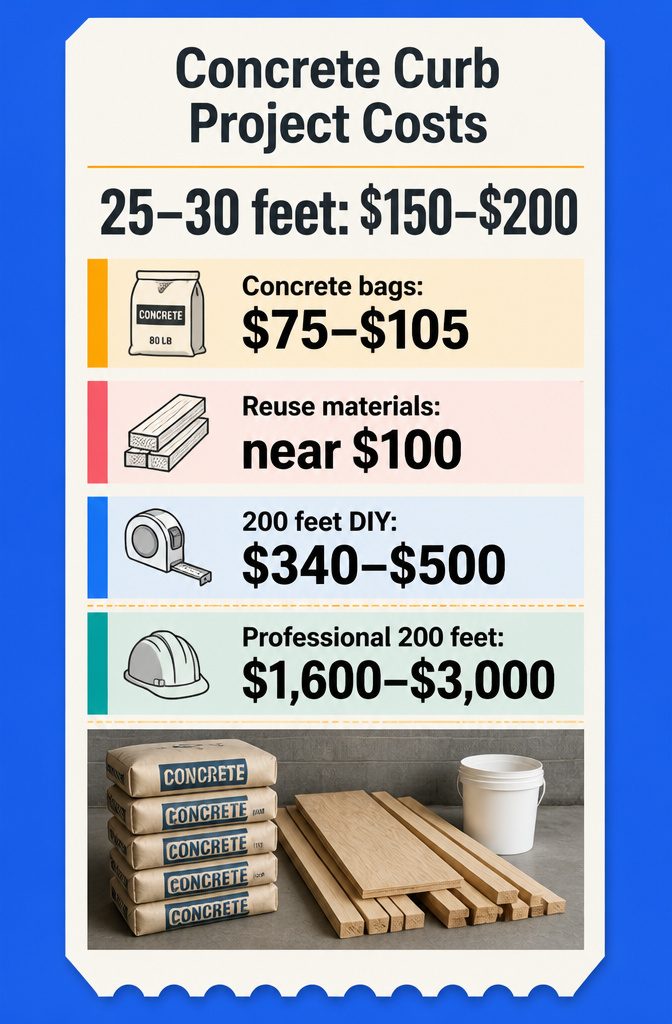
A 25 to 30 foot curb costs $150 to $200 if you’re starting from scratch and buying everything new.
That breaks down to 15 bags of high-strength concrete at $75 to $105, composite siding boards for the forms at $30, 1/5-inch plywood for tight curves at $15, 1×2 and 1×3 furring strips for stakes at $10, wood screws at $5, road base at $20, and marking spray paint at $5.
If you already own scrap lumber and an edger, you can bring it closer to $100.
Some projects get by with less concrete. A smaller curb might need only seven 80-pound bags of general-purpose concrete, and basic forming materials for a short decorative border can come in under $50.
Scale matters: a 200-foot project runs $340 to $500 in materials if you pour it yourself, versus $1,600 to $3,000 for professional installation.
When to Pour and How Long It Takes
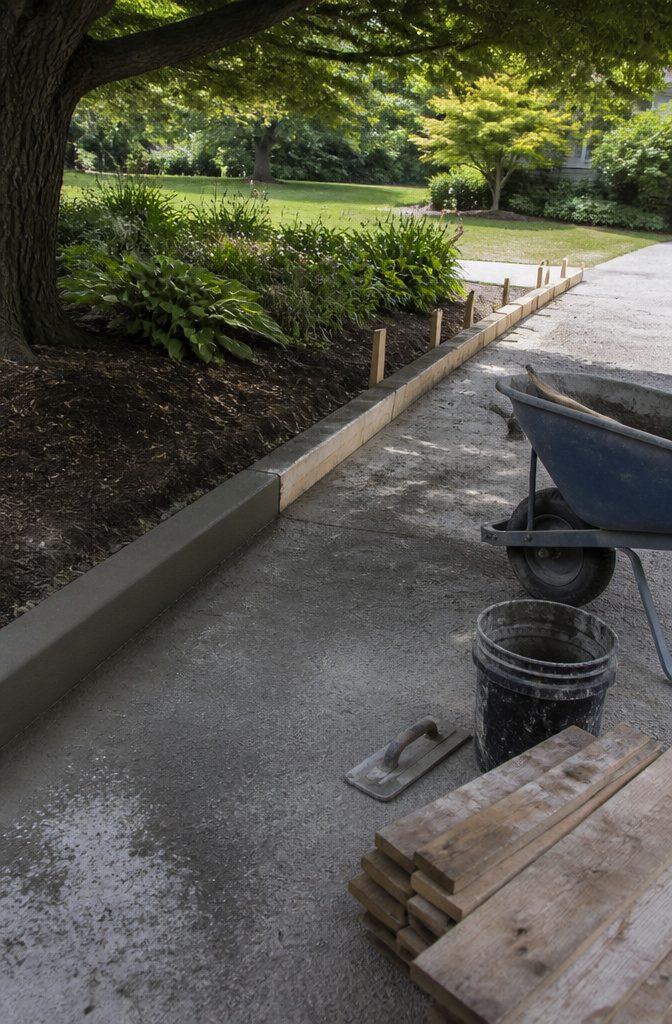
The window for pouring a concrete curb is between 50 and 80°F, when the concrete sets reliably without flash-drying or stalling out. Outside that range you’re watching the mix too closely or waiting days for it to firm up.
Plan for four to six hours of active work, split across a day or two depending on how long your curb runs and whether you’re mixing in a bucket or a wheelbarrow.
I poured in sections of ten to fifteen feet at a time, smoothing each stretch before mixing the next batch so the trowel work didn’t pile up at the end when I was too tired to care about it.
The curb needs twenty-four hours before you pull the forms, but full strength takes twenty-eight days.
That month-long cure is structural, not decorative. A week in, the curb holds up to foot traffic and light use; a month in, it’s done settling and you can treat it like permanent hardscape.
Form-and-Pour Against Machine Methods
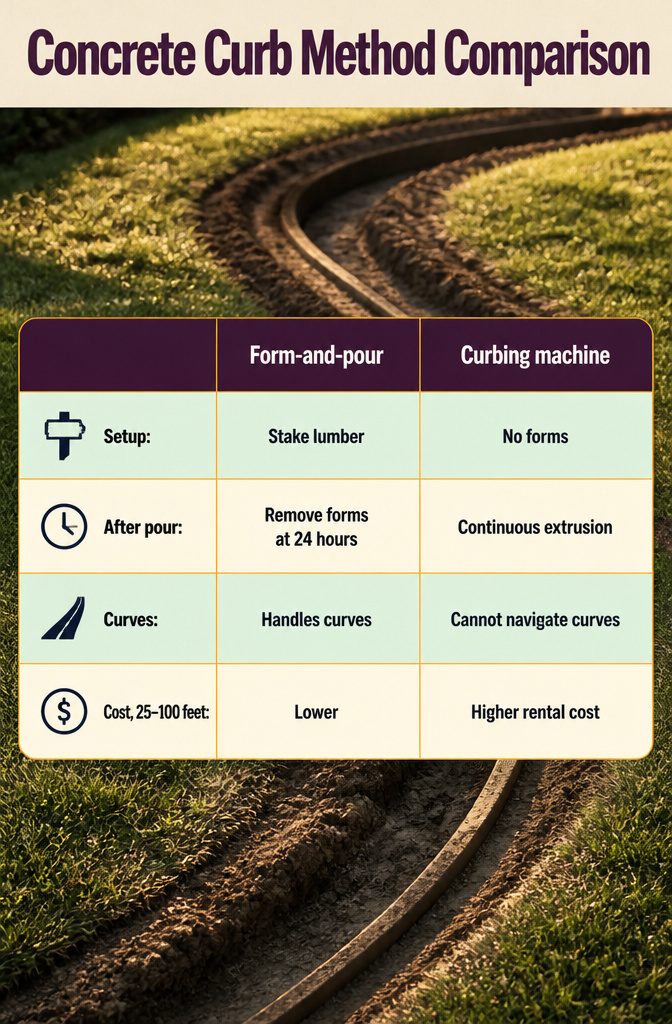
A form-and-pour method is the most practical way to shape a concrete curb at home. You dig the trench, stake lumber on both sides to define the shape, and pour concrete between them.
The forms come off after twenty-four hours. A curbing machine extrudes concrete in one continuous pass without forms, and it’s faster across long runs, but you’d need to rent one and learn to run it.
For a twenty-five to hundred-foot home curb, the form method costs less and handles curves a machine can’t navigate.
No-form methods exist—some contractors use a special trowel and a stiff, dry mix that holds its shape as you mold it—but I prefer forms.
Without them, you’re fighting to keep the shape consistent while the concrete stiffens, and the result rarely matches the clean lines lumber gives you.
Forms also let you check level along the entire length before you pour, which matters more than speed when you’re building something permanent.
What a Properly Poured Curb Lasts
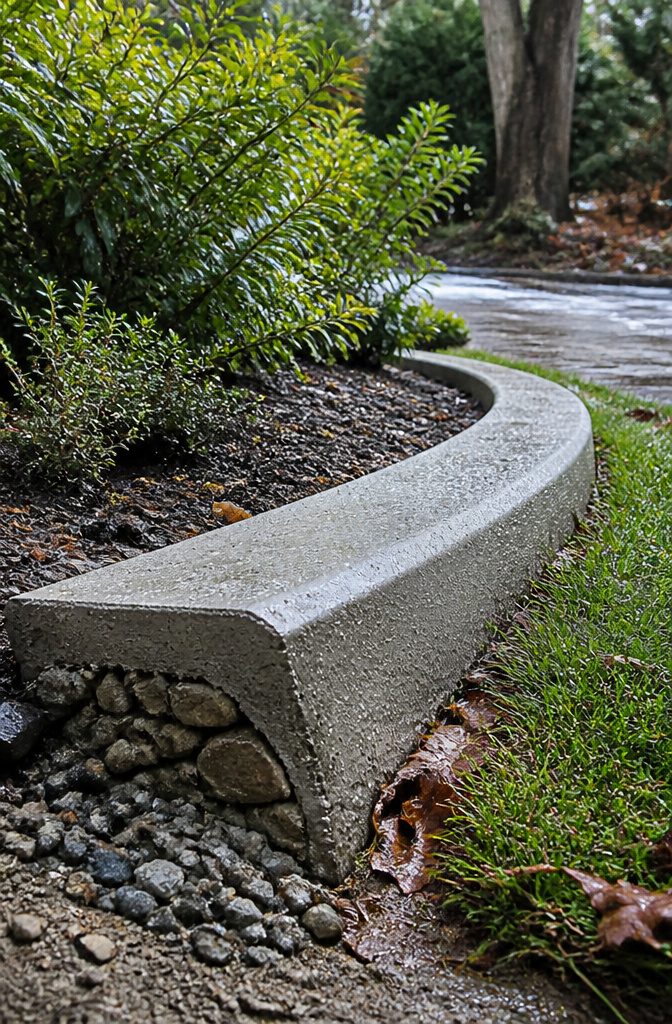
A properly poured curb with a prepared road base lasts 15 to 25 years, and many hold up longer when the conditions are right.
The range comes down to how well the ground beneath it was prepped, how water moves around it, and what your climate throws at it year after year.
Base preparation matters most. A curb poured over compacted gravel drains better and shifts less than one poured straight onto dirt.
Drainage keeps water from pooling against the concrete and working its way in through freeze-thaw cycles or steady saturation. In places with hard winters, standing water is the fastest way to crack a curb that looked solid the summer before.
Climate plays the other hand. Curbs in the Southwest can outlast the 25-year mark without much attention.
Curbs in the Midwest or Northeast take more of a beating from frost heave and road salt tracked onto landscape borders, so expect the lower end of that range unless the base work was excellent.
Frequently Asked Questions
How can I make a concrete curb at home?
Mark the path with paint or stakes, dig an 8-inch trench, compact the soil and add 4 inches of gravel base, build forms with composite siding or plywood staked every 12 to 18 inches, pour concrete mixed to thick oatmeal consistency, tap the forms to release air, smooth the top with a float, cut control joints every 4 to 8 feet, and remove the forms the next morning.
The full process takes 4 to 6 hours of work, and the curb is walkable within a day.
How deep does a concrete curb need to be?
Dig down 8 inches to leave room for a 4-inch gravel layer and position the finished curb at or just above ground level.
Some projects get by with 4 to 5 inches of excavation if the soil is stable and the curb sits shallow. The curb itself is typically 6 inches tall for landscape borders.
Do you need rebar in a concrete curb?
No, not for small landscape curbs.
Anything under 8 inches wide usually holds without rebar. Wider curbs benefit from rebar running the length of the pour, and commercial curbs that carry vehicle weight always use it.
How much does it cost to build a concrete curb?
A 25 to 30 foot curb costs $150 to $200 if you buy everything new, or closer to $100 if you already own scrap lumber and tools.
That breaks down to $75 to $105 for 15 bags of concrete, $30 for composite siding forms, and smaller amounts for plywood, stakes, screws, road base, and spray paint.
Do you need a concrete curbing machine to make a curb?
No.
A form-and-pour method is more practical for home projects. Curbing machines extrude concrete faster across long runs, but they cost money to rent, require learning to operate, and cannot handle curves the way staked forms can.
What’s the best material to make concrete curb forms with?
Composite siding boards work for moderate curves because they flex enough to follow the line but hold their shape under the weight of wet concrete.
For tighter bends, use 1/4-inch plywood. Straight runs can use 2×4s or hardboard.
How do you make a curved concrete curb?
Use flexible form material like composite siding for moderate curves or 1/4-inch plywood for tight curves, and stake every 12 inches around the bend to hold the shape.
Thinner plywood will not hold position under the concrete weight, and wider stake spacing lets the curve sag.
How long does a concrete curb take to dry?
The forms can come off the morning after you pour, though waiting a full day is safer. The curb is walkable within a day, but full strength takes 28 days.
How long does a DIY concrete curb last?
A properly poured curb with a prepared road base lasts 15 to 25 years, and many hold up longer when conditions are right.
The range comes down to how well the ground beneath it was prepped, how water moves around it, and what the climate does to it year after year.