A coffee bar can cost under $50 in materials if you build a cart from plywood and casters, or several hundred if you start with a new espresso machine and grinder.
The difference comes down to what you already own and whether you need the machine to pull shots or just brew drip coffee.
The Cuisinart DCC-3200P1 PerfecTemp can be programmed the night before so the pot finishes when you walk into the kitchen, and a corner with an outlet two feet from the counter decides where the whole setup can go.
1. Pick a Location With Outlet Access
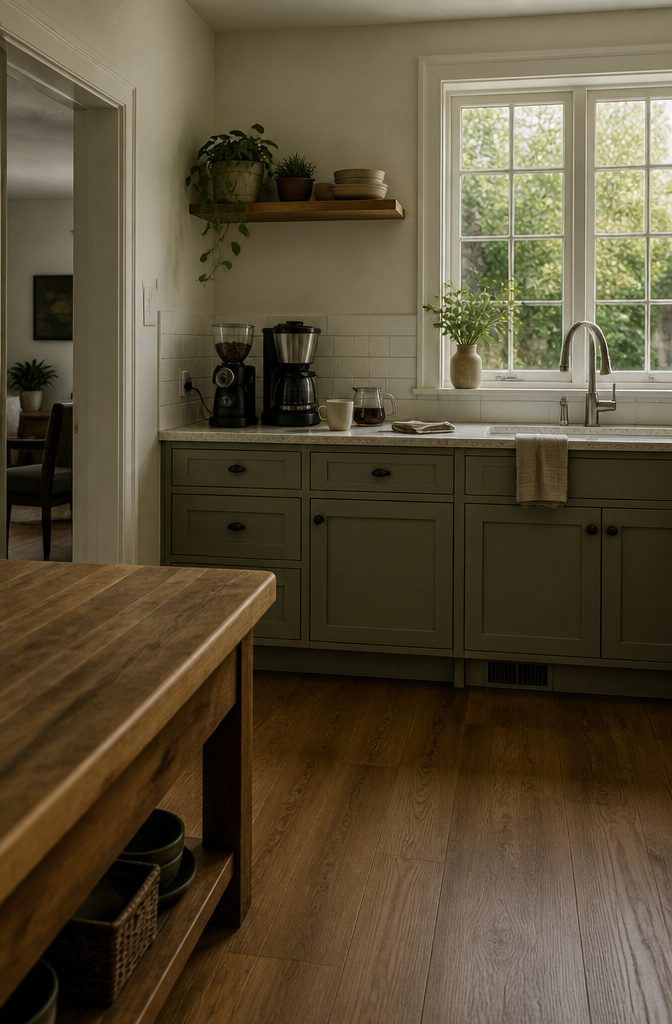
The outlet decides everything else. A coffee maker and grinder both need power, and running an extension cord across the kitchen floor every morning gets old fast.
I look for counter space within two feet of an outlet — close enough that the cord reaches without pulling tight or hanging where someone might catch it.
If the counter sits near the sink, even better: refilling the reservoir and rinsing the carafe happen in one motion instead of carrying water across the room.
A corner or a short stretch of unused counter works as long as nothing crowds it.
You need enough clearance to pour hot water safely and room to set down a mug without knocking into a cabinet door or a stack of pans.
High-traffic zones — the path between the stove and the fridge, or the spot where everyone dumps their bags — make terrible coffee bar locations because someone will jostle your elbow mid-pour.
Tight on space? A Murphy Door or built-in bookcase door holds the full setup behind 20 cubic feet of built-in storage, and you can pull what you need without turning the counter into a permanent display.
The cart option works too if you can wheel it to an outlet, but I prefer a fixed spot that doesn’t require setup every time I want coffee.
2. Use a Cart or Shelf When Space Is Tight
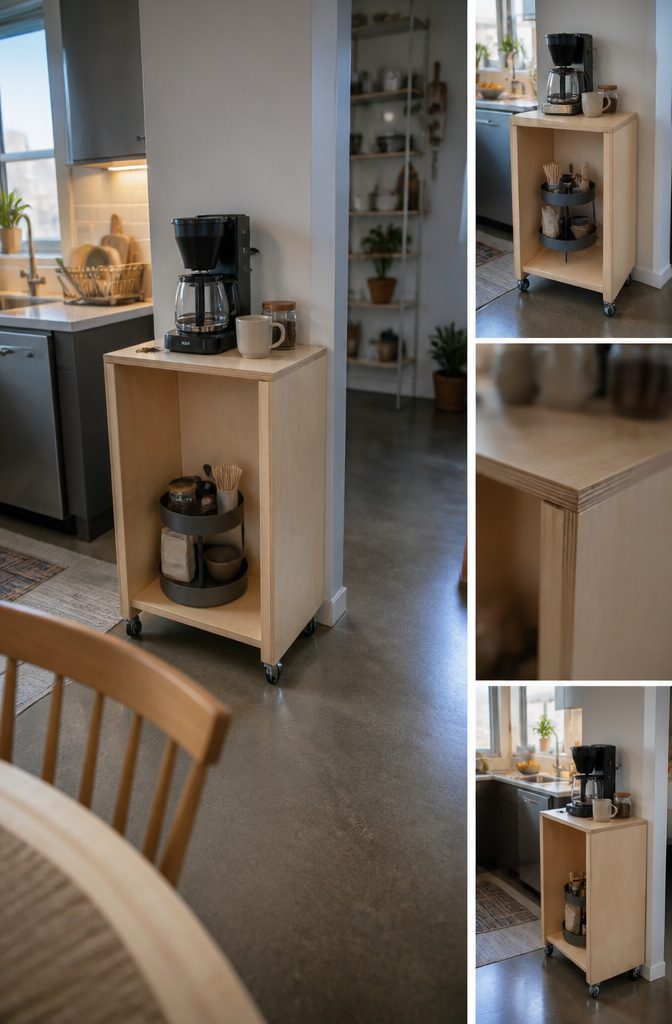
A rolling cart, a wall-mounted shelf, or a narrow console table will give you a working coffee bar when counter space is already claimed.
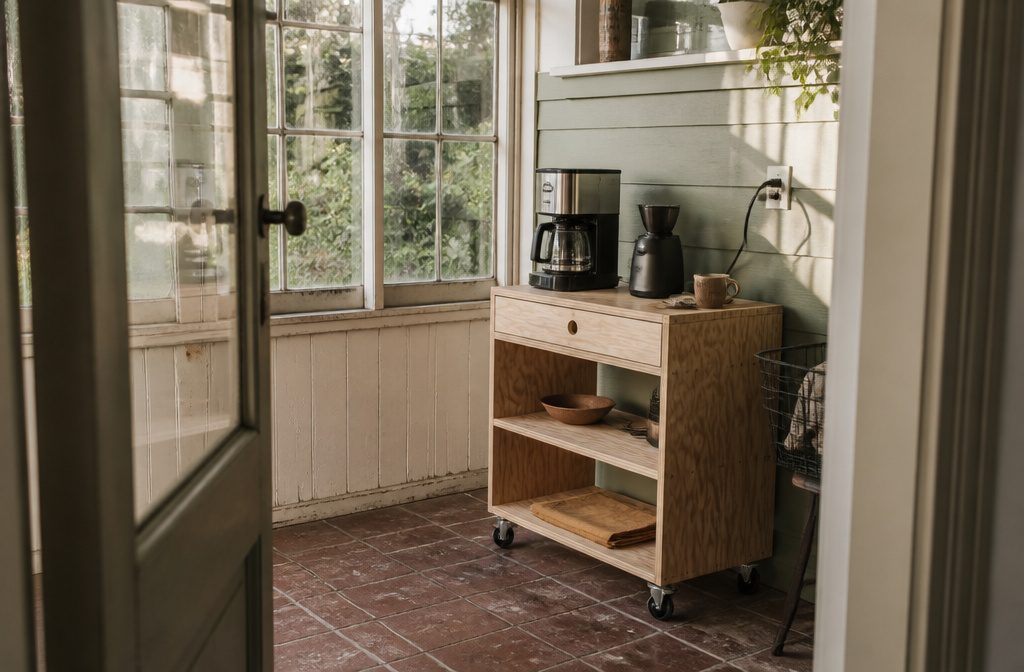
The cart has the advantage of rolling out of the way when you’re done, and you can build your own from a 2×2-foot sheet of 3/4-inch pine plywood and four 2-inch casters for under $50 in materials.
Retail equivalents run $150 or more for something similar.
This DIY bar cart was a little more time-consuming to build, but definitely worth it in the end, especially for the amount of savings! It cost me less than $50 in building materials to build, whereas other similar bar carts retail around $150+.
Repurposed furniture works just as well: Sophia Dewald found a dresser for $50 and turned it into a bar with the drawers holding pods and filters. Kristy Wilson spent $5 on cabinet door molding and chalk paint to upcycle a hallway piece.
A sofa table, a buffet sideboard, or even an old entertainment center can hold a coffee maker and supplies without taking up floor space you need for something else.
Tiered trays keep small items off the main surface if you’re working with just one narrow shelf.
3. Choose a Coffee Maker for Your Brewing Style
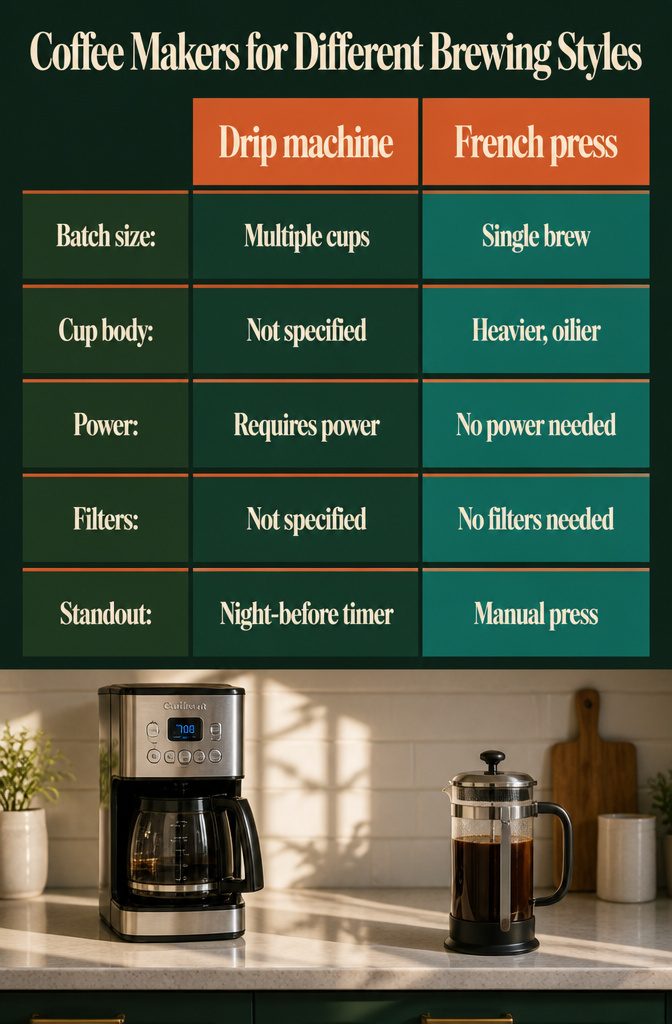
The brewing method shapes the coffee you get and how much counter it claims.
A drip machine handles multiple cups in one pass, and the Cuisinart DCC-3200P1 PerfecTemp 14-cup programmable model lets you set a timer the night before so the pot finishes right when you walk into the kitchen.
Single-serve pod systems suit one person drinking different roasts, though the per-cup cost adds up fast if you make three a day.
French press gives you a heavier body and more oil in the cup, and it needs no power or filters.
Pour-over with a Chemex pulls a lighter, cleaner flavor than French press, but you need a gooseneck kettle to control the water flow or the grounds flood and turn bitter.
The Yabano 6-cup stovetop espresso maker runs under $30 and produces strong coffee without the bulk or price of a pump machine. An AeroPress splits the difference when you want flexibility in a small footprint, and it travels better than glass.
4. Add a Grinder and Use Fresh Beans
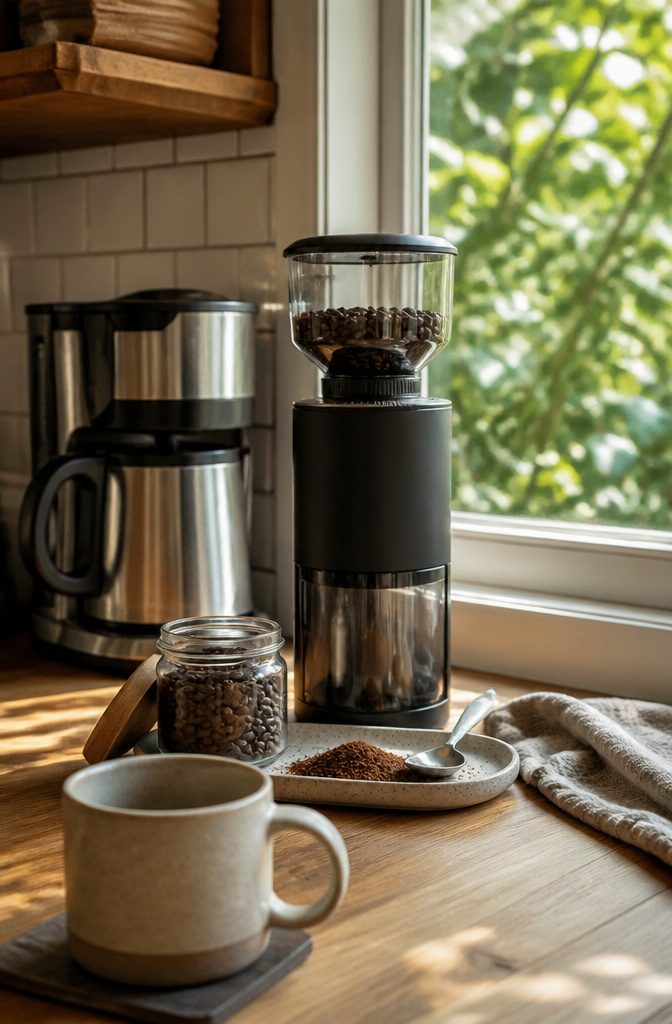
Grinding coffee shortly before you brew is what separates a bright, nuanced cup from one that tastes flat.
Once beans are ground, they begin releasing aroma compounds and oils, and those dissipate fast. The closer the grind is to the brewing moment, the more flavor stays in the cup rather than the air.
A conical burr grinder is the standard choice because it produces consistent particle size, which matters for even extraction. The Baratza Encore is an affordable and reliable option that delivers precision without the cost of high-end machines.
If budget is tight, a manual grinder works. You lose the convenience of an electric motor, but you keep the control over grind size that a blade grinder can’t match.
The difference shows up in taste.
Freshly ground beans bring out more complexity in the roast, the kind of detail that gets lost when coffee sits pre-ground for days. It’s not a subtle shift.
5. Organize Storage and Display
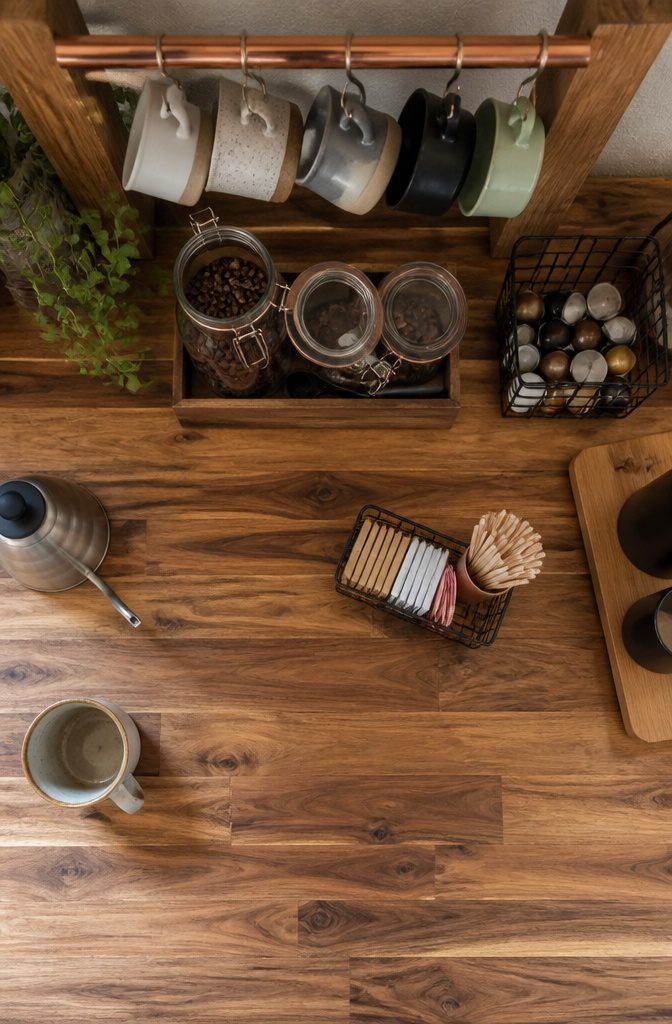
Airtight canisters are the first line of defense against stale coffee. Glass jars with rubber gaskets keep beans fresh longer than the bag they came in, and labeled versions let you tell medium roast from dark without opening every lid.
I keep mine on a shallow tray so the whole setup moves when the counter needs wiping down.
Mugs can live on a shelf or in a cabinet, but a DIY copper pipe display pulls them off the counter and into view.
The build uses three 18-3/4-inch pieces of 1/2-inch copper pipe, with holes bored at 2, 11, and 20 inches from the top using a 5/8-inch Forstner bit at 3/8-inch depth.
The pipes slot into a wooden frame and hold S-hooks for hanging. It takes an afternoon and frees up drawer space for the things that actually need to hide.
For low-cost styling, Dollar Tree contact paper lines drawer interiors, faux vines soften the edges of open shelves, and a wire crate corrals single-serve pods or tea bags.
Small frames prop against the wall to fill blank spots without drilling. Trays and baskets group add-ins like sweeteners and stirrers so they stay accessible instead of migrating across the counter.
6. Stock Mugs and Travel Cups
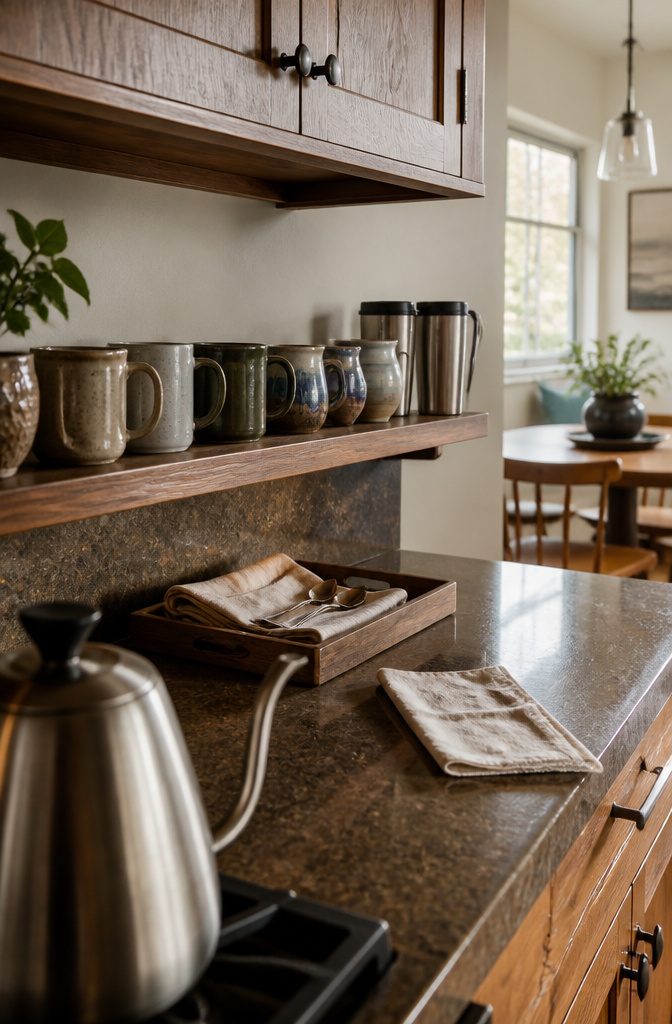
I keep everyday mugs at the front and a few special pieces on display behind them.
The everyday rotation lives where I can grab one half-awake — ceramic, microwave-safe, nothing precious. The displayed collection can lean decorative: vintage finds, handmade mugs, anything with a story.
If you’re setting up for more than two or three people, pull out what you have and supplement with disposable cups rather than running the dishwasher twice.
Travel mugs earn their own spot if weekday mornings mean coffee on the road.
Insulated styles hold temperature longer than ceramic, and a lid keeps spills out of the car. I keep two clean ones ready so there’s always one available.
When hosting, I set mugs out with napkins and spoons tucked inside so guests can serve themselves without asking where anything is.
A small lidded canister next to the station works as a discreet trash receptacle for used pods, stirrers, and empty sugar packets — it keeps the counter clear and gives people a place to toss things without hunting for the bin.
7. Set Out Sweeteners, Syrups, and Milk Options
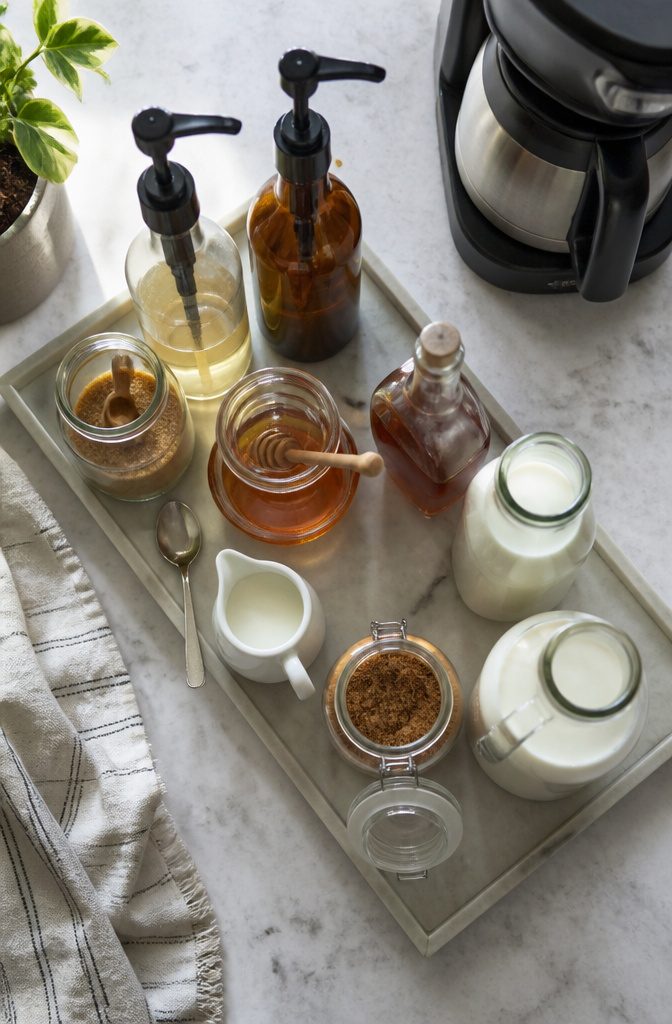
The add-ins are where everyone gets to customize their cup, so stock the options that let them dial in exactly what they want.
- Raw sugar, coconut sugar, honey, maple syrup, and monkfruit cover the sweetener range from minimally processed to zero-calorie.
- Vanilla, raspberry, chocolate, mocha, and pumpkin pie spice sauces or syrups handle the flavor side. Keep two or three on rotation rather than trying to stock them all at once.
- For milk, Elmhurst Barista Oat Milk (5 ingredients, 16 grams whole grain) and Unsweetened Cashew Milk (2 ingredients) are high-performing plant-based options that foam well and taste clean in coffee.
- Homemade nut milks infused with vanilla bean, lavender, cinnamon, cacao, or edible rosebuds are worth the extra step if you want something store versions do not offer. Make enough for the week and keep them refrigerated in airtight containers.
8. Gather the Right Accessories
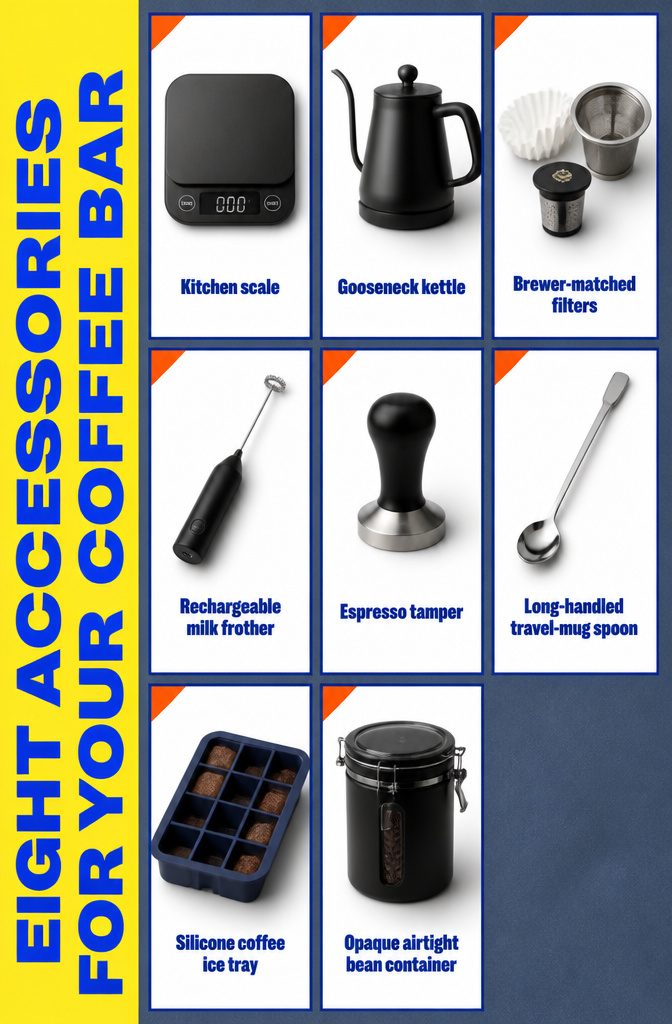
The right tools depend on what you are brewing, so this is less about owning everything and more about matching accessories to method.
- A kitchen scale measures coffee and water by weight rather than volume, which matters when the ratio controls extraction. Pour-over setups rely on this precision most.
- A gooseneck kettle gives control over pour speed and placement for pour-over brewing. If you are working with drip or French press, a standard electric kettle boils water faster and costs less.
- Filters match the brewer: paper for pour-over and drip, metal mesh for French press. For single-serve machines, a reusable coffee pod cuts waste and cost per cup.
- A milk frother — handheld and rechargeable — froths steamed milk, creamer or syrup for lattes and cappuccinos without taking up counter space.
- A tamper compresses espresso grounds evenly before brewing. Skipping it on an espresso machine leaves extraction uneven.
- Stirrers and spoons sit within reach. Long-handled spoons work better in tall travel mugs.
- A silicone ice cube tray stores leftover coffee as cubes for iced drinks without diluting them.
- Airtight containers keep beans fresh longer than the bag they came in. Glass jars work, but opaque containers block light and preserve flavor better.
9. Make the Bar Reflect Your Style
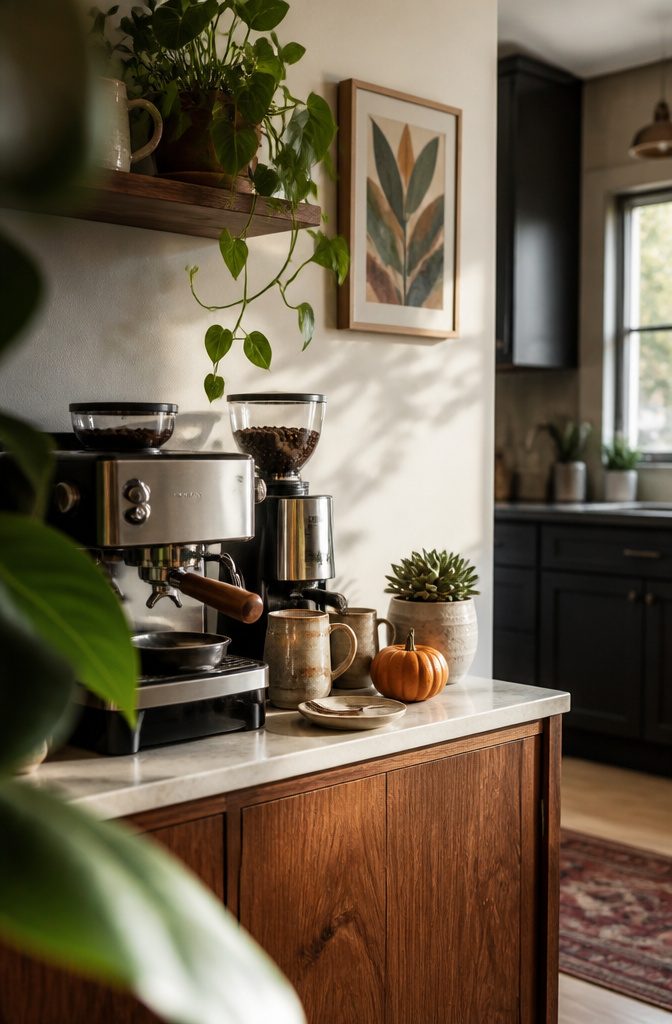
The setup works when decor reinforces what the bar already does rather than competes with it.
A color scheme ties the pieces together without announcing itself—Behr Linen White on the wall behind the bar reads as clean space that lets the machine and the mugs hold focus, and it takes most wood tones and metal finishes without a clash.
Plants earn a spot when they fit the edges: a small potted succulent next to the grinder, a trailing pothos on the shelf above.
Artwork stays small and gets mounted rather than propped where it blocks access to supplies. A letter board works if it holds a rotation—the day’s roast, a rotation of quotes, whatever keeps it from turning into static background.
Seasonal swaps keep the bar feeling considered: a small pumpkin in October, a sprig of pine in December, nothing that takes up counter real estate or needs dusting every other day.
I stick to the test that every visible item either holds something I use or balances the shape of the setup, and anything else moves off the counter.
10. Set Up a Self-Serve Station for Guests
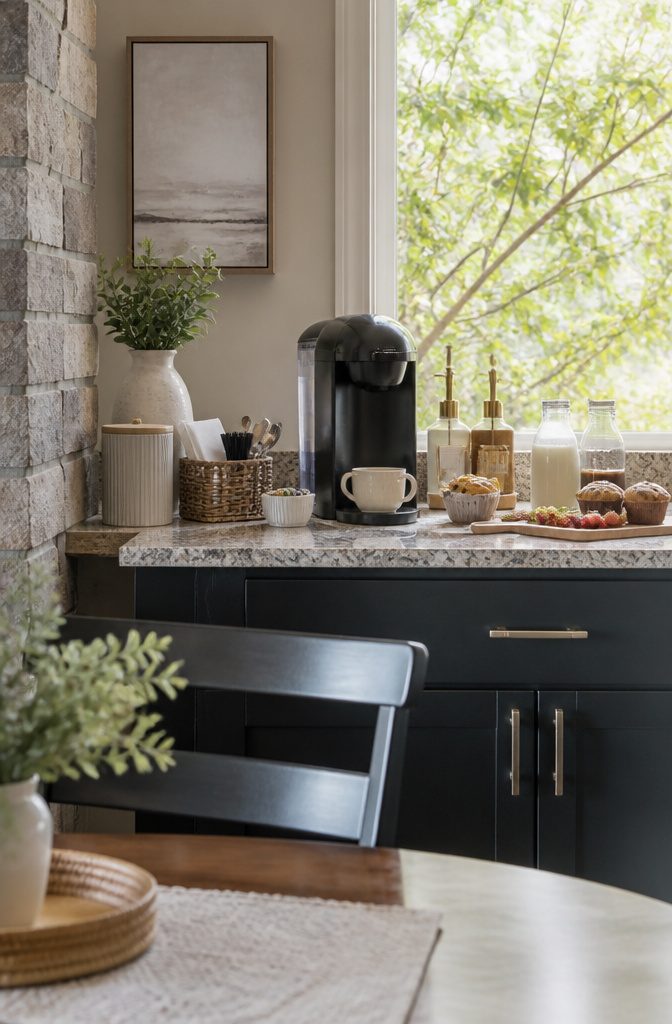
A self-serve setup means guests can build their own drinks without asking for anything. I lay out cups with napkins and spoons already tucked inside, so the pieces stay together and the counter looks ready rather than cluttered.
Syrups, sweeteners, and milk options sit within reach, and labels help if you stock more than one kind of each. A small lidded canister catches empty sugar packets, stirrers, and pods before they pile up by the coffee maker.
Pairing the station with something to eat turns it into a natural gathering point. Fruit, mini muffins, croissants, or biscotti set out on the same counter means people linger and talk instead of carrying their cups back to separate rooms.
The setup works just as well for a regular morning as it does when hosting, and keeping drink options varied covers the friend who wants green tea when you made espresso.
11. Offer Tea and Hot Chocolate Too
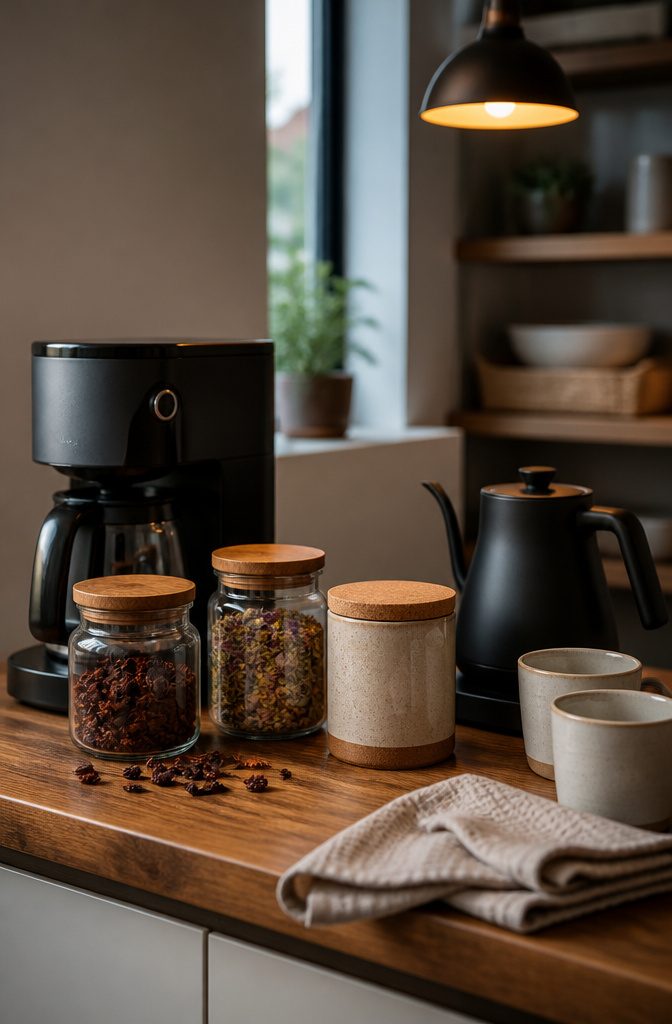
A coffee bar that only does coffee leaves out half the people who walk into the kitchen.
I keep cascara tea next to the beans — it’s made from dried coffee fruit, so it fits the theme without needing a separate setup. Hot chocolate takes one jar.
A few tea varieties fit in a second. That’s it.
The extra options matter more than the space they cost. Someone who doesn’t drink coffee at all still uses the station, and guests don’t have to ask if you’ve got something else.
I’ve watched a household coffee bar sit unused all morning because the non-coffee drinker had no reason to walk over, and adding tea fixed that.
Cascara works especially well here because it bridges the gap: coffee drinkers curious about something adjacent will try it, and it uses the same hot water setup you already have.
The flavor is fruity and lighter than coffee, closer to a tisane than black tea. If you’re stocking flavored syrups anyway, they work in hot chocolate and some teas the same way they do in lattes.
12. Keep the Station Clean
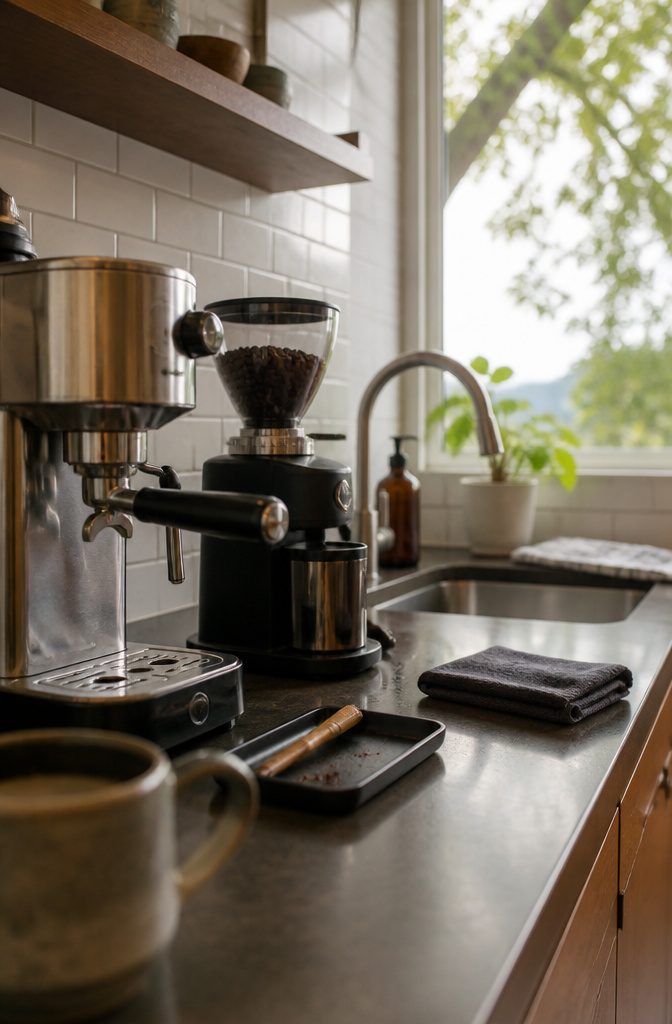
A coffee bar that stays clean runs better and tastes better.
The equipment matters less than the rhythm: rinse the coffee maker after each use and deep-clean it monthly to keep oils and mineral deposits from building up in the lines.
That buildup is what turns a good machine bitter. The grinder gets a quick brush after each session and a thorough clean once a week, which takes under two minutes and keeps grounds from going stale inside the burrs.
Daily maintenance is just wiping down the counter and emptying the drip tray, maybe five minutes if you let it sit. I keep a microfiber cloth next to the station and use it before I walk away with the cup.
Consistency is the part that matters: a machine cleaned every month lasts years longer than one cleaned twice a year when someone finally notices the taste is off, and the coffee it makes is noticeably cleaner from the first week.
What Every Coffee Bar Needs
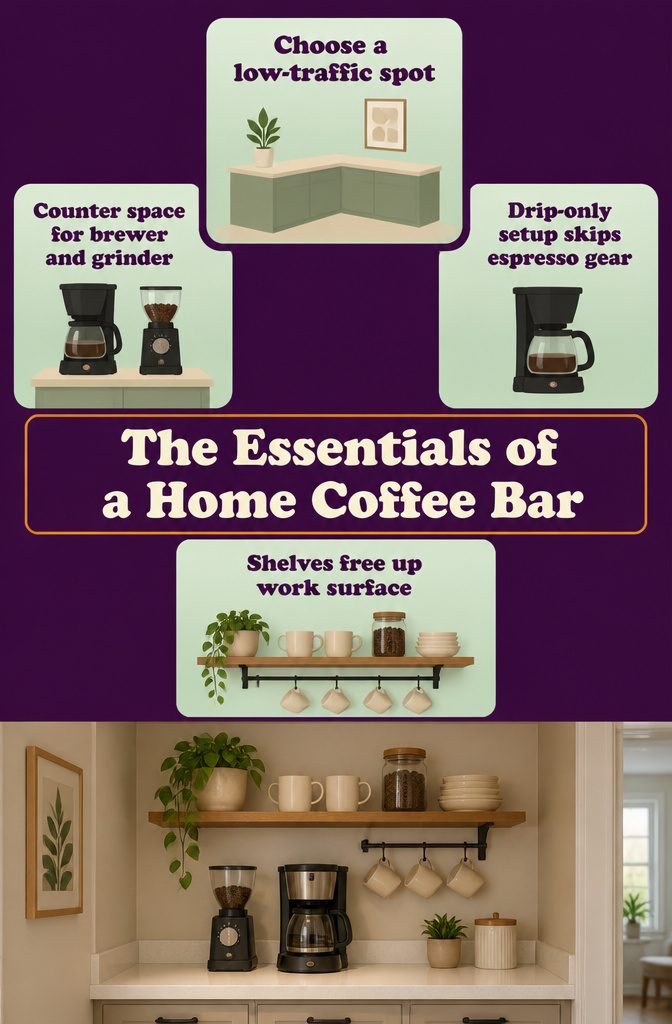
Every coffee bar starts with a dedicated spot, whether that’s a corner of the counter, a nook near the kitchen, or a cart that can be moved where it’s needed.
The spot should stay away from high-traffic zones to avoid spills, and it needs enough counter space to hold a coffee maker, grinder, and whatever brewing equipment you plan to use.
The right equipment depends entirely on the drinks you make. An espresso machine for lattes and cappuccinos, a drip coffee maker or French press for regular coffee, and a grinder for fresh beans cover most setups.
If you only brew drip coffee, you can skip the espresso gear and keep the station simple.
Organization matters once the equipment is down.
Shelves or hanging racks above the counter keep mugs, spoons, and coffee beans within reach but off the work surface. Trays, baskets, and small bins make it easy to find sweeteners, syrups, and other add-ins without rummaging.
Furniture That Works as a Coffee Bar
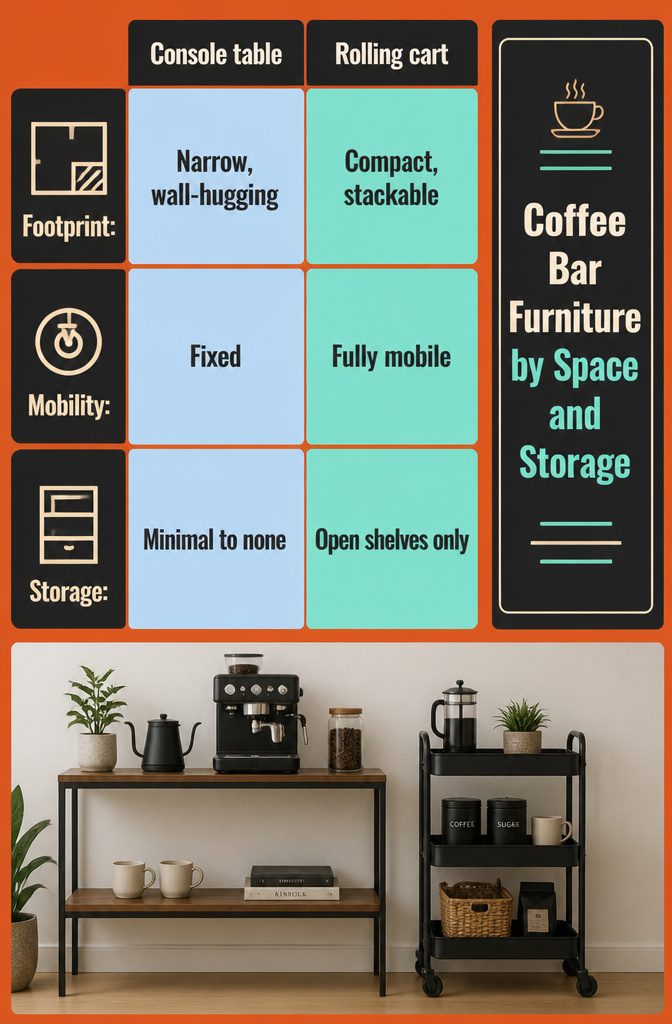
The shape a coffee bar takes depends on how much floor it can claim and whether it needs to move.
A console table or buffet fits a wall you intend to commit, while a rolling cart gives you the option to wheel everything out of the way when counter space matters more.
Wall-mounted shelving claims zero floor at all but asks you to live without drawer storage. A dresser brings both surface and compartments, though you may need to remove a shelf to fit the pot flush against the back.
| Furniture Type | Footprint | Mobility | Storage |
|---|---|---|---|
| Console table | Narrow, wall-hugging | Fixed | Minimal to none |
| Rolling cart | Compact, stackable shelves | Fully mobile | Open shelves only |
| Wall-mounted shelving | Zero floor space | Fixed | Open display |
| Buffet or sideboard | Wide, substantial | Fixed | Drawers and cabinets |
| Dresser | Medium depth | Fixed | Drawers, removable shelves |
| Kitchen island cart | Medium to large | Some models roll | Shelves, occasional drawer |
| Tiered trays | Countertop scale | Portable by hand | Vertical stacking only |
| Sofa table | Narrow, behind furniture | Fixed | Depends on model |
The cart wins when you need to store it completely out of sight between uses, and floating shelves win when the outlet sits above counter height and you would rather keep beans and mugs visible than tucked in a drawer.
Frequently Asked Questions
What are the essential items needed to set up a coffee bar?
A coffee maker (drip, French press, or espresso), a burr grinder, and airtight storage for beans form the foundation.
Add mugs, sweeteners, milk options, and a dedicated counter spot near an outlet. A milk frother matters if you make lattes, and accessories like a scale, filters, and stirrers round out the setup based on what you brew.
What is a coffee bar?
A coffee bar is a dedicated station in your home where you keep everything needed to make coffee in a single spot.
It holds your brewing equipment, beans, mugs, and add-ins like syrups and sweeteners so you can make drinks without hunting through cabinets.