
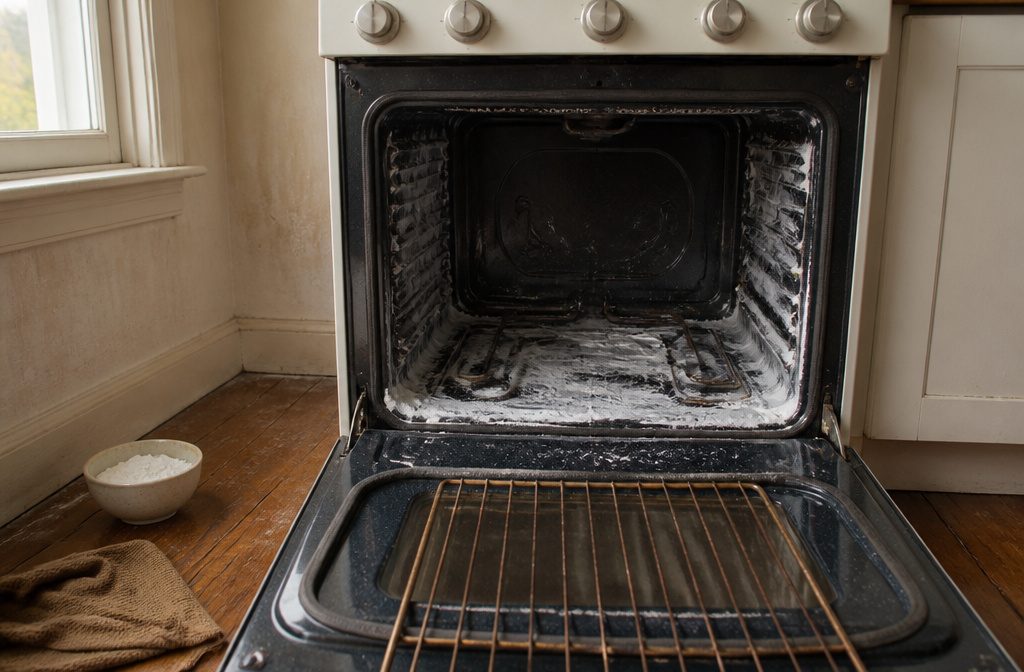
A spotless oven interior takes a baking soda paste and anywhere from 30 minutes to an overnight sit, depending on how long the buildup has been there.
The mistake most people make is coating the heating elements, rubber gaskets, or gas burner vents, which either damages the parts or clogs the ports you need clear for even flames.
1. Check the oven type and choose your cleaning method
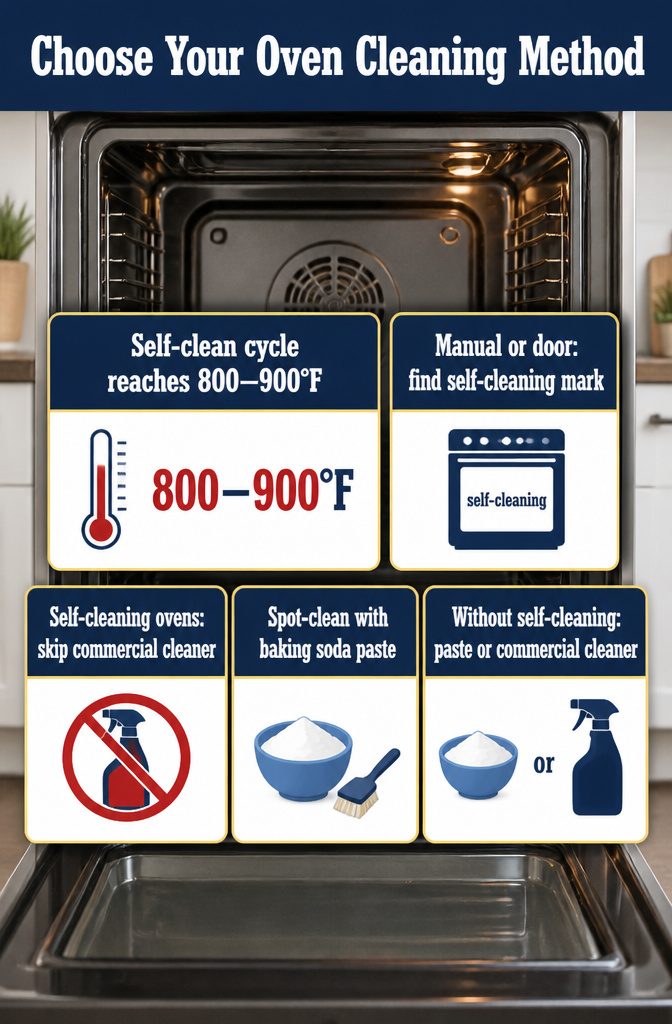
Start by looking in the owner’s manual or along the inside of the oven door for a marking that says "self-cleaning."
If you find it, the oven heats itself to somewhere between 800 and 900 degrees Fahrenheit to burn off grime, and that changes what you can safely use.
Commercial oven cleaners are off the table for self-cleaning ovens; the chemical formulation can damage the interior coating. Stick to the self-cleaning cycle itself or a baking soda paste if you want to spot-clean without running the full cycle.
If your oven lacks a self-cleaning feature, you have two paths. A baking soda paste works well for routine buildup and gives you full control over what goes on the surfaces.
Heavy-duty commercial cleaners cut through burnt-on grease faster, but you will need to follow the label closely and ventilate the kitchen while you work.
Gas and electric ovens can both handle either method, though gas models need extra attention around the burner ports, which the next section covers.
2. Gather supplies and pull out the racks
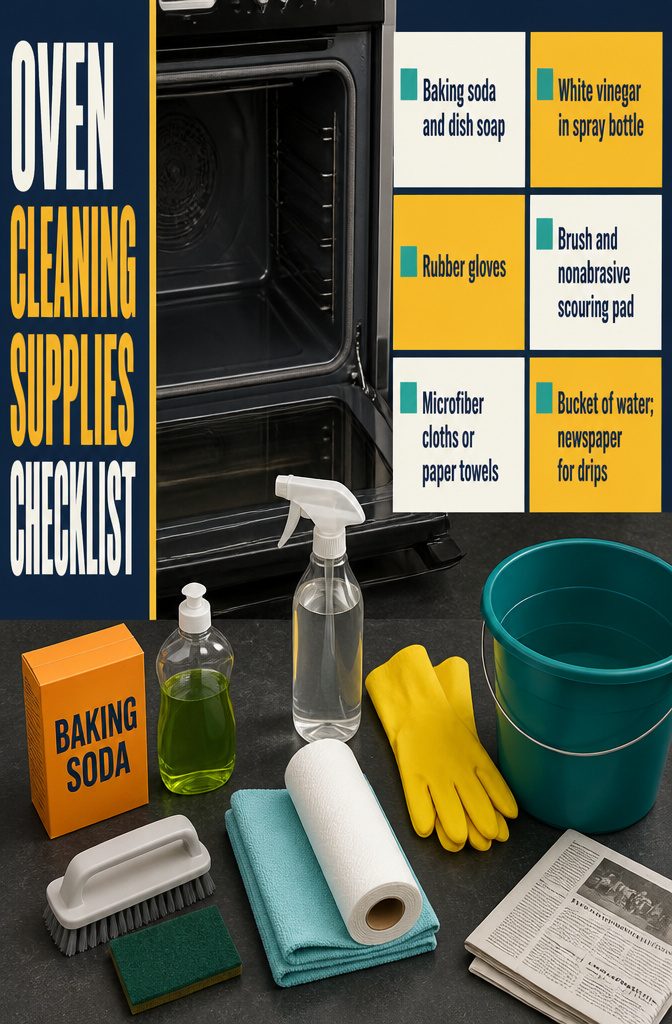
Before you start, gather everything you need and clear out the interior so you can work.
Pull out the racks first — they get cleaned separately and need soak time. Then remove the oven drawer below and any other parts that lift out.
Use a dry cloth or paper towel to wipe out loose crumbs and debris from the bottom and corners, or run a handheld vacuum across the floor of the oven if you have one nearby.
Set out:
- Baking soda and dish soap
- White vinegar in a spray bottle
- Rubber gloves
- A scrub brush and a nonabrasive scouring pad
- Microfiber cloths or paper towels
- A bucket of water
You can also lay newspaper on the floor around the oven to catch drips. If you prefer a commercial oven cleaner over the baking soda method, grab that instead — the rest of the supplies stay the same.
3. Mix the paste and coat the interior
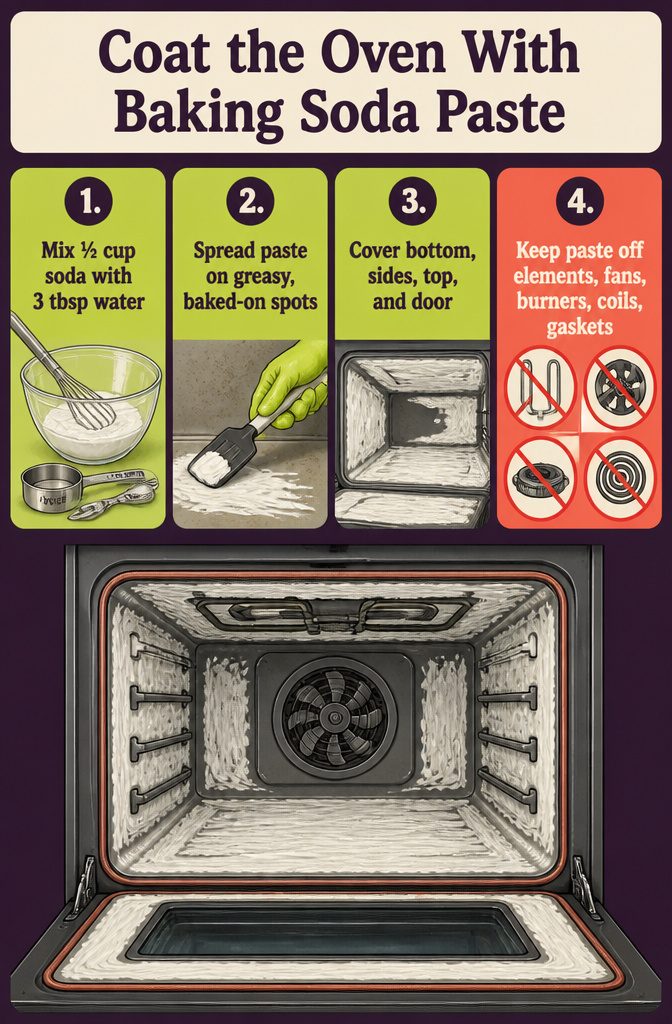
Mix the paste and coat the interior
- Mix ½ cup baking soda with 3 tablespoons water in a bowl until you have a thick paste. If the oven is really dirty, double it: 1 cup baking soda with ⅓ cup water. Another ratio that works is 4 parts baking soda, 1 part dish soap, and 1 part water, which gives you a slightly thicker consistency and extra grease-cutting power from the soap.
- Spread the paste on greasy spots and baked-on grime using a spatula, sponge, or your gloved hand. Focus on the bottom, sides, top, and door where grease accumulates.
- Avoid coating heating elements, fans, burners, coils, and rubber gaskets. The paste needs time to work on the carbon and grease, but those parts either can’t take moisture or don’t need it.
4. Let the paste sit
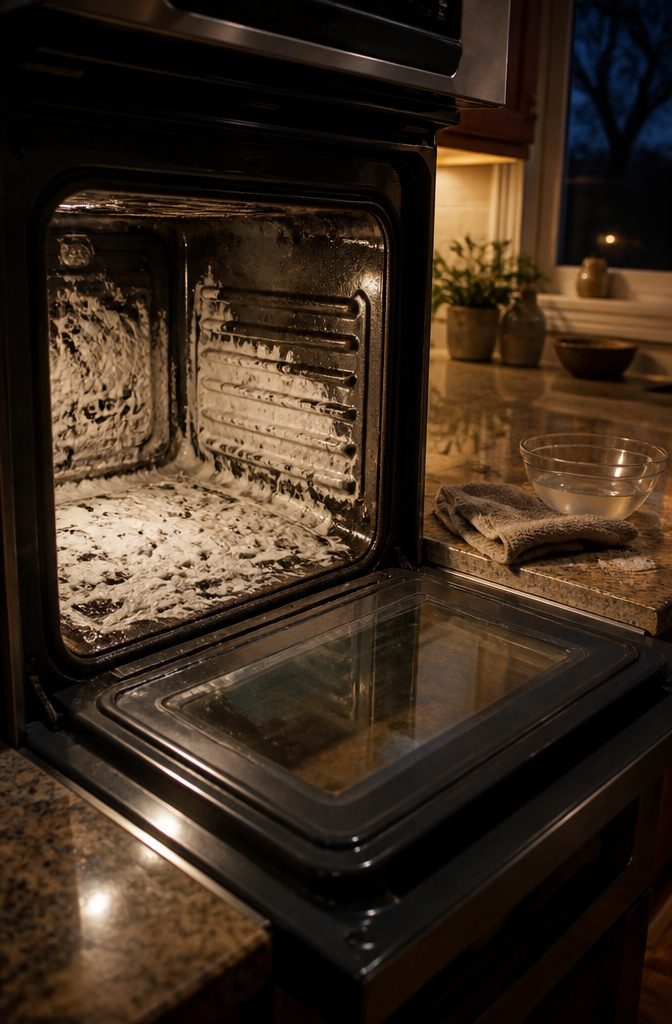
Give the paste at least 30 minutes, though most ovens need longer. A lightly used oven can look clean after 30 to 40 minutes, but baked-on drips and carbonized grease need more time to soften.
An oven you have not cleaned in months does better with overnight contact, and I leave the paste on through the night when the buildup is thick.
The longer dwell lets the baking soda break down grease without you having to scrub harder later.
Commercial oven cleaners work faster but still need 30 minutes to an hour depending on the product. Plan your timing around how bad the interior looks before you start: a quick wipe-down earns a short wait, a neglected oven earns patience.
5. Scrub and scrape the loosened grime
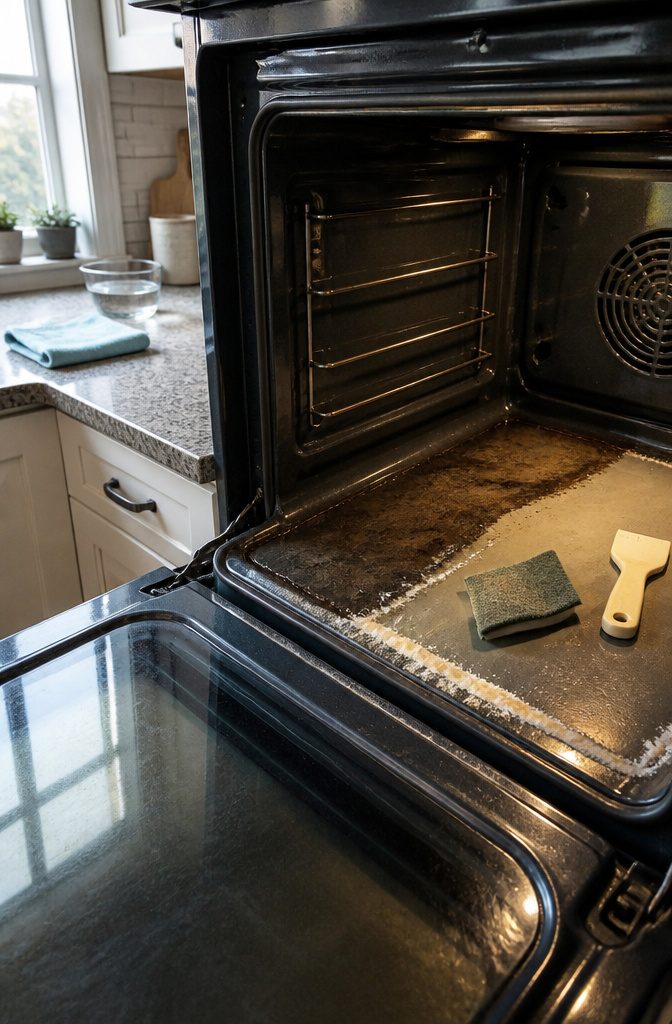
Once the paste has sat long enough, wet a sponge or nonabrasive pad and scrub the oven surfaces in overlapping passes. Dip the pad into a bowl of clean water as you go so you aren’t just spreading residue around.
The baking soda should have loosened most of the baked-on grime, but stubborn patches may need a second pass with a plastic scraper or the edge of a spatula.
I alternate between the two — scrape the thick stuff, then follow with the pad to lift what remains.
For spots that won’t budge even after scraping, a pumice stone or a tougher scouring pad will get the job done.
The pumice works especially well on mineral deposits and carbonized grease without scratching the enamel, though it takes more elbow grease than I’d like to admit.
Once the interior looks clean, wipe everything down with a damp microfiber cloth to remove the baking soda residue, which will leave a white film if you skip this step.
6. Wipe away all the residue
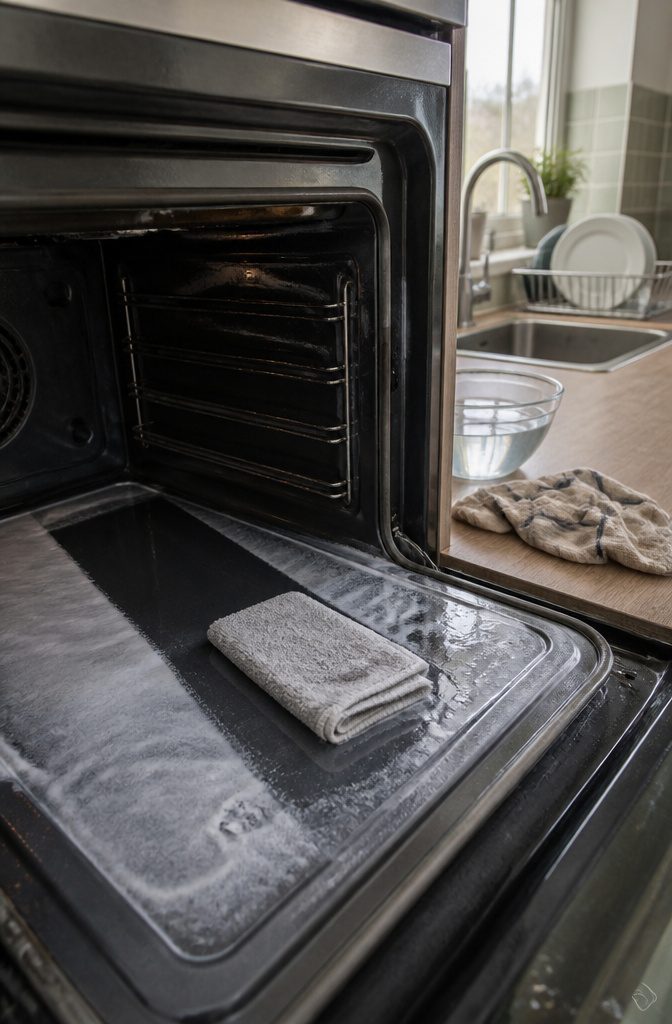
A clean, damp cloth pulls up what the paste loosened. I work section by section, folding the cloth to a fresh side when one gets loaded with grime, and rinse it under hot water between passes.
Baking soda leaves a white film if you skip the rinse, so I make two trips: one to lift the bulk of the paste, another with a wrung-out cloth to get the last of it.
After a commercial cleaner, I wipe the surfaces down with hot water and a little baking soda on the cloth to cut any lingering chemical taste or smell.
The alkalinity offsets what the cleaner leaves behind, and the oven heats without fumes the next time you use it.
7. Soak and scrub the racks
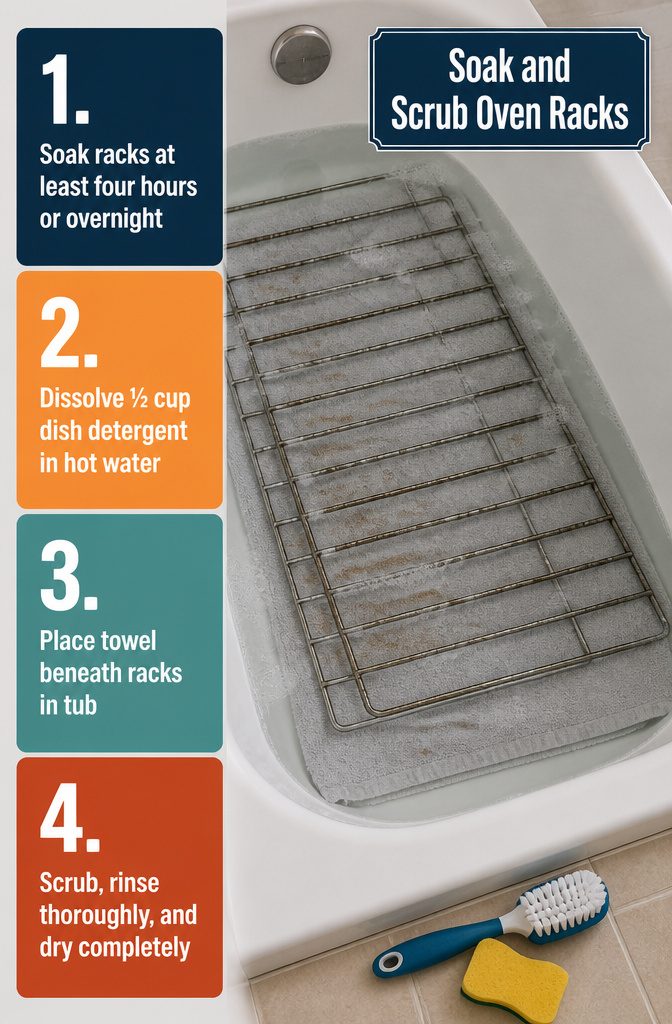
- Soak the racks in hot, soapy water for at least four hours or overnight. I fill the bathtub until the water covers the racks completely, then dissolve half a cup of dishwashing detergent in the water. If you’re in a hurry, 30 minutes will loosen some of the grime, but the longer soak gets you closer to a no-scrub finish.
- Place a towel in the bottom of the tub before you put the racks in. The metal will scratch porcelain or acrylic if you skip this step.
- Scrub any stuck-on particles with a soft brush or sponge after the soak. Most of the baked-on food should lift away without much pressure.
- Rinse the racks thoroughly to remove all soap residue, then dry them completely before sliding them back into the oven.
8. Clean the oven door and glass
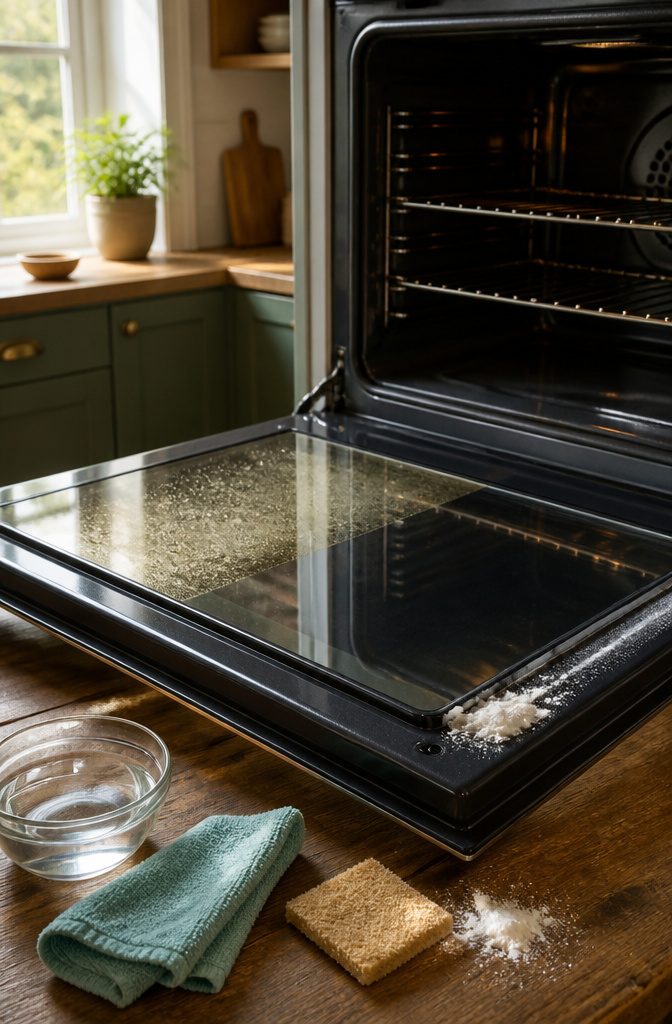
The interior window takes more work than the rest of the door.
I wet the glass lightly, dust Bar Keepers Friend over it, and scrub with a scouring pad — more pressure than the walls needed, but the oxalic acid cuts through the film faster than baking soda will.
A damp microfiber cloth lifts what is left.
For baked-on spots on the outer door, I spread a thick paste of three parts baking soda to one part water and let it sit a few hours.
A spray of white vinegar starts the fizz, and I wipe the paste off once it stops.
Stubborn marks get a second coat and a nonabrasive pad. A final vinegar spray over the whole door and exterior brings the shine back, then I dry everything with a clean cloth.
Skip disassembling the door to reach between the panes unless you are comfortable with hardware — the interior glass alone makes the bigger difference.
9. Check gas burners and clear blocked ports
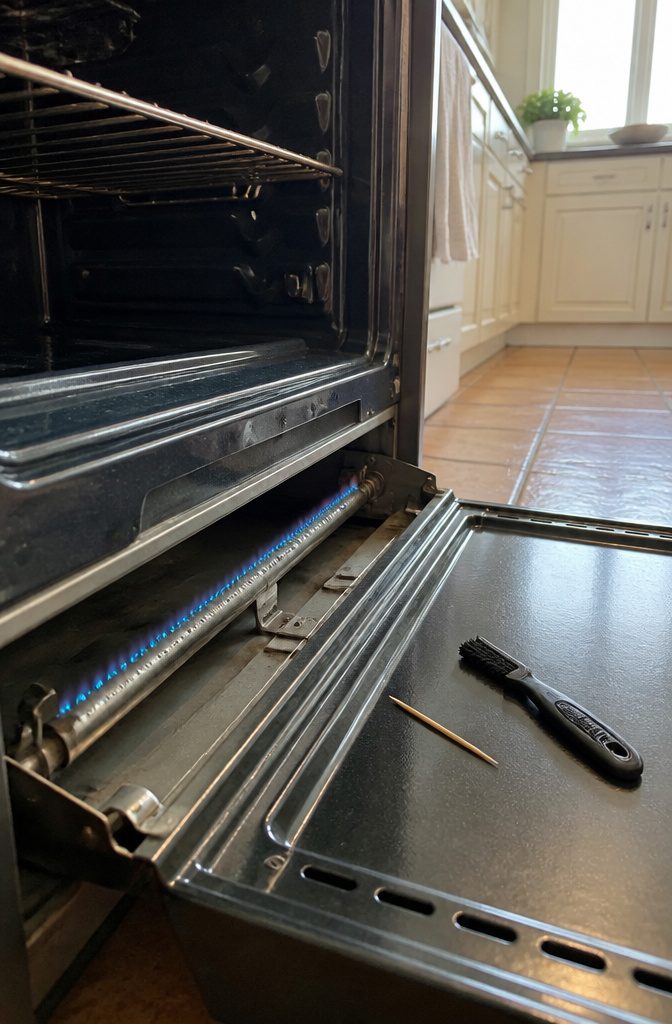
If you have a gas oven, keep liquid away from the vent slots while you clean — any drip onto the burner causes problems you do not want.
The burner sits under a panel at the bottom of the oven, and you reach it either by removing that panel or by pulling out the broiler drawer if your model has one.
Some ovens ask you to remove the front panel under the door instead.
Turn the oven on and watch the flames.
Gaps in the flame pattern mean blocked gas ports — the small holes that distribute the gas. A toothpick or straight pin clears them: push gently through the clogged port, then brush the burner clean.
If the flames still look uneven after you clear the ports, your manufacturer’s instructions will tell you how to adjust them. I do not guess at flame settings; the manual is there for a reason.
Natural paste against commercial cleaner
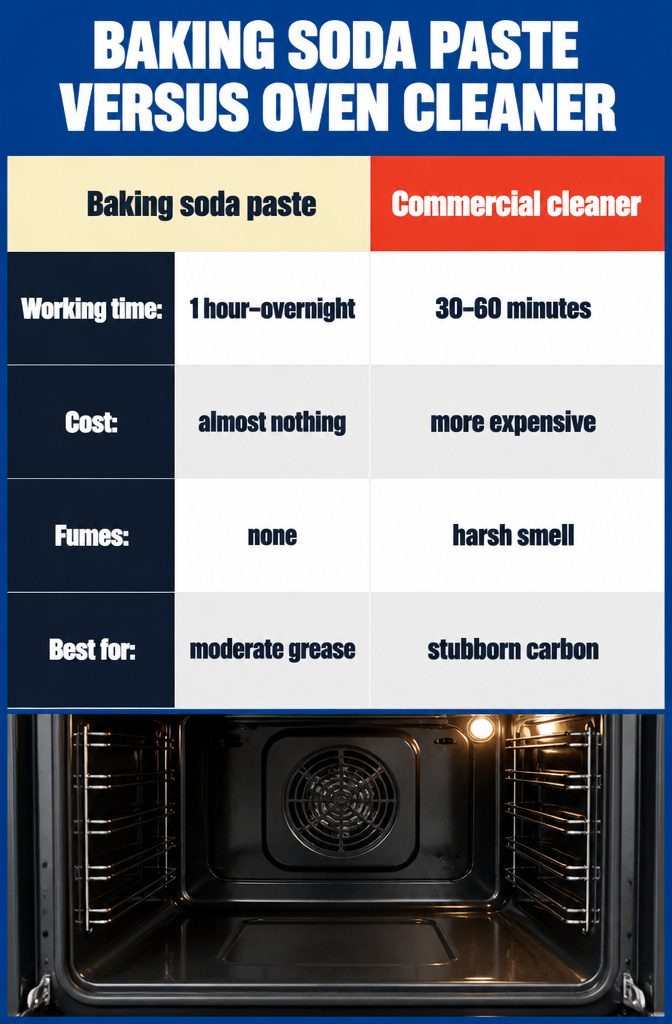
I keep baking soda paste on hand for most wipe-downs: half a cup of baking soda mixed with three tablespoons of water (bump it to a full cup if the oven is filthy).
It sits for an hour or overnight, lifts moderate grease without fumes, and costs almost nothing. Really stubborn carbon buildup won’t budge.
Commercial oven cleaners cut through the worst messes in thirty to sixty minutes with minimal scrubbing. They cost more, smell harsh, and irritate skin and eyes if you skip gloves or ventilation.
I open windows and turn on the exhaust fan before I spray. The other concern: chemical residue can linger on surfaces or seep into gasket edges and vents if you overapply.
Wiping everything down with hot water and baking soda after the cleaner does its job neutralizes what is left and keeps fumes out of the next bake.
For light maintenance between deep cleans, baking soda wins. When I have ignored the oven for months and the back wall looks like charcoal, I reach for the commercial bottle.
Parts to avoid when you apply cleaner
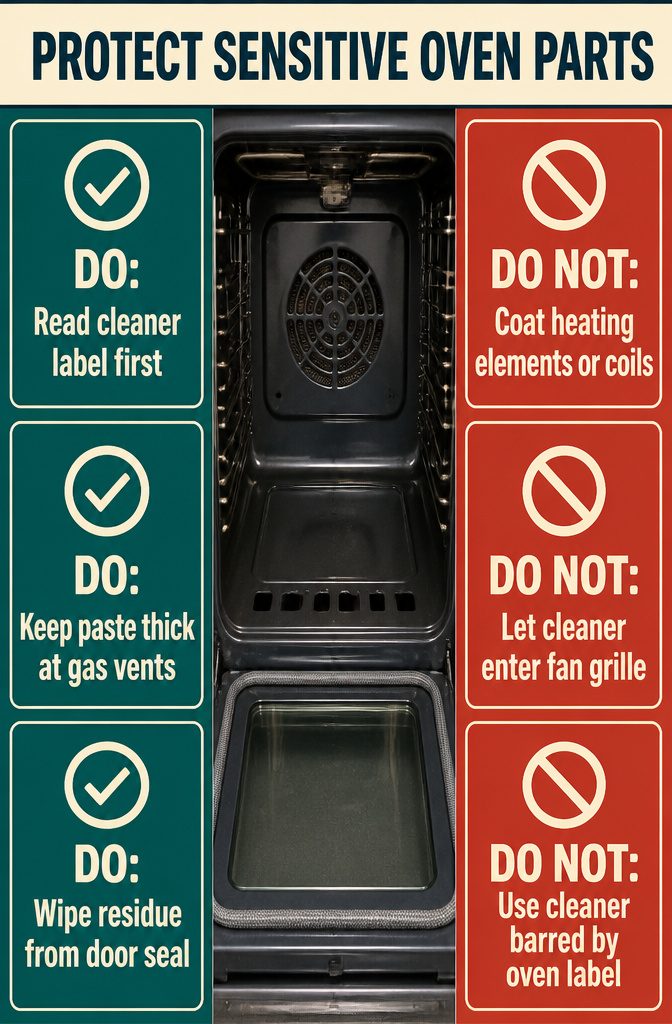
Commercial cleaners and even homemade pastes can damage sensitive parts if you apply them carelessly. Before you spray or spread anything, check what sits in the path:
- Heating elements and coils: Skip any metal rod or coil that glows when the oven is on. Cleaner left on these parts can smoke or burn the next time you preheat.
- Rubber gaskets: The seal around the oven door stays flexible when it stays clean of caustic chemicals. Wipe paste or spray away from that strip.
- Gas burner vents: On a gas oven, liquid running down through the vent slots at the bottom can reach the burner and clog the small gas ports. Keep the paste thick and contained.
- Fans: Self-cleaning and convection ovens have a fan behind a metal cover. If cleaner seeps through the grille, it bakes on during the next use.
Read the label before you open a commercial cleaner. Some are not safe for self-cleaning ovens or continuous-clean coatings, and using the wrong one voids the manufacturer’s coverage.
When to clean based on use and buildup
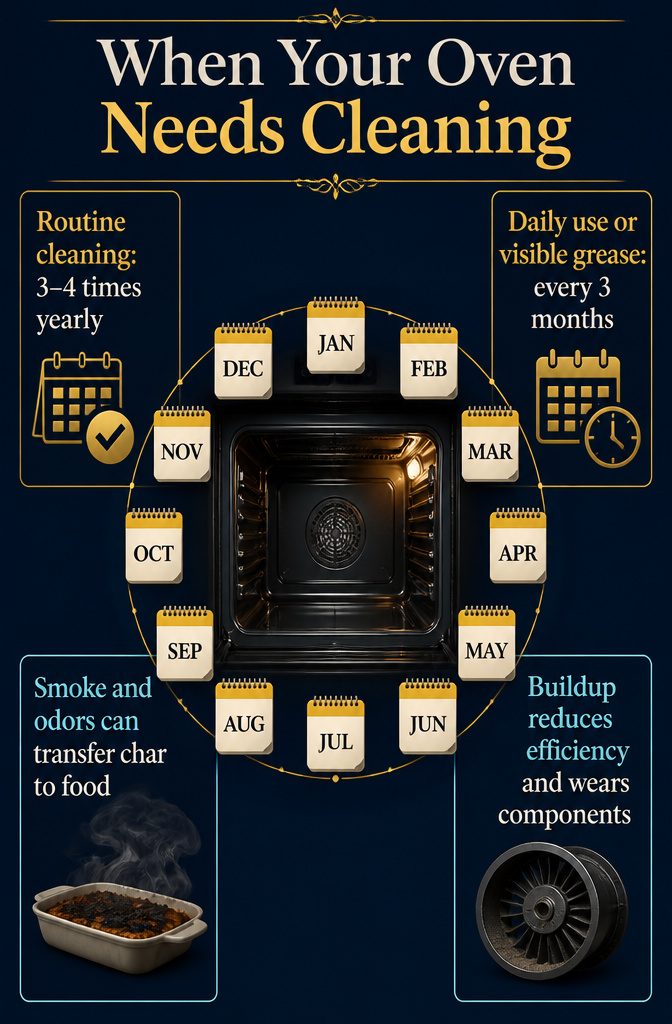
The question is what dirty enough looks like. Grease and food that bake on over repeated cycles produce smoke and unpleasant smells when the oven heats, and those odors transfer to whatever you’re cooking.
A roast can pick up the char from last month’s casserole. Beyond the smell, buildup forces the oven to work harder to hold temperature, which cuts efficiency and adds wear to internal components over time.
I clean three to four times a year, spacing it out so the mess never gets ahead of me.
If you use the oven daily or notice visible grease on the walls, every three months keeps it manageable. Waiting until smoke appears means the residue has already affected your food and wasted energy.
A quick look inside after a spill tells you whether you can wipe it now or whether it needs a full scrub before the next big meal.
Self-cleaning cycles and their precautions
Self-cleaning cycles run between 800 degrees Fahrenheit and 900 degrees Fahrenheit, hot enough to incinerate grease and turn baked-on spills to ash you can wipe away.
The convenience is real, but the heat brings two risks worth planning around. Any debris left inside can ignite at those temperatures, and the fumes released during the cycle can aggravate asthma or other respiratory conditions.
Before you start the cycle, pull out the racks and any loose trays. Check the oven floor for crumbs or foil scraps that could catch fire.
Turn on the exhaust fan, open a window, and keep pets and anyone with breathing sensitivities out of the kitchen until the cycle finishes and the oven cools.
Some sources discourage self-cleaning altogether, arguing that the extreme heat can shorten an oven’s life or damage nonstick coatings over time.
If you’d rather skip it, set the oven to high with a pan of water inside for an hour. The steam loosens buildup without the temperature spike, and you can wipe the interior clean once it cools.
Frequently Asked Questions
How often should you clean your oven?
Clean every 3 to 4 months if you use the oven regularly, or sooner if you see grease on the walls or notice smoke during preheating.
Buildup that bakes on repeatedly produces smells that transfer to food and forces the oven to work harder to hold temperature. Wipe spills immediately to avoid a full scrub later.
What is the best way to clean oven racks?
Soak the racks in hot, soapy water for at least 4 hours or overnight, placing a towel in the tub first to prevent scratches.
Scrub any stuck-on particles with a soft brush or sponge after soaking, then rinse and dry completely before sliding them back in.
How long does it take to clean an oven?
A lightly used oven needs 30 to 40 minutes of paste contact time plus scrubbing, while heavy buildup benefits from overnight dwell before you start wiping.
Commercial cleaners work faster but still need 30 minutes to an hour depending on the product and the mess.
Is using an oven’s self-cleaning mode safe?
The self-cleaning cycle can be safe if you remove all debris first, ventilate the kitchen, and keep pets and people with respiratory sensitivities out while it runs.
The extreme heat can shorten an oven’s life or damage coatings over time, so some people prefer steam cleaning with a pan of water at high temperature instead.
What is the easiest way to clean a really dirty oven?
A commercial oven cleaner cuts through burnt-on grease in 30 to 60 minutes with minimal scrubbing.
Open windows and turn on the exhaust fan before you spray, wear gloves, and wipe everything down with hot water and baking soda after to remove chemical residue.
Will vinegar and Dawn dish soap clean an oven?
Vinegar and dish soap handle minor spills and light grease but won’t touch baked-on carbon. For heavy buildup, use a baking soda paste (half a cup baking soda with 3 tablespoons water) or a commercial cleaner designed for ovens.
How do I get baked-on grease off my oven?
Spread a thick baking soda paste on the grease and let it sit overnight so the alkalinity breaks down the carbon.
Scrub with a damp nonabrasive pad the next day, using a plastic scraper on stubborn patches, then wipe away all residue with a clean, wet cloth.
How to clean an electric oven inside?
Mix half a cup of baking soda with 3 tablespoons of water, coat the interior (avoiding heating elements and gaskets), and let it sit at least 30 minutes or overnight for heavy buildup.
Scrub with a damp pad, wipe away the residue, then clean the door glass separately with Bar Keepers Friend or a similar oxalic acid cleaner.
How long does it take to clean an oven with baking soda and vinegar?
The baking soda paste needs at least 30 minutes of contact time for light grime, or overnight for baked-on grease and carbon.
Spraying vinegar after you apply the paste starts a fizzing reaction that lifts the loosened residue, and scrubbing plus wiping down the surfaces adds another 15 to 30 minutes.