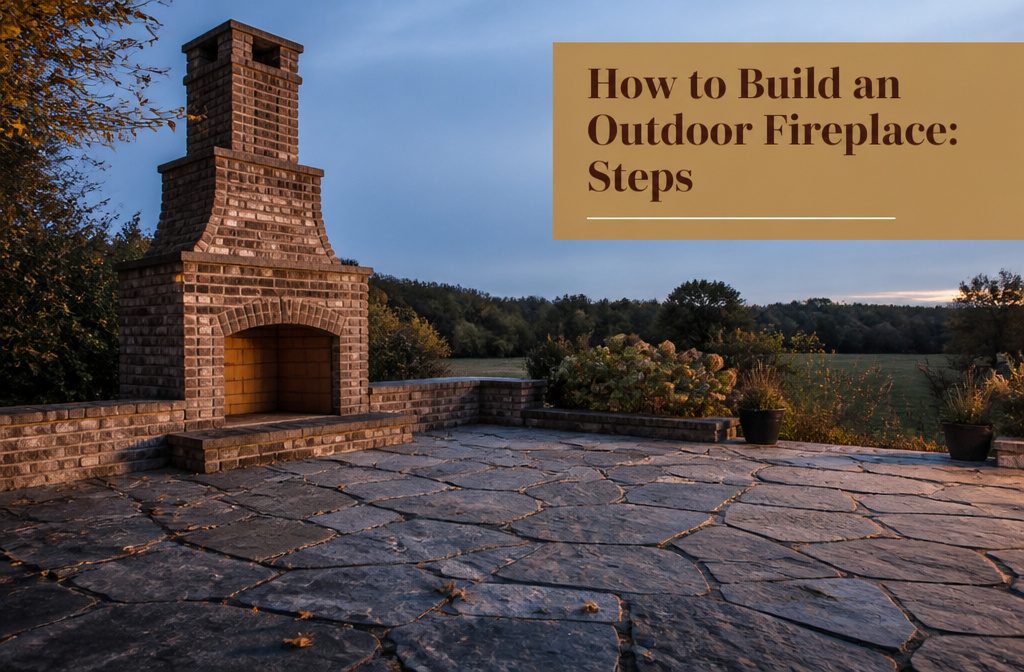
A full masonry outdoor fireplace costs $800 to $1,500 in materials and takes several weekends to build from footing to finished chimney.
Most projects stall at location: codes require 10 to 15 feet clear from fences, trees and the house, and a wood deck cannot support the structure.
The firebox gets firebrick and fireplace mortar, not standard materials, or the joints crack under repeated fires.
1. Choose the Fireplace Type, Design, and Location
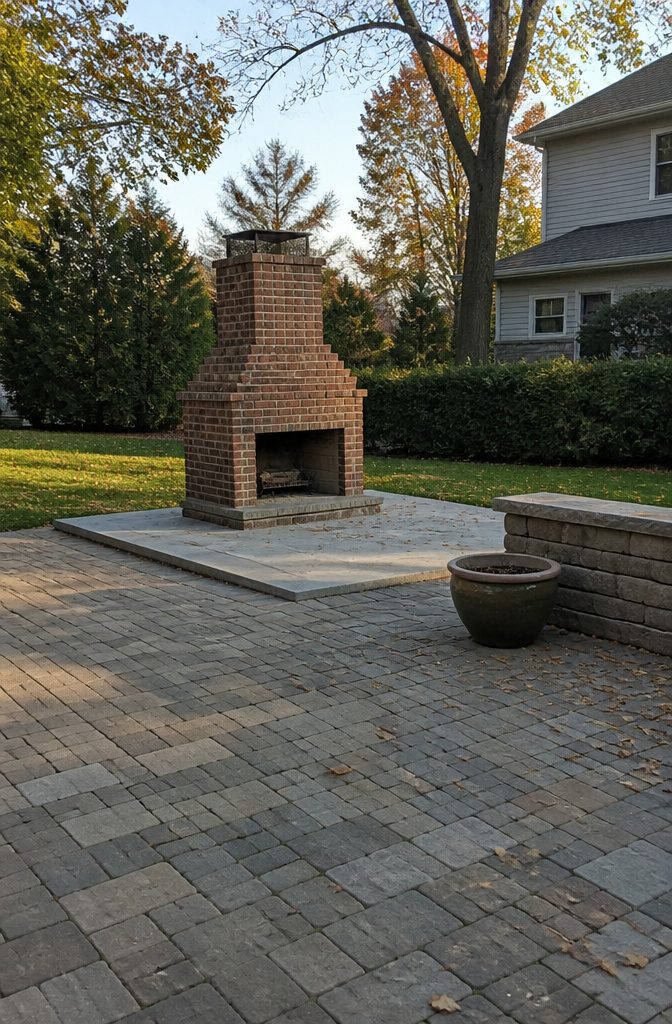
The first decision is fuel. Wood gives you the smell and crackle of an open fire, but you tend it the whole night and clean out ash the next morning.
Gas lights with a switch and shuts off just as fast, though you’ll need a line run if your patio doesn’t already have one. Electric shows flame without combustion or venting, which works where codes won’t allow wood or gas.
Next comes structure.
A full masonry fireplace means laying block and brick from the ground up. A prefab firebox drops into place and you build the surround to match your yard.
Kits land between the two: the bones arrive cut and measured, you set them and point the joints. Select the firebox or appliance before you design the enclosure around it, since dimensions drive every measurement that follows.
Location decides whether the project moves forward or stops at the permit office.
Most towns want 10 to 15 feet clear from fences, trees, and the house. Call your building department for the exact setback before you mark the spot.
Never build on a wood deck. Set it on its own footing on stone or concrete, with nothing that can burn close by.
Wood under or near a firebox catches, and a retrofit footing under decking rarely passes inspection. Pour a pad or choose pavement that already exists.
2. Plan Materials, Tools, Support, and Utilities
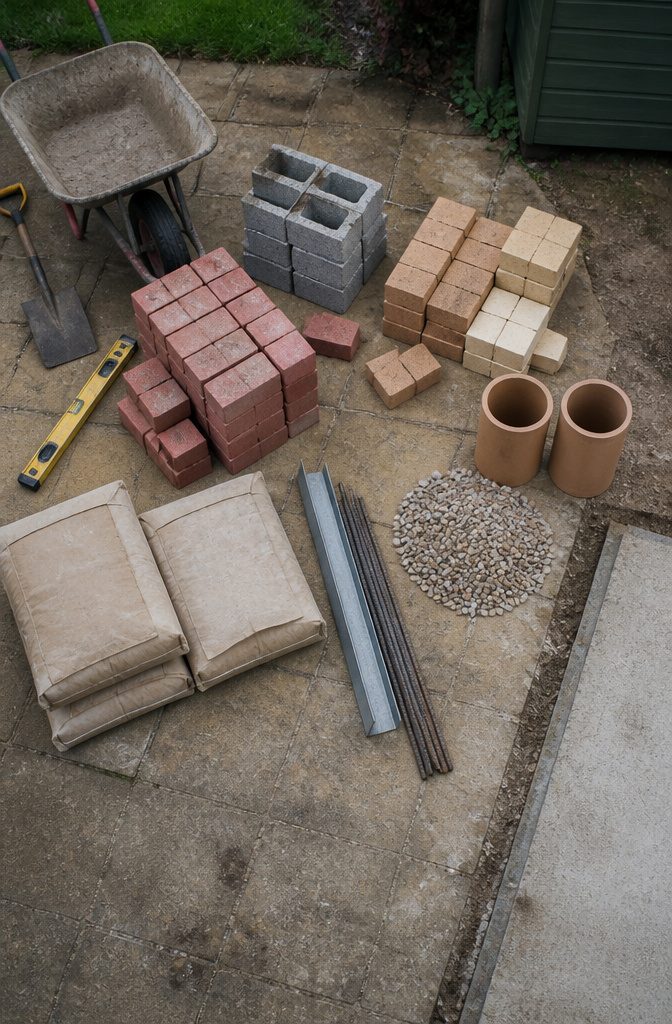
The bill of materials depends on whether you’re building in masonry or working from a manufactured fireplace kit.
A full masonry build uses 1,300 house bricks, 50 firebricks, 150 concrete blocks, and 75 bags of mortar mix for a structure standing about 46 inches to the mantel.
That count includes two 13 by 13 inch clay flue liners at 2 feet tall, angle iron and steel bar for lintels, concrete with sand and pea gravel for the footing, and refractory mortar for the firebox joints.
Firebrick only lines the floor and walls of the firebox where flame touches; the outer walls, arch face, and chimney get built in regular house brick, which keeps the cost down.
If you’re building around a manufactured appliance instead, the work shifts to coordinating framing, chimney or venting, utilities, drainage, and service access rather than mixing mortar by the wheelbarrow.
Either path, get everything on site before you dig so a mid-project run doesn’t stall your momentum.
3. Prepare and Pour the Foundation or Pad
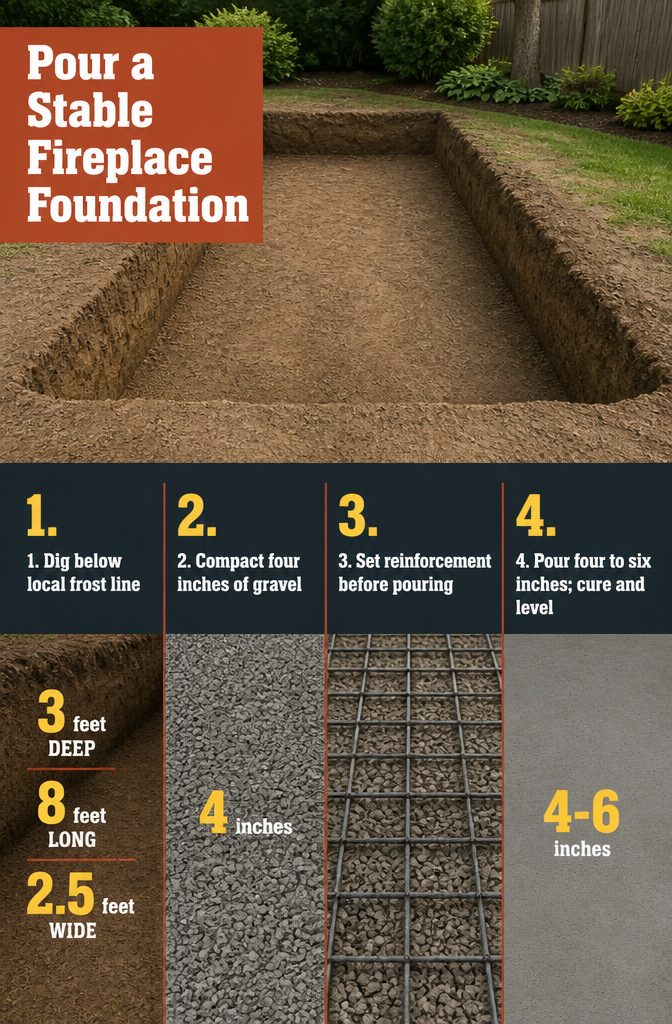
- Dig below your frost line — around 3 feet in most zones — for a hole about 8 feet long by 2.5 feet wide. Your local building office has the exact depth for your area. The footing keeps the whole structure from shifting once you stack several hundred pounds of brick and mortar on top.
- Add 4 inches of compacted gravel to the bottom of the hole, then set rebar or wire mesh across it before you pour. The reinforcement keeps the slab from cracking under weight.
- Pour at least 4 inches of concrete, going to 6 if your design ends up tall or runs heavy at the top. A taller firebox or a wide mantel needs the thicker pad.
- Let the concrete cure for a few days before you lay brick. Set a 4-foot level across the slab in both directions and check corner to corner — if it reads off, you will spend the rest of the build fighting it.
4. Build the Outer Walls, Frame, or Enclosure
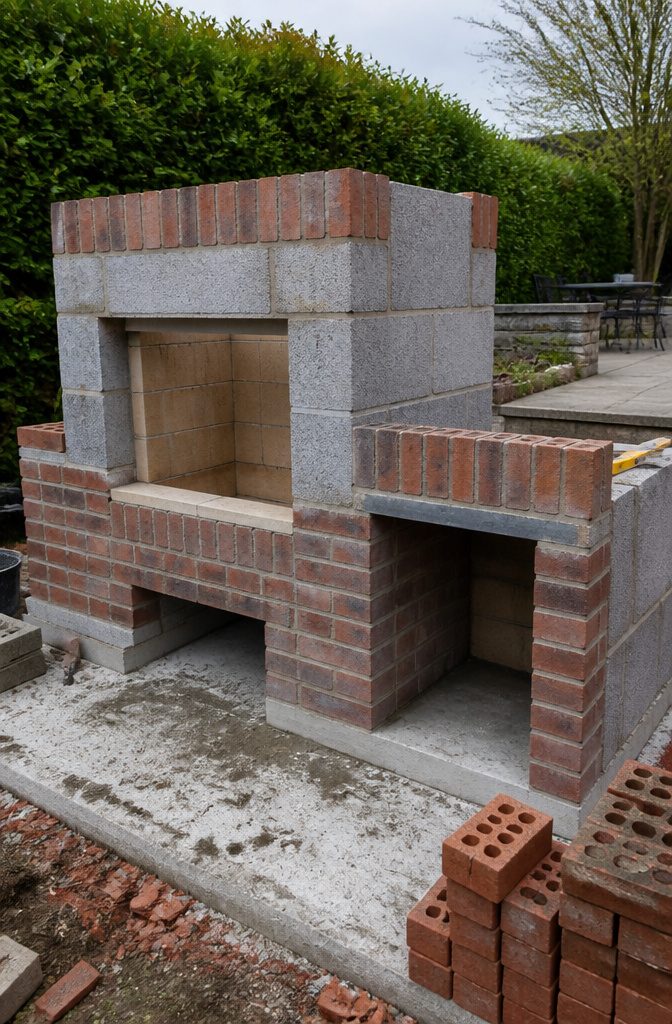
Start with the outer structure: lay brick or block in courses, checking plumb and level as you go.
The exact method depends on what sits inside. A wood-burning firebox gets an outer shell of common brick or concrete block, with firebrick reserved for the firebox itself where flame touches.
Steel-framed builds frame the extension first, then cover it with cement board as a base for stone or stucco.
If you’re building a side nook for firewood, measure 26 inches from the center of the bay opening after three courses on the front wall.
Frame the opening at 35 inches tall, set it in place and lay brick around it. Span the top with angle iron to carry the next courses, then finish with half-bricks stood on end as a soldier course.
For kit installs, the enclosure follows the appliance’s framing and clearance specs rather than the other way around. Ready-to-finish systems sometimes include prepared enclosures that cut down framing work, but confirm what’s supplied before you assume anything.
5. Build and Line the Firebox
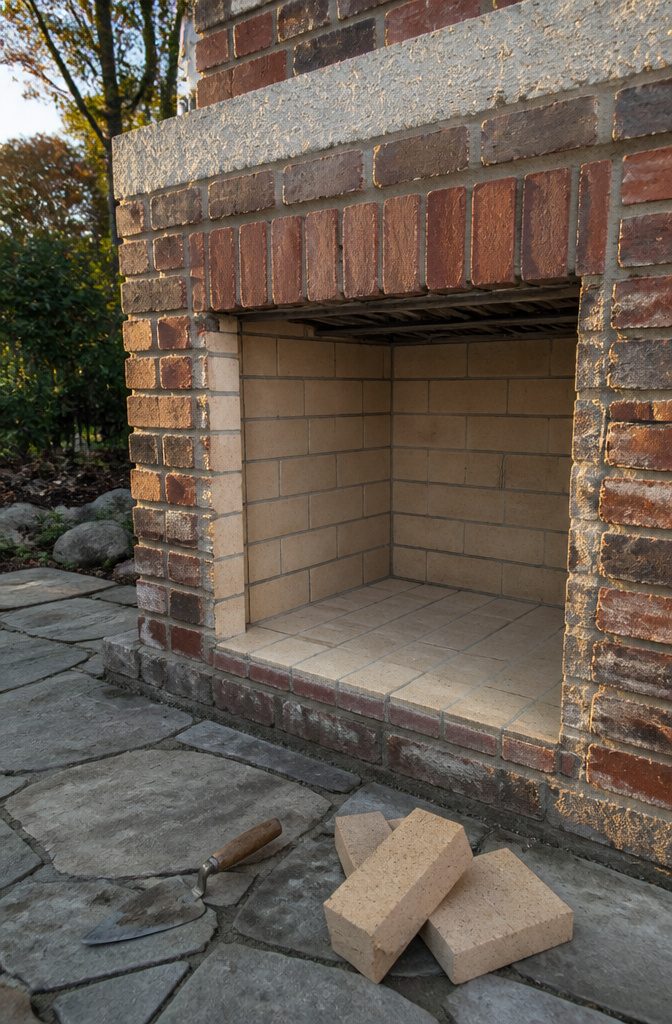
The firebox floor and walls get firebrick and fireplace mortar, not regular brick or standard mortar. Regular mortar breaks down under repeated fires, so this is not a place to swap in what you have left over from another job.
Lay firebrick on the floor of the firebox first, then up the side and back walls.
The firebox opening is 29 by 29 inches from the base to the bottom of the arch. Continue upward about 8 inches past that point to form the smoke chamber.
I scrape extra mortar off the joints with the trowel edge as I go. Fireplace mortar sets differently than standard mortar, so skip the wet sponge you would normally use to clean joints.
Squared firebox walls work better outdoors than angled Rumford-style walls.
Wind affects performance either way, and a larger squared firebox lets you set the fire grate behind the lintel so smoke follows the draw up the chimney instead of billowing out the front.
That matters more than the theoretical efficiency gain from angling the walls.
6. Install the Flue, Chimney, or Venting
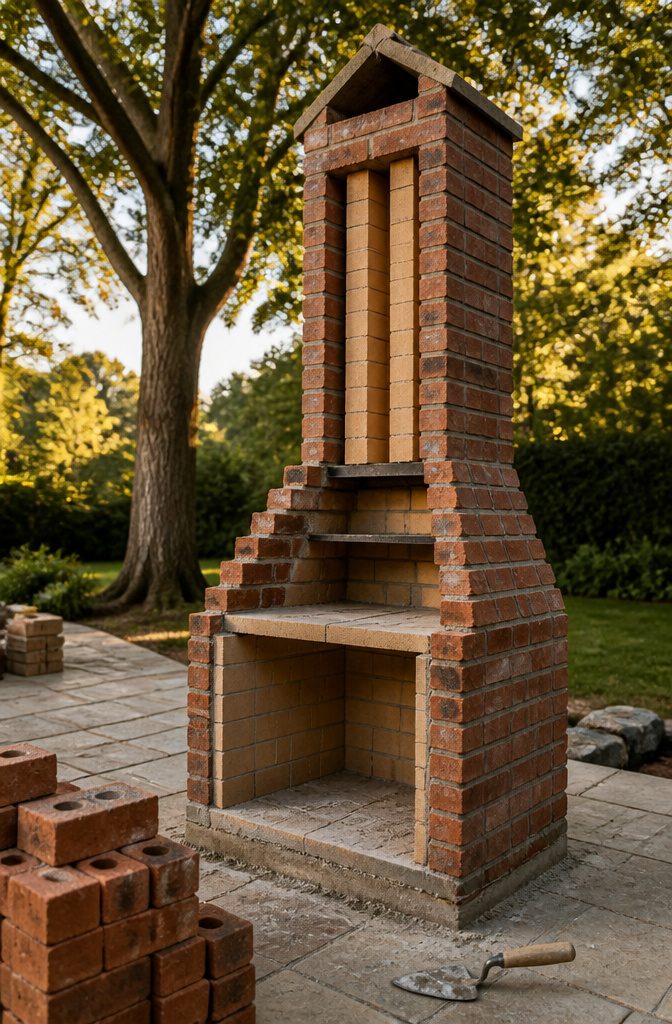
Set a clay flue liner before the arch so you can still reach inside to work.
Two 13-by-13-inch clay liners, each 2 feet tall, stacked and joined with fireplace mortar will work. The first liner sits on angle iron laid across the firebox opening, pressed against the back wall.
Fill the gaps on either side with firebrick, then seal the smoke chamber roof with mortar. Look up through the flue — you should see daylight with no mortar bridging the opening.
Now build the chimney around the second liner. Lay brick up to the top of the liner, then add about ten courses above the mantel height.
Set the angled side bricks first, then shape the peaked top. Width matters: too wide and smoke hovers around the yard instead of pulling up and out; too narrow and you get a smoky situation on calm days.
Add a small smoke shelf right above the throat to knock down any downdraft before it reaches the seating area.
If you are installing a gas appliance, some outdoor models require no combustion chimney at all, while others need a specified venting system.
Follow the manufacturer’s instructions for chimney routing, supports, clearances and termination height rather than assuming a general rule applies. Factory-built construction does not eliminate chimney requirements or allow swapping pipe components between systems.
7. Form the Entrance Arch and Add Supporting Details
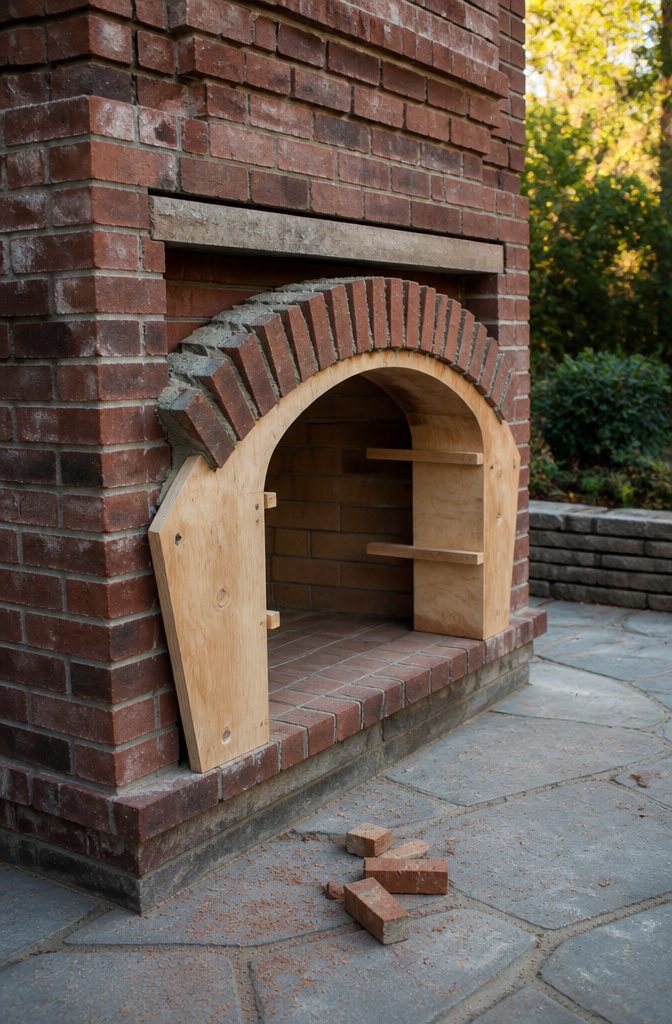
The arch over the firebox opening carries weight and looks right doing it.
I build mine over a temporary plywood form — trace the curve you want, cut two matching pieces, join them with spacers, and bend a thin board over the top to hold the shape.
Stand half bricks on end over the form, mortar them in place, and leave the whole thing alone for a few days. Pull the form too early and the arch can drop before the mortar hardens.
Small wedge pieces cut with a tile saw fill the gaps beside the arch where full bricks won’t fit. Once the arch is set, add a lintel above it to support the mantel or the next course of masonry.
If you’re working with a kit, the arched lintel is often included — the New Age 42″ Arched Lintel (SA-NA-ARCH42) pairs with their fireplace base, along with chimney extensions, flue inserts, and optional wood storage boxes.
The kit route gives you precut pieces that fit the first time.
8. Apply the Exterior Finish and Fit Accessories
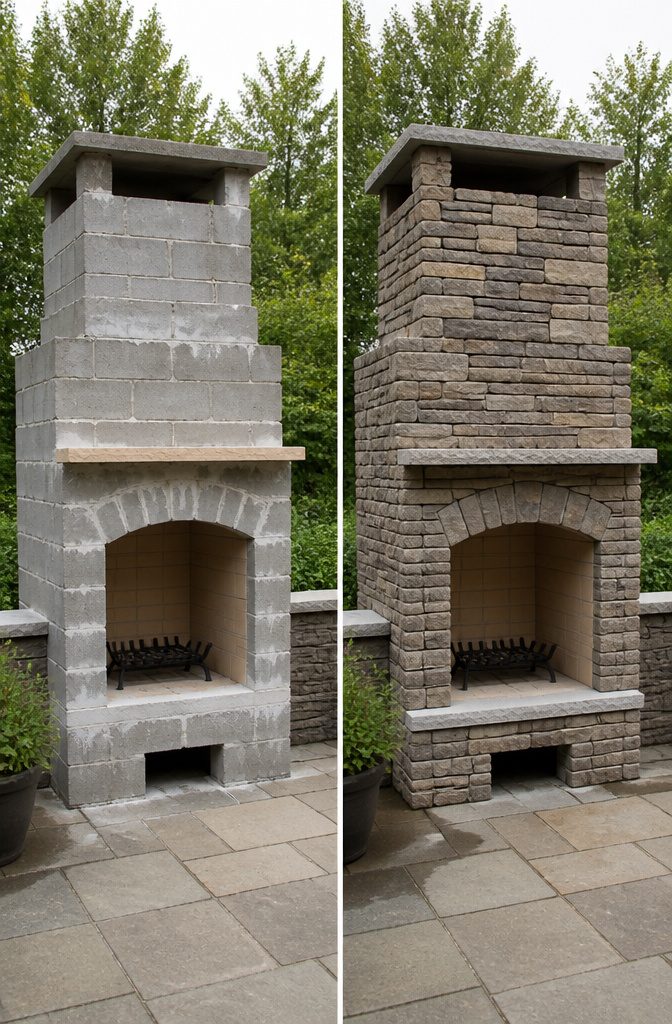
Once the structure is cured, metal lath goes on with screws or ties, then a layer of mortar troweled over it to cover the lath completely.
Work in sections small enough that the mortar stays wet while you press the stone in — if it starts to skin over, mist the whole area before continuing.
Manufactured stone veneer is the standard choice: it gives the look of stacked stone or natural rock at a fraction of the cost and labor, and the math runs roughly 158 square feet of flat pieces and 43 linear feet of corner pieces for a fireplace with chimney extensions and wood storage.
Press each piece into the wet mortar and hold it until it supports itself, keeping the joints tight so no gaps show through.
Exposed block painted with high-heat masonry paint is the cheapest finish by a wide margin — not leftover house paint, actual masonry paint rated for outdoor use — and it reads as intentional if the color matches your patio or trim.
Stucco and natural stone are also options, but neither can block vent openings or access doors.
After the final cure, wet the surface first, then clean off mortar smears with a masonry cleaner the brick maker approves. Add the mantel slab over the arch and drop the grate inside.
9. Cure, Test, and Commission the Fireplace
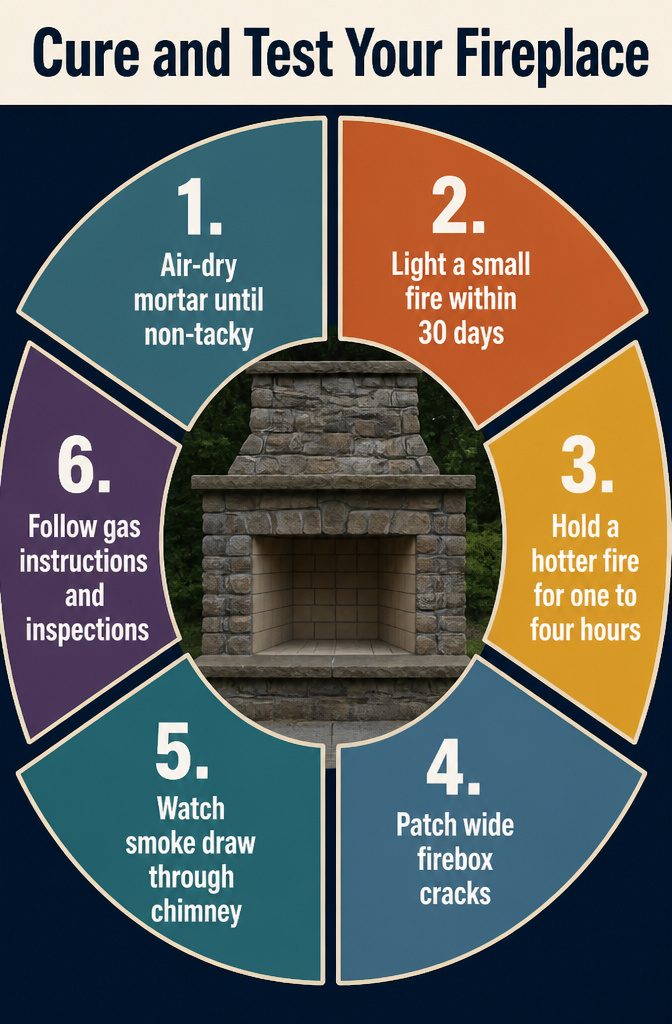
- Let the mortar air dry until it’s no longer tacky — anywhere from 1 to 30 days depending on weather. Keep water off the joints during this period.
- Light the first fire within 30 days so the mortar bonds properly. Keep it small and burn for 1 to 4 hours until the mortar is dry. Fresh mortar still holds water, and a hot fire turns that water to steam inside the joints, cracking them.
- Build a second, hotter fire and hold it for 1 to 4 hours to finish the cure.
- After the curing fires, check the firebox joints for cracks. A few hairline ones are normal. Wide cracks need patching before you use the fireplace regularly.
- Run a small test fire and watch how the smoke draws through the chimney.
- For gas fireplaces, follow the manufacturer’s lighting instructions and complete any required inspections before regular use. If you smell gas or the appliance doesn’t light normally, stop and follow the safety instructions.
Kit Builds Against Full Masonry
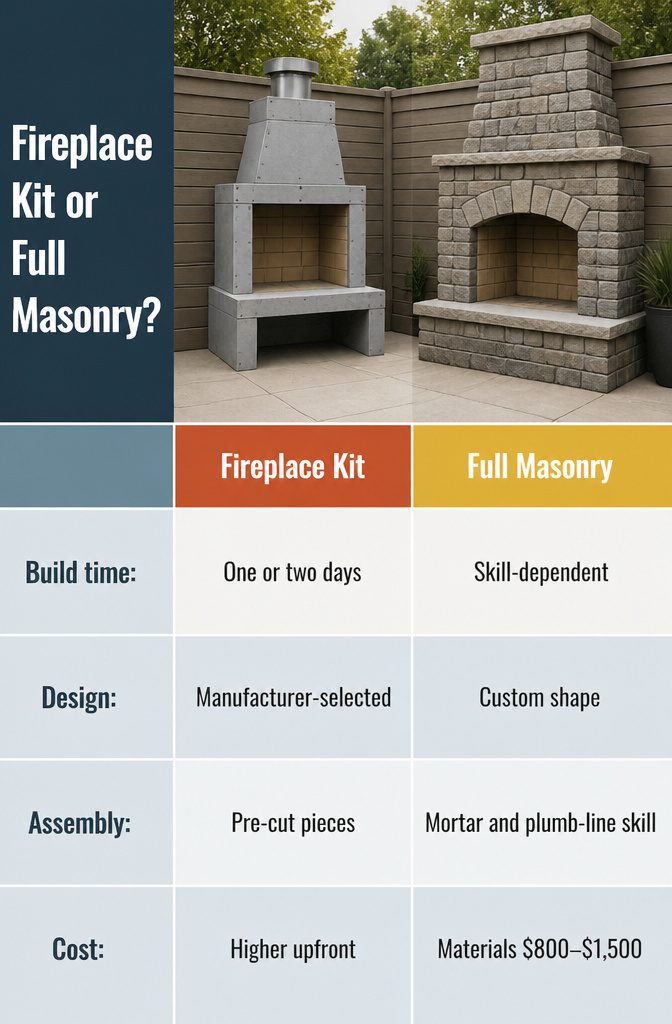
Masonry materials for a DIY build run $800 to $1,500, depending on size and finish, while hiring a mason for the same footprint starts at $3,000 and can double with natural stone.
Kits cost more upfront but collapse the timeline: a prefab fireplace can go together in a day or two if you’re building into an existing fence corner or wall, since you’re only framing two sides instead of four.
Masonry gives you full control over the look and takes whatever shape you can build, but it demands skill with mortar joints and plumb lines.
Kits like the FireRock Conventional or Arched Front models arrive with pre-cut pieces and instructions, which removes most of the guesswork but locks you into the dimensions and style the manufacturer chose.
I’d take the kit route for a first build or a tight weekend schedule, and save masonry for when the design needs something a box can’t deliver.
Where to Save and Where Not To
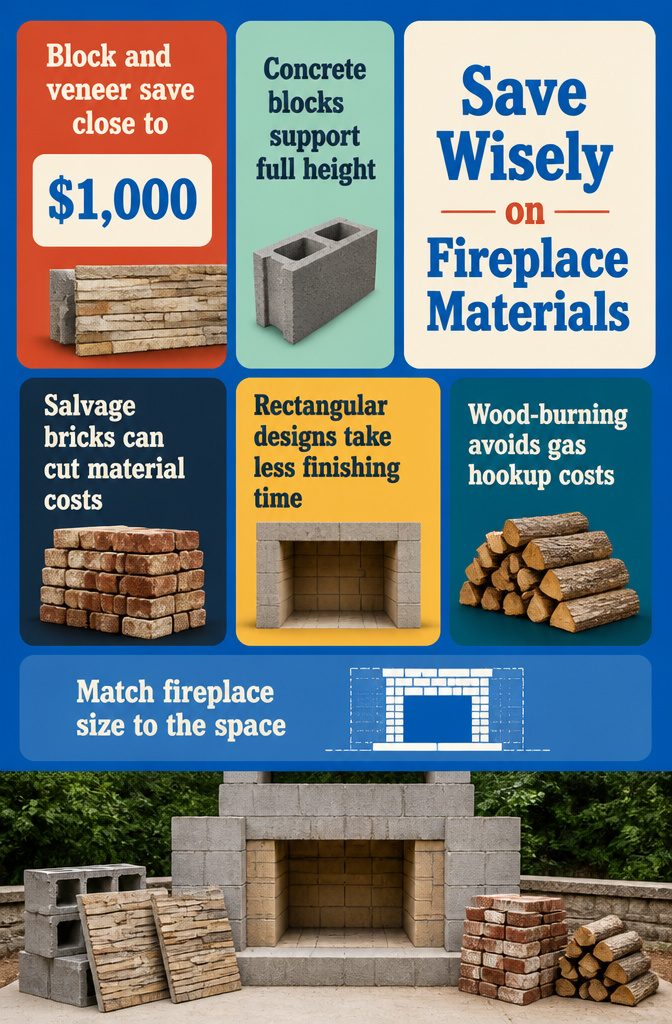
The firebox and foundation have to be right, but once they are, cheaper materials elsewhere can bring the total down without any loss in safety or longevity.
Block and veneer instead of natural stone can save close to $1,000, and the finished look is almost identical.
Here’s where to reduce expense:
- Start with concrete blocks for the outer structure. They’re affordable, easy to work with, and strong enough for the full height. Add stone veneer later if you want a different finish.
- Check Facebook Marketplace or a local salvage yard for leftover bricks or stone. Someone else’s surplus can cut your material bill considerably.
- Keep the design simple. A straightforward rectangular fireplace does the same job as a complex one and takes less time to finish.
- Stick with wood-burning if you’re trying to keep costs low. Gas hookup may add a few hundred dollars depending on how far the line has to run from your existing supply.
Brick count drives the total higher the larger the fireplace gets, so size the structure to fit the space rather than oversizing it for visual effect.
Frequently Asked Questions
How much does it cost to build an outdoor fireplace?
DIY materials run $800 to $1,500 depending on size and finish.
Hiring a mason for the same structure starts at $3,000 and can double with natural stone. Gas adds a few hundred dollars if you need to run a line from your existing supply.
Can you put a fireplace on a patio?
Not if the patio is wood.
Set the fireplace on its own concrete footing or existing pavement that will not burn. Most codes require 10 to 15 feet clear from the house, fences, and trees.
How to make a cheap outdoor fireplace?
Start with concrete blocks for the outer structure and add stone veneer later if you want a different finish.
Check salvage yards for leftover brick, keep the design rectangular instead of complex, and stick with wood-burning to avoid gas hookup costs. Block and veneer instead of natural stone can save close to $1,000.
Do I need firebrick for the whole fireplace?
Only where flame touches.
Firebrick lines the firebox floor and walls where the fire burns, but the outer walls, arch, and chimney use regular house brick. That keeps the cost down without sacrificing safety.
Why can’t I light a big fire right away?
Fresh mortar still holds water.
A hot fire turns that water to steam inside the joints and cracks them. Light a small fire first and let it burn for 1 to 4 hours, then build a hotter one to finish the cure.
How long does it take to build an outdoor fireplace?
A masonry build takes several weekends plus extra evenings for curing fires. A prefab kit can go together in a day or two if you are building into an existing corner, since you only frame two sides instead of four.
Do you need a chimney cap on an outdoor fireplace?
A cap keeps rain and leaves out of the flue and stops smoke from blowing back at you. Nobody inspects for one, but it solves problems before they start.
Are outdoor fireplace kits worth it?
Kits cost more upfront but collapse the timeline and remove most of the guesswork.
They work well for a first build or a tight weekend schedule, but they lock you into the dimensions and style the manufacturer chose. Save masonry for when the design needs something a box cannot deliver.
How long does an outdoor fireplace last?
A well-built masonry fireplace can last 20 to 30 years. The firebox and foundation have to be right, but cheaper materials elsewhere bring the total down without any loss in longevity.