
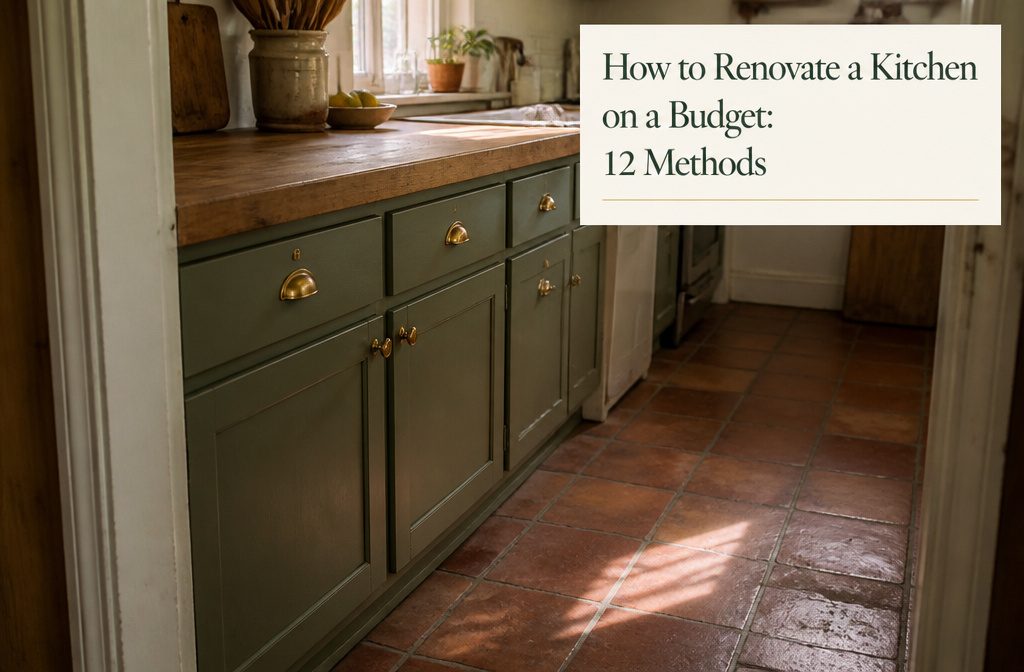
A full kitchen renovation costs $20,000 to $60,000 for most homes, but keeping the existing layout and avoiding moved plumbing or electrical lines cuts that figure in half. The mistake is treating every surface change as a reason to relocate services.
Painting cabinets, swapping hardware, and resurfacing countertops deliver a finished look without opening walls or pulling permits, and butcher block costs a fraction of what granite runs while holding up just as long.
1. Keep the Existing Layout and Avoid Moving Services
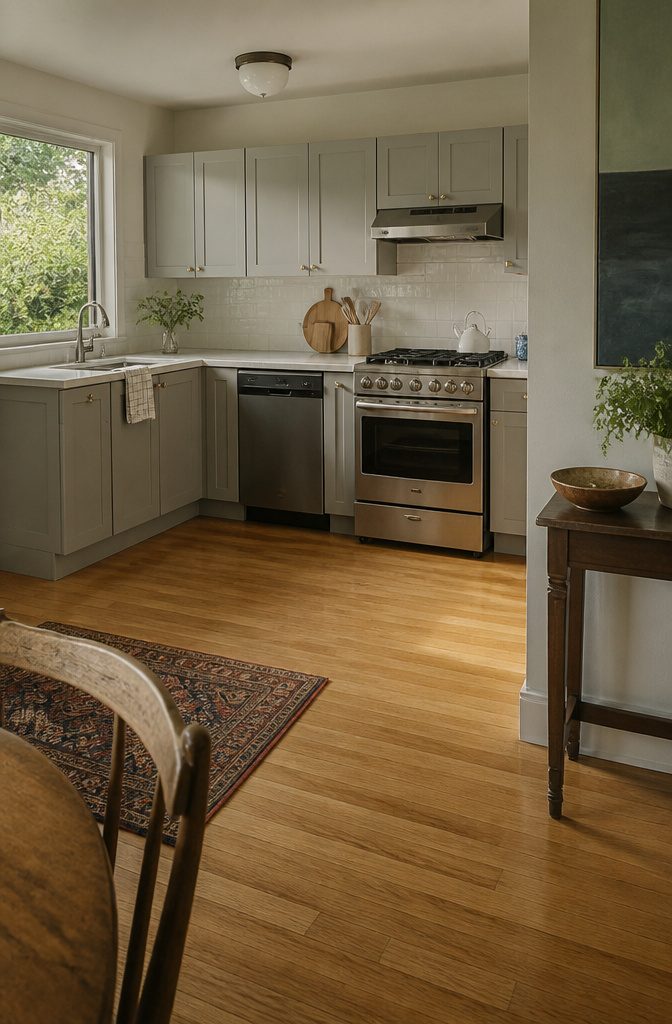
The fastest way to drain a renovation budget is moving plumbing, gas lines, or electrical rough-ins. Keeping sinks, stoves, outlets and walls where they are avoids permit fees, demolition labor, and the plumber’s hourly rate while drywall sits open.
If the current layout lets you cook and clean without crossing the room three times, the bones work — which means refinishing cabinets and swapping hardware will show more than relocating a dishwasher ever could.
Moving a sink to an island costs what a full cabinet refresh does, and you get one fixture in a new spot instead of twenty doors that look new.
Removing a wall to open the space is fine if that one change solves the problem, but stacking it with appliance moves and a relocated sink burns the budget on infrastructure instead of finishes.
Adding an outlet or a pendant fixture barely registers; rerouting waste lines does.
Small kitchens benefit even more from layout discipline. Fewer square feet means less material cost, but moving services in tight quarters often means opening more wall to thread pipe and wire.
Better lighting, a lighter paint color, and smarter storage make a compact kitchen feel larger without touching a single stud.
2. Set a Budget, Prioritize Needs, and Plan Ahead
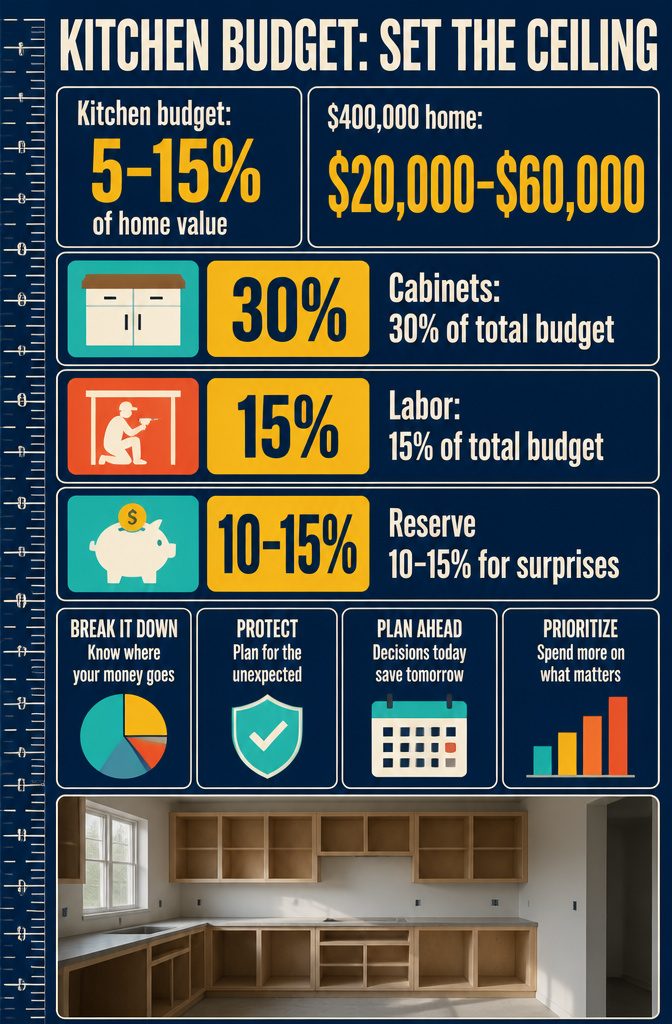
Before spending a dollar, decide how much you have to spend. A workable starting range is 5 to 15 percent of your home’s value.
A $400,000 home puts the kitchen somewhere between $20,000 and $60,000. That is the ceiling, not the goal—if you can do what you want for less, stop there.
Break the total into categories before work starts.
Cabinets typically take 30 percent, appliances 20, countertops 10, flooring 7, backsplash 5, sink and faucet 5, lighting 5, paint and hardware 3, labor 15. Those shares shift depending on what matters most to you.
If you find good appliance pricing, move the difference to cabinets or countertops. The breakdown exists to keep you from blowing half the budget on one item and scrambling to finish the rest.
Set aside 10 to 15 percent as contingency.
Hidden plumbing problems and permit fees happen, and finishing without stalling depends on having a buffer for them. Finalizing every choice before demolition starts cuts down surprise costs more than any other move.
3. Get and Compare Contractor Quotes
Get and Compare Contractor Quotes
Calling one contractor and signing feels efficient until you compare bids and realize the first quote came in $3,300 higher than the final one.
Getting at least three detailed quotes is standard for a reason: it shows you the going rate for your scope and surfaces differences in how contractors estimate the same job.
The detail in those bids matters as much as the total.
Comparing line items can reveal that one contractor has a framer on call at a locked-in rate while another has to hire out and passes the premium on to you.
Those differences change what you actually get for the number at the bottom, and asking questions about the gaps helps you see which parts of the project cost more than expected and where you might adjust scope.
I wouldn’t automatically pick the lowest bid. A rock-bottom quote often means something got left out or a subcontractor is cutting a corner you will pay to fix later.
Compare the scope, ask about the subs they use, and choose the bid that covers what you need done at a price that makes sense for the work.
4. Reuse, Repair, or Refinish Existing Materials and Appliances
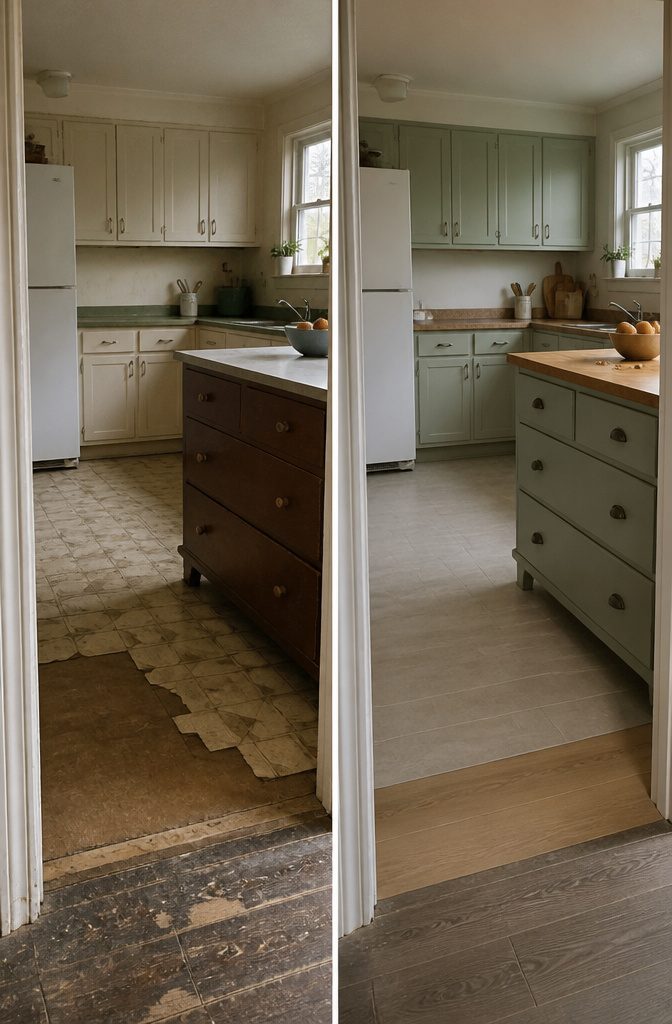
Cabinets are usually the biggest line in a kitchen budget, but you don’t have to replace them to change how they look. Paint or reface the existing boxes and swap out the doors and drawer fronts.
I’ve seen kitchens go from builder-grade oak to a clean painted finish for a fraction of what new cabinetry costs, and when you add soft-close hinges and concealed hardware at the same time, the result reads as a full replacement.
Refacing runs higher than paint but still undercuts new cabinets.
Countertops follow the same logic.
If the surface is sound but dated, resurfacing treatments or a thorough cleaning can buy you years before you need to replace. Flooring is worth salvaging too.
One homeowner pulled up old porcelain tile hoping for hardwood underneath, found only subfloor in part of the room, and saved around $500 by refinishing the good sections and sourcing matching planks to fill the gaps rather than starting over with slate.
Appliances can be repaired instead of scrapped. Microwaves, refrigerators, dishwashers and garbage disposals often need a part or a fix, not a replacement, and repairing them keeps them out of the landfill while keeping money in your budget.
Old furniture gets a second life as kitchen storage. A dresser with a new countertop becomes an island without the custom price.
5. Choose Lower-Cost Materials and Cabinet Options
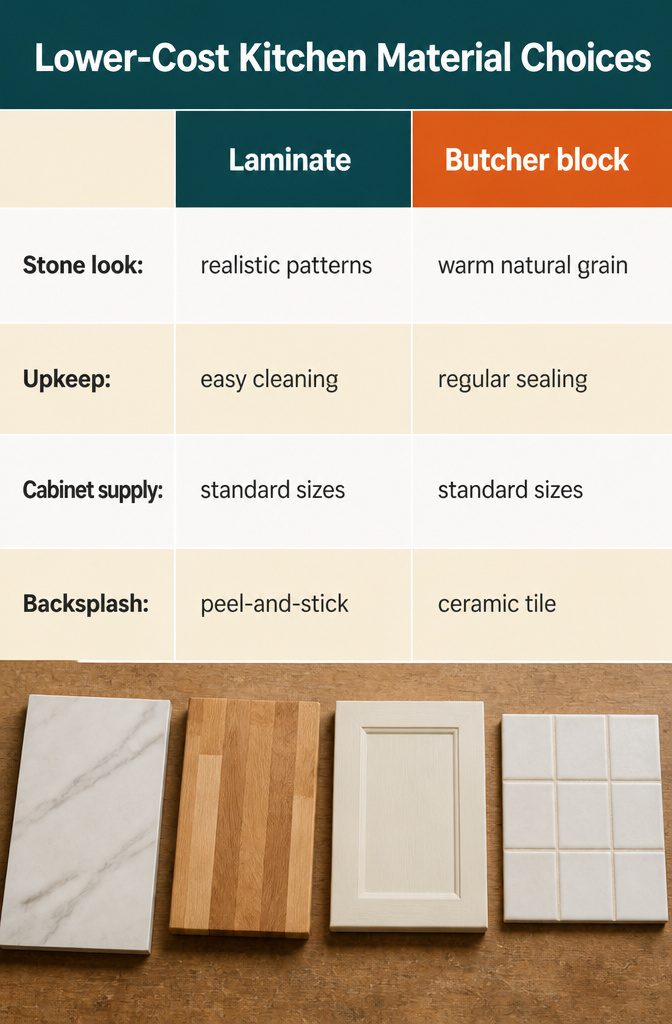
Laminate and butcher block deliver the countertop look without the granite price, and certain engineered surfaces give you similar durability for less. Butcher block needs sealing, but the warmth is hard to beat at that cost.
Laminate has come a long way from the old patterns and now mimics stone well enough that most guests won’t notice. For flooring, vinyl holds up better than you’d expect and costs a fraction of what hardwood runs.
Cabinets take the biggest bite out of any kitchen budget, so that’s where the savings add up fastest. Stock cabinets and ready-to-assemble (RTA) cabinets both come in standard sizes and finishes, cutting out the custom markup.
RTA cabinets arrive flat-packed and go together on site, which keeps shipping and manufacturing costs down. The assembly takes time, but the structure is solid.
Backsplashes give you another place to save without sacrificing the look.
Ceramic tile costs far less than natural stone and still reads as finished. Peel-and-stick options skip the mortar and grout altogether, which means you can install them yourself in an afternoon and pull them off later if you’re renting.
6. Update Cabinets With Paint, New Doors, Refacing, or Hardware
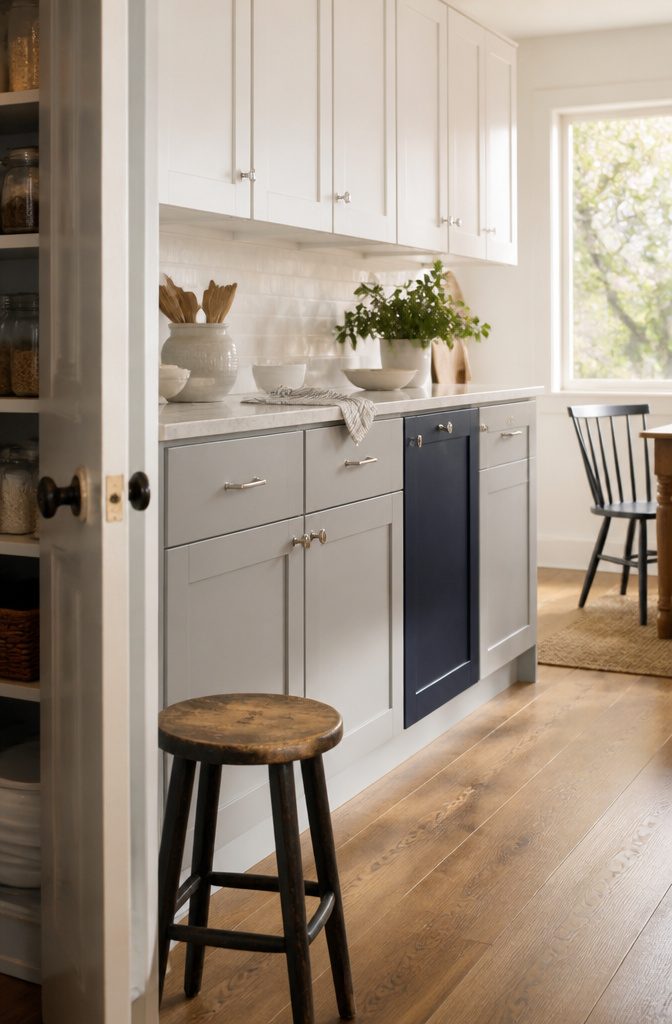
Cabinets take up more wall space than anything else in a kitchen, so painting them is the single fastest way to change what the room feels like.
I sanded the frames with 220-grit sandpaper, wiped them down, primed with a bonding primer, then gave them two coats of Benjamin Moore Advance in Simply White with a satin finish.
The cabinet doors matched the yellowed trim perfectly once the trim caught up. Soft gray, deep navy and classic white all reset a dated kitchen without replacing the box structure underneath.
If the boxes are solid but the doors look worn, replace just the doors and drawer fronts and keep the cabinet frames.
That gets you new cabinetry at a fraction of the cost. Refacing with a veneer is another option—pricier than paint, cheaper than new cabinets.
New hardware finishes the reset: knobs in 1 5/16 size, Golden Champagne finish, sold in budget packs of 20 or 30. Swapping pulls and knobs is inexpensive enough that it reads like new cabinetry even when the rest stayed put.
7. Use DIY Selectively and Hire Professionals for Complex Work
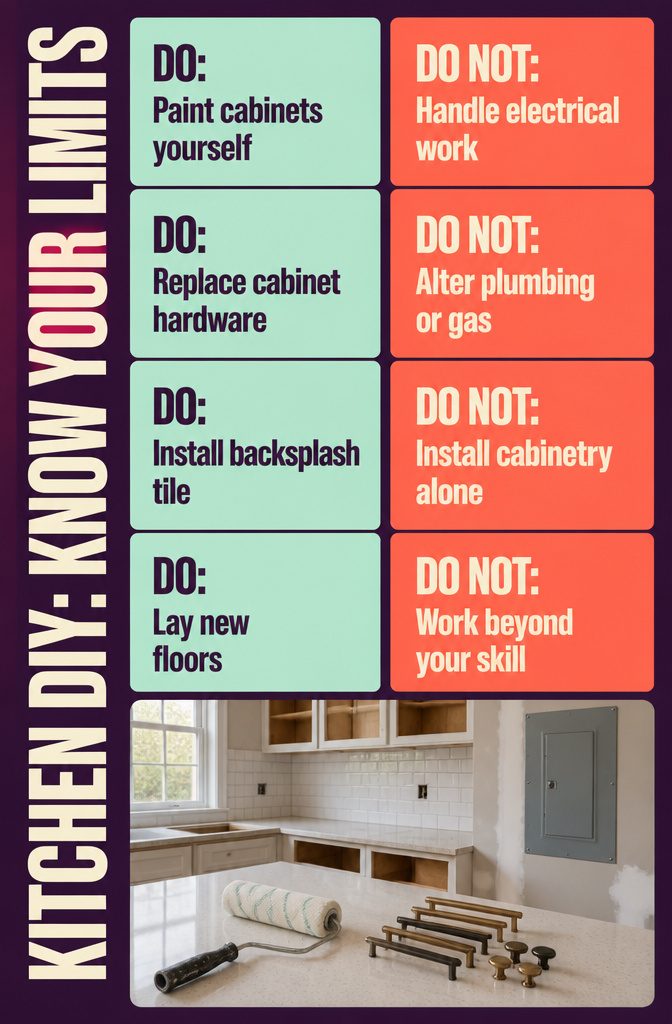
Painting cabinets or swapping out hardware is the sort of work most people can handle. So is backsplash installation, laying floors, hanging drywall, changing lights and outlets, and installing trim and baseboards.
Labor accounts for the largest part of most renovation budgets, so taking on those tasks yourself can save hundreds or even thousands of dollars — money that stays in the materials column instead.
The line to draw is skill, not ambition. Work beyond what you can actually do creates added cost when you hire someone to fix it, and certain trades carry real risk if they go wrong.
Electrical work, plumbing, gas lines, and cabinetry installation are where most people hire professionals.
A slightly higher quote from a contractor who breaks down their costs clearly usually beats a low bid that leaves you guessing what went wrong when the invoice comes in higher.
8. Refresh the Backsplash
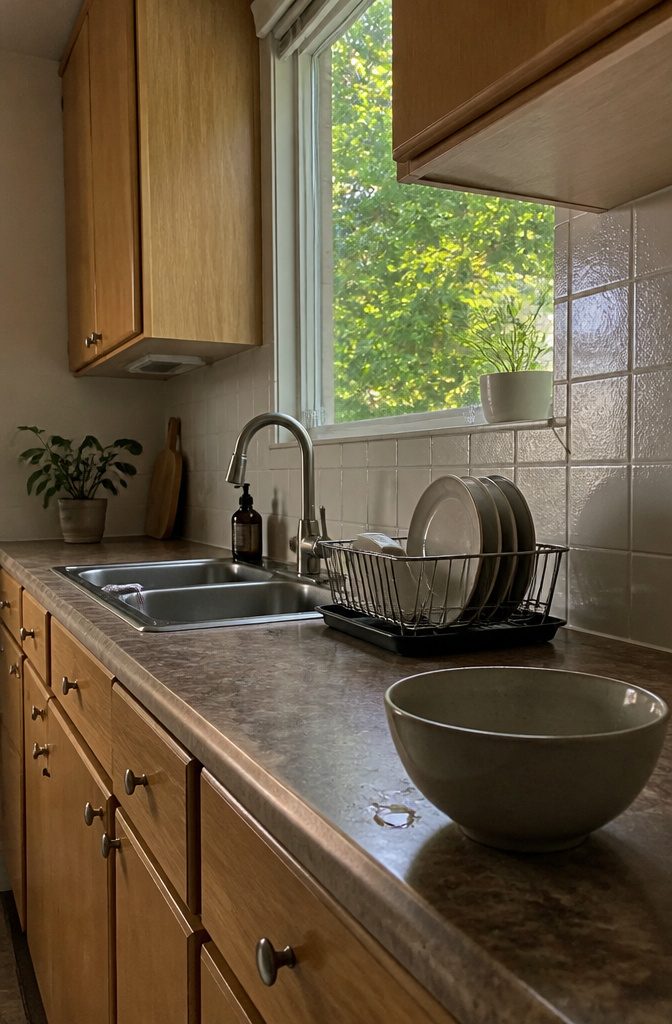
Peel-and-stick tile changed my kitchen backsplash in an afternoon for under fifty dollars. The water-resistant contact paper made for kitchens and bathrooms goes straight over drywall or existing tile, no grout lines to tape off and no contractor needed.
I used subway tile sheets that come in twelve-by-twelve panels—you cut them with scissors, press them flat, and the seams disappear once everything’s aligned.
For a backsplash that looks dated but isn’t damaged, painting the existing tile works just as well.
Use the same prep and paint you would for a ceramic tile floor: degrease with TSP, prime with bonding primer, then two coats of epoxy paint.
It takes longer to dry than peel-and-stick takes to install, but the finish holds up to water and wipes clean without peeling at the edges.
If you want pattern without committing to tile, wallpaper the backsplash area and seal it with dead-flat varnish—that protective coat stops water and food splatter from ruining the paper, and a single roll usually covers the space under the cabinets.
9. Update Lighting
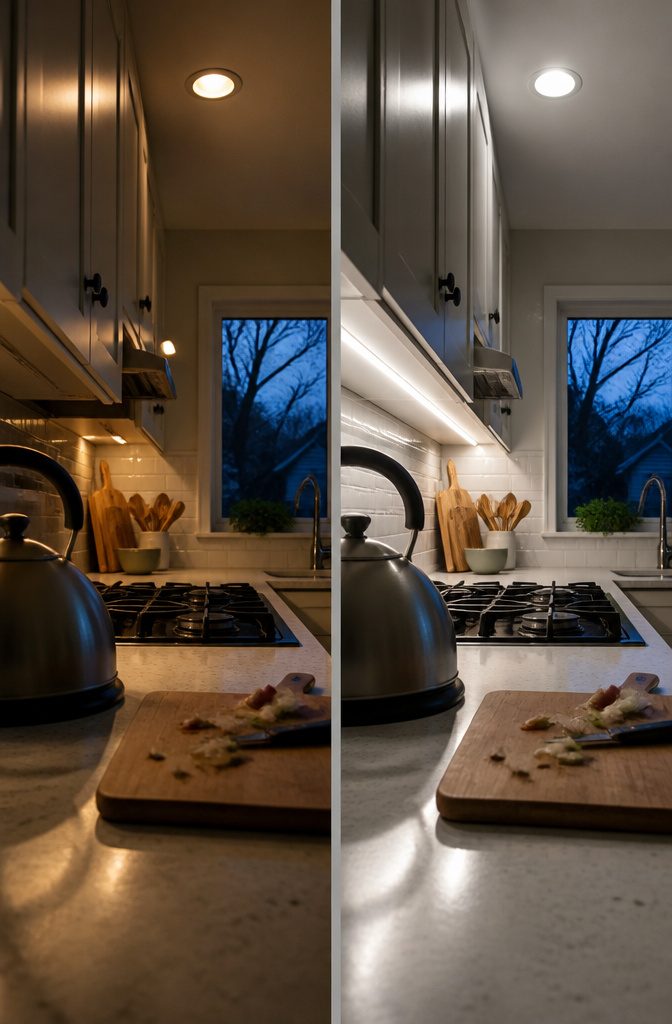
Dated overhead fixtures flatten a kitchen faster than worn cabinets, and updating them costs far less. Pendant lights over an island or new under-cabinet LEDs change both function and mood without opening walls.
The fixtures themselves matter, but so does the trim around recessed cans. Yellowed plastic rings age a space even when the bulbs are fine.
Spray-painting recessed-light trim with high-heat paint takes two coats and dries overnight.
One can covers 14 lights in a typical kitchen. The job is pull, spray, reinstall.
If the trim is beyond saving or you’d rather skip the painting, a 12-pack of replacement baffle trim runs less than new fixtures and fits standard 6-inch recessed cans. Both moves land under $20 and take a single afternoon.
Task lighting pays back faster than ambient fixtures.
A dark counter or dim stovetop slows prep work every day, and fixing it shows immediately. Energy-efficient LED fixtures drop the electric bill and last years longer than incandescent options, so the upfront cost spreads thin.
10. Refresh Countertops Without Full Replacement
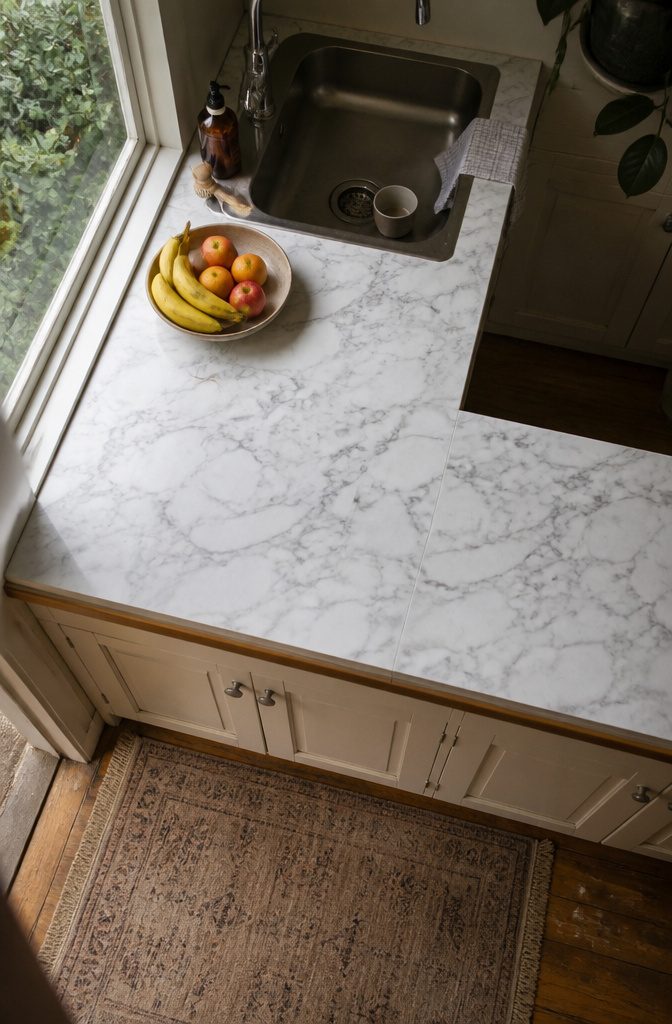
Peel-and-stick marble contact paper offers the fastest fix if your laminate countertops work fine but look dated. The material is made for kitchens and bathrooms, so it resists water, and installation takes an afternoon rather than a weekend of demolition.
One pass with contact paper turns wood-edged laminate into something that photographs clean and modern without the weight or cost of stone.
Resurfacing treatments give laminate a second life when the surface itself is sound but dull.
A good cleaning sometimes does enough on its own. If the color or pattern feels stuck in the wrong decade, a resurfacing kit costs less than replacement and buys another few years before a full swap makes sense.
Switching to affordable solid materials keeps the update permanent without the premium price. Laminate and butcher block both hold up to daily use and cost a fraction of granite or quartz.
Engineered surfaces split the difference, offering durability closer to stone at a lower entry point. Any of these materials work if the existing layout stays put and no plumbing moves.
11. Use Open Shelving or Improve Storage
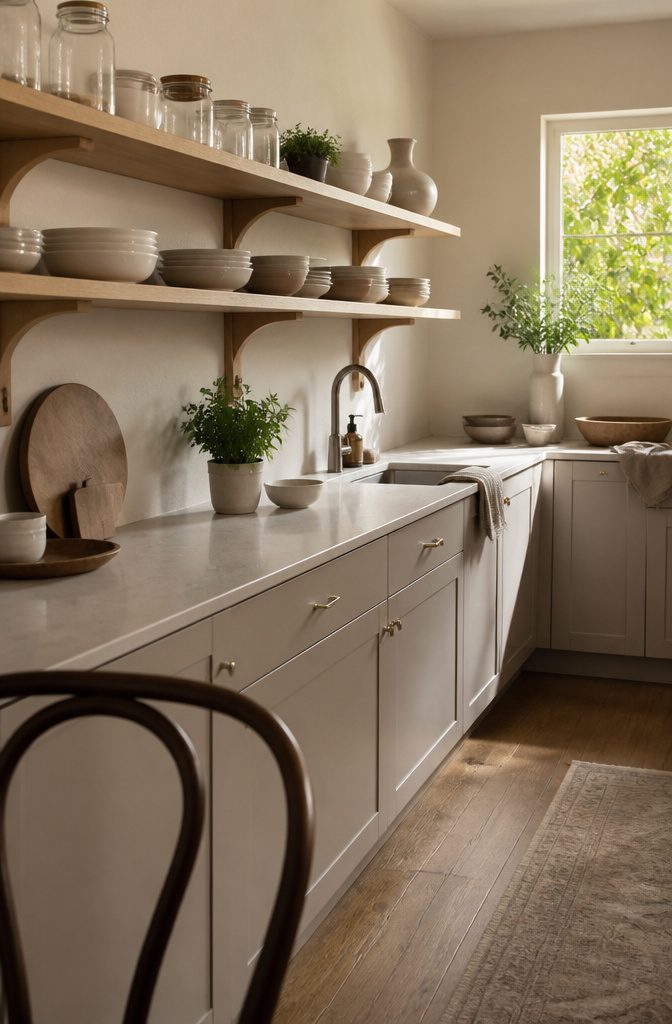
Swapping some upper cabinets for open shelves opens the room and cuts material cost at the same time.
The brackets and boards run a fraction of what cabinet boxes do, and if the walls can take the load, installation is straightforward.
Pull-out shelves and hanging racks make the storage you keep work harder: a pull-out tray in a base cabinet brings back corners you stopped reaching into, and a pot rack over the island clears counter space without drilling into every wall.
I like open shelves best on one wall rather than the whole kitchen—you get the visual break without losing closed storage for things that look better hidden.
Add simple organizers inside existing cabinets before you tear anything out; drawer dividers and door-mounted racks cost less than twenty dollars and often solve the problem without construction.
Light colors on the shelves and pale cabinet interiors make a small kitchen feel larger, but the openness only helps if you’re willing to keep what sits on those shelves looking decent.
12. Make Small Finish and Accessory Changes
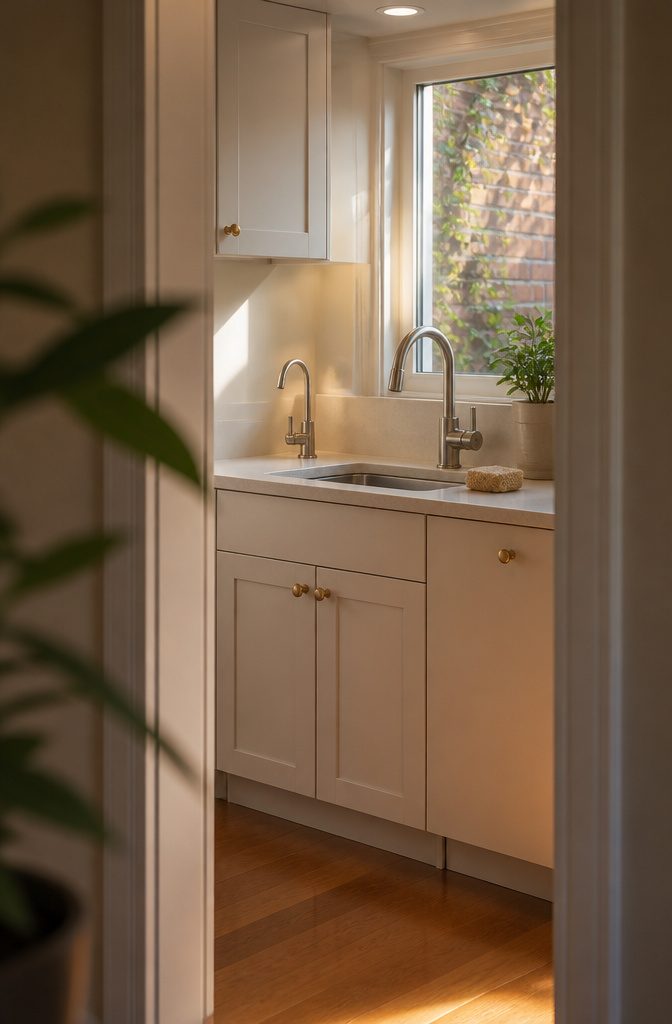
A high-arc brushed nickel faucet and matching soap pump can reset the whole feel of the space for under $200, and painting a mismatched drinking faucet yourself saves another $125 when you can’t find the exact finish.
Spray paint delivers a perfect match in a weekend. The Aquasana model at $178 hit the right finish but missed on style; painting a lower-cost style match closed the gap without adding a second fixture order.
Wall paint changes the room faster than anything else you can do in a day. Fresh white or a soft neutral pulls dated finishes into the present, and trim follows the same logic.
Yellowed recessed lighting trim gets the same treatment: pull it down, hit it with high-heat white spray paint, and reinstall the next morning. Fourteen lights take one can.
Cabinet hardware sits at a similar price-to-impact ratio.
Swapping dated brass knobs for matte brass or brushed nickel in the 1 5/16-inch size runs less when you buy in bulk packs of twenty or thirty, and the room reads newer before you touch anything structural.
Where Cost-Conscious Materials Win and Where They Trade Off
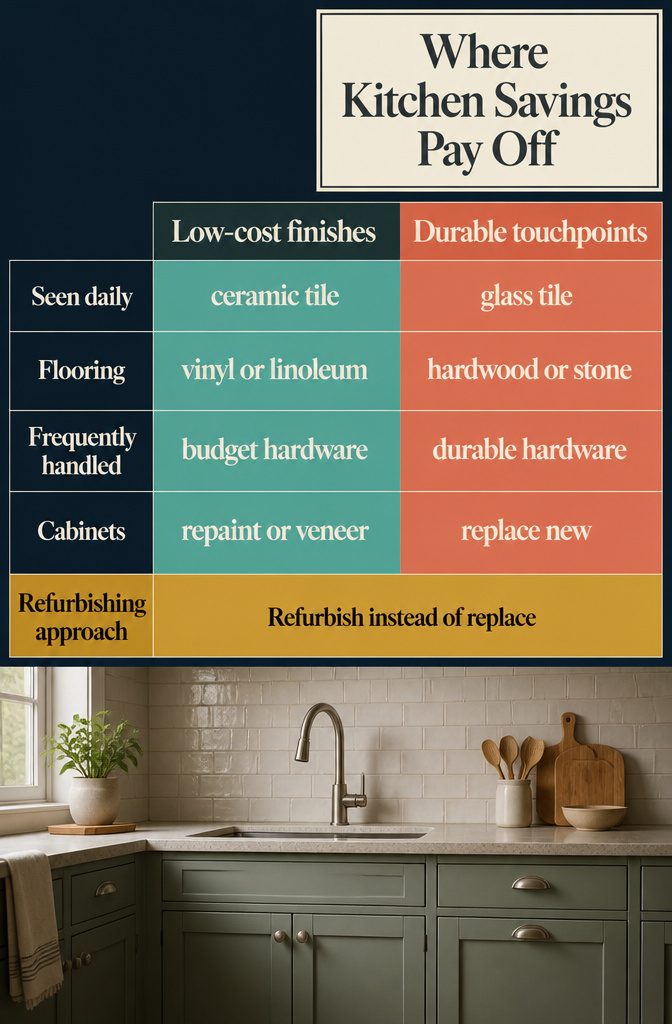
Cost-conscious materials work best where the reader sees them every day but does not touch them often.
A backsplash made from ceramic tile instead of glass subway tile saves money without sacrificing durability, because nothing but a sponge ever makes contact with it.
The same logic applies to flooring: vinyl or linoleum holds up under foot traffic and costs far less than hardwood or natural stone, and the visual difference from across the room is smaller than the price gap suggests.
The opposite rule applies to anything that gets handled or opened dozens of times a day.
Cabinet hinges, drawer slides, and faucets earn back a few extra dollars in longevity. Cheap hardware fails within a year or two, and replacing it costs more than buying something durable the first time.
I’d rather spend on a solid faucet and use laminate countertops than reverse that priority and end up with a dripping fixture six months in.
Refurbishing instead of replacing splits the difference. Painting existing cabinets or applying a new veneer keeps the bones in place while changing the look, and the cost stays well below what new cabinets would run.
Stripping and repainting hardware does the same thing at an even smaller scale. The result may not match a full gut renovation, but it solves the problem the reader came with: a fresher kitchen without the high-end price tag.
What a Small-Kitchen Remodel Changes About Planning
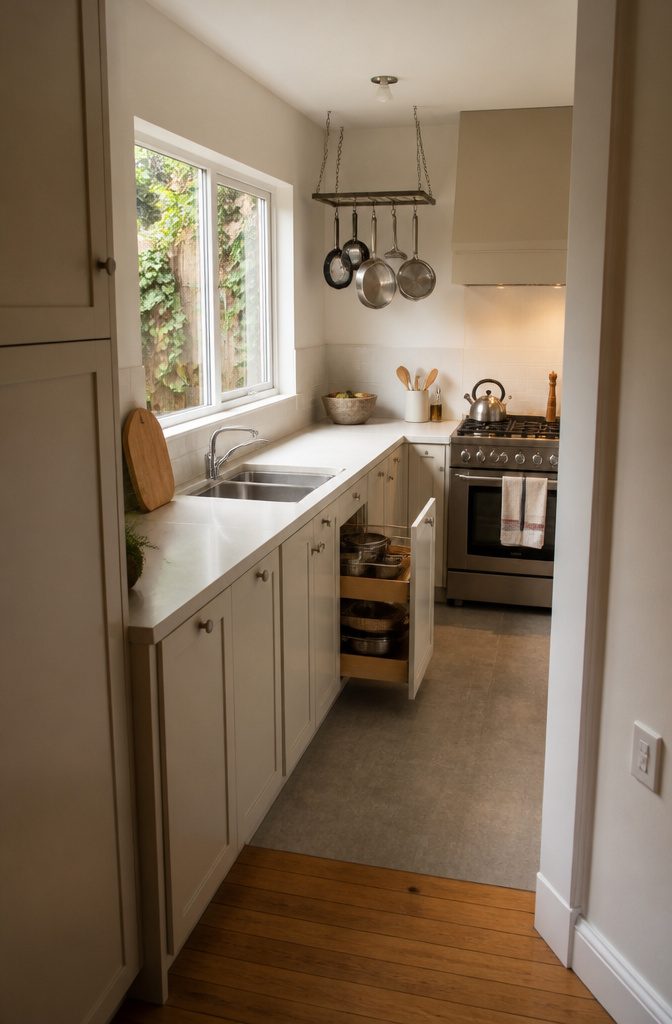
Small kitchens cost less to renovate because they need fewer materials, but planning matters more. Every square foot counts, and poor layout decisions waste space you cannot spare.
Lighter colors on walls and cabinets make the room feel larger than it measures. Better lighting does the same work without touching the structure.
Efficient storage solutions like pull-out shelves or hanging racks organize without adding bulk. These changes stay affordable because they leave the bones alone.
Avoid moving plumbing or walls. A sink relocated to an island or the opposite wall burns through budget faster than any other choice.
The same goes for wall removals. Adding an outlet or a new light fixture adds modest cost.
Shifting major infrastructure does not. Minor appliance moves work if the space and existing plugs allow for it, but moving the sink to create an open concept while also relocating every appliance compounds the expense.
Pick one structural change or none, and let storage and finish handle the rest.
Frequently Asked Questions
How much should I budget for a kitchen renovation?
A workable range is 5 to 15 percent of your home’s value.
A $400,000 home puts the budget between $20,000 and $60,000, though you should spend only what the project actually needs. Set aside 10 to 15 percent as contingency for hidden problems and permit fees.
What are the best ways to save money during a kitchen remodel?
Keep the existing layout to avoid moving plumbing, gas lines, or electrical rough-ins.
Refinish cabinets instead of replacing them, choose lower-cost materials like laminate or butcher block, and tackle tasks like painting or hardware swaps yourself. Those moves save thousands without sacrificing the finished look.
Can I save money by doing some of the renovation work myself?
Yes.
Painting cabinets, swapping hardware, installing backsplash, laying floors, and changing lights and outlets are all manageable DIY tasks that can save hundreds or thousands in labor costs. Hire professionals for electrical, plumbing, gas lines, and cabinetry installation.
Should I always choose the cheapest materials available?
No. Spend more on items you touch daily, like cabinet hinges, drawer slides, and faucets, because cheap hardware fails within a year or two and costs more to replace.
Save on materials you see but rarely handle, like backsplash tile or flooring, where the visual difference is smaller than the price gap.
Why is it important to get multiple quotes from contractors?
Getting at least 3 detailed quotes shows you the going rate for your scope and reveals differences in how contractors estimate the same job.
Comparing line items helps you see which parts cost more than expected and where you might adjust scope, and prevents you from overpaying by thousands.
Can you remodel a kitchen on a very tight budget?
Yes. Focus on cosmetic updates like painting cabinets, swapping hardware, updating lighting, and adding a simple backsplash.
Keep the layout to avoid infrastructure costs, and handle manageable tasks yourself. Small changes deliver noticeable improvements without the financial burden of a full gut renovation.
What is the cheapest way to update a kitchen?
Paint cabinets, replace hardware, update lighting, or add a peel-and-stick backsplash.
Those tasks cost under $200 combined and change the room faster than anything structural. A fresh faucet and new recessed-light trim round out the refresh for minimal spend.
Are budget kitchen remodels worth it?
Yes, when planned carefully.
Targeted upgrades like painted cabinets, new hardware, and better lighting improve daily use and appearance without overspending. Finalizing every choice before demolition starts and setting aside contingency money keeps the project from stalling.
How do I save the most money on a kitchen remodel?
Avoid layout changes, choose cost-effective materials like laminate and butcher block, and plan every decision before work starts.
Combine DIY tasks with professional services for complex work, and get 3 quotes to find the going rate. Those steps keep more money in the materials column instead of burning it on labor and infrastructure.
Should I hire professionals for a budget kitchen remodel?
Hire professionals for electrical work, plumbing, gas lines, and cabinetry installation.
Those trades carry real risk if they go wrong, and fixing DIY mistakes costs more than hiring someone the first time. Handle painting, hardware swaps, and backsplash installation yourself.
Can I redo my kitchen myself?
You can handle painting cabinets, changing hardware, installing a backsplash, laying floors, and updating lights and outlets.
Those tasks are manageable for most people and save hundreds in labor costs. Leave electrical, plumbing, and cabinetry installation to professionals.
How can I make a small kitchen look bigger on a budget?
Use lighter colors on walls and cabinets, improve the lighting, and add efficient storage like pull-out shelves or hanging racks.
Those changes make the space feel larger without touching the structure. Avoid moving plumbing or walls, which burns budget on infrastructure instead of finishes.
What are affordable ways to upgrade my kitchen countertops?
Laminate and butcher block both hold up to daily use and cost a fraction of granite or quartz.
Peel-and-stick marble contact paper offers the fastest fix if your laminate works fine but looks dated. Resurfacing treatments give laminate a second life when the surface is sound but dull.
What’s the easiest way to update my kitchen?
Change cabinet knobs and pulls, update the faucet, or replace dated overhead fixtures.
Those small swaps take an afternoon and cost under $200 combined, but they reset the whole feel of the space. Spray-painting recessed-light trim with high-heat paint takes 2 coats and covers 14 lights with one can.