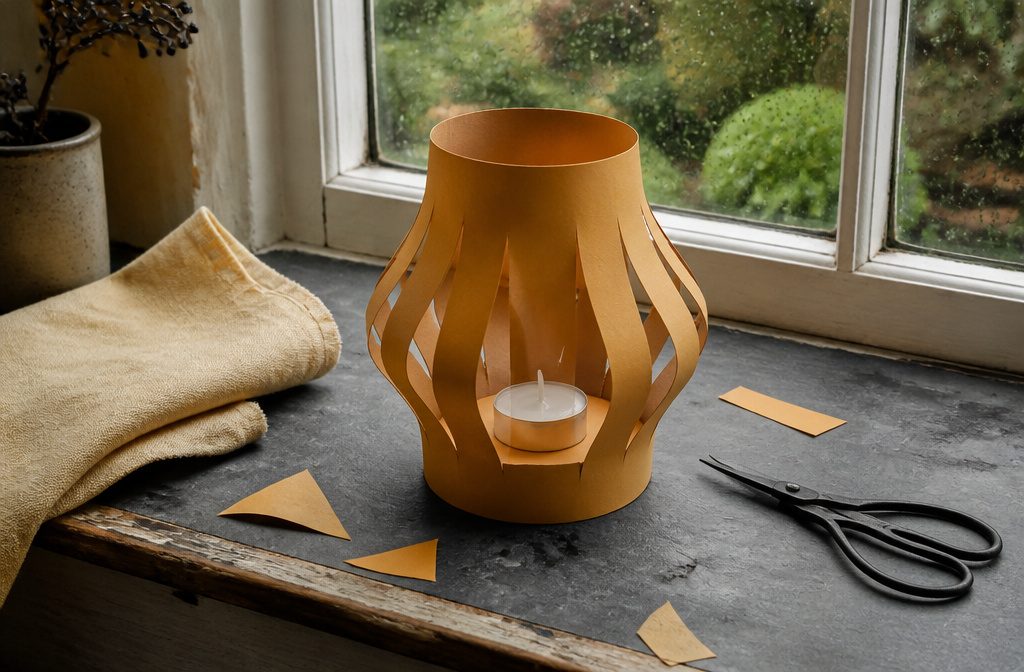
A paper lantern takes about 30 minutes and costs almost nothing if you already have construction paper, scissors and glue. Most attempts fail at the base, where the fringe either buckles or won’t overlap cleanly when you fold the cylinder closed.
The spacing matters more than it looks like it should: cuts 3 inches apart leave enough material to form a stable platform that holds a tea light without tipping.
1. Decorate the Paper

Heavy construction paper or watercolor paper works best here, sized around 9×12 or 12×16 inches. The thickness holds up to decorating and folding without buckling, and watercolor paper especially takes wet media without warping.
Crayons, pastels, or watercolor all work. Suns, moons, and stars fit the lantern theme, but you can skip the motifs and just work with color.
Warm colors suggest the light and flame inside the lantern. Cool colors play up the contrast between the cold dark outside and the glow within.
Fill the whole sheet with color before you move on to cutting. The decoration shows through strongest when every inch of paper carries pigment, and gaps read as unfinished once the lantern is lit.
2. Fold the Base
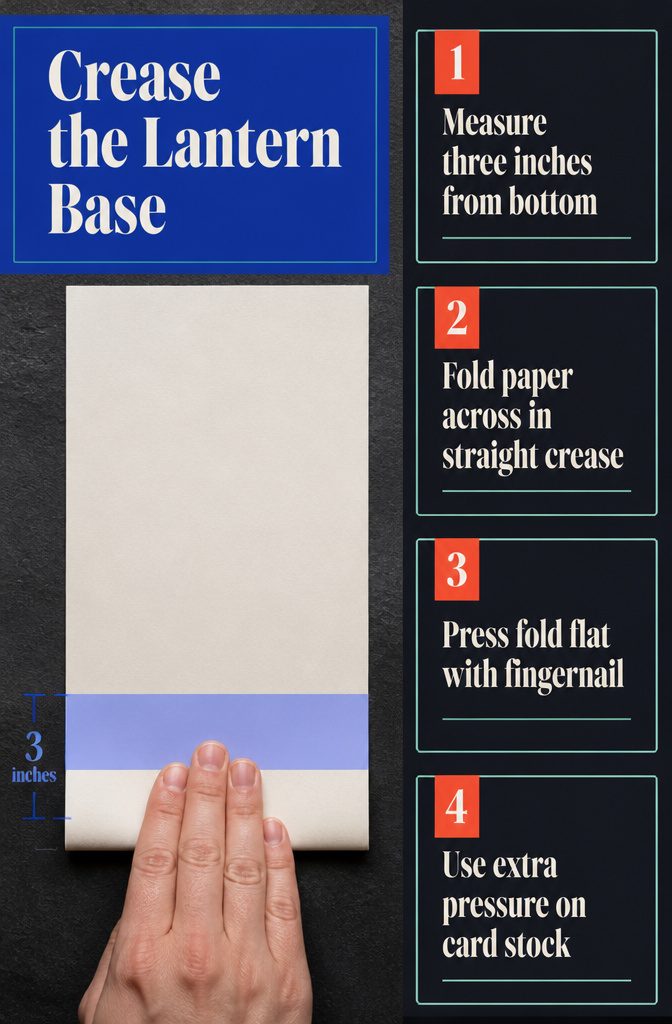
About 3 inches from the bottom edge, fold the paper all the way across in one long, straight crease.
Press it flat. This fold marks where the fringe cuts stop in the next step, and it sits low enough to give the finished lantern a stable base without taking up too much of the decorative space above.
The measurement matters more than it looks like it should. Fold too high and the fringe ends up too short to overlap properly when you bring the cylinder together.
Too low and you lose structural support. Three inches leaves enough material below the fold to form a solid platform that holds a tea light without tipping.
Run your fingernail along the crease if the paper fights back. Construction paper usually folds clean on the first pass, but card stock needs more pressure to stay put.
3. Cut the Fringe
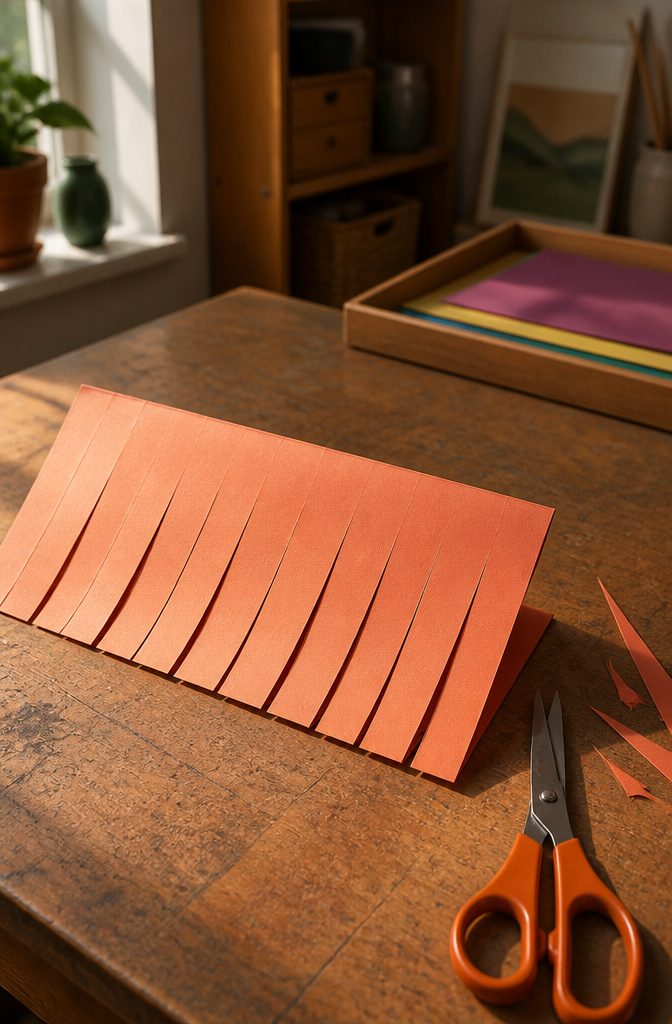
With the paper folded, make cuts about 3 inches apart, starting from the bottom edge and stopping at the fold line.
That spacing creates squares of fringe that will overlap neatly when you form the base of the lantern. The cuts should run straight up to the fold, parallel to each other, across the entire width of the paper.
If you’re working with younger children, wider strips are easier to manage.
Cuts up to 1 inch apart give them less precise work and still create enough fringe to secure the base. The lantern will look a little bushier at the bottom, but the structure holds just as well.
4. Add Cutouts and Tissue Paper
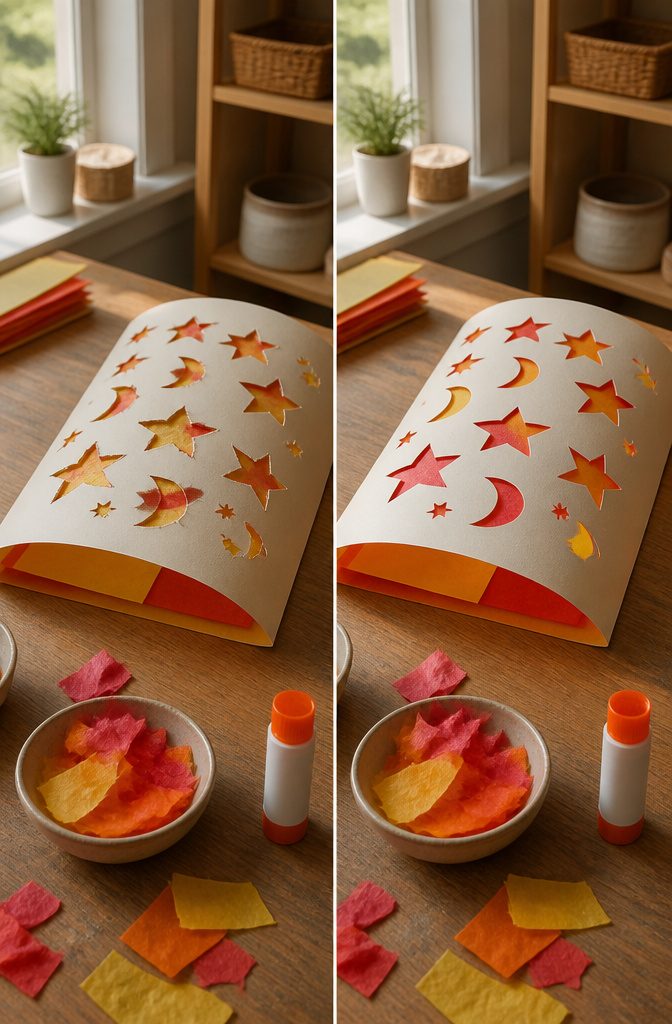
Cut shapes from the top portion of the paper if you want light to show through patterns.
Suns, moons and stars fit the theme, but any shape works. An adult may need to help with this step if you’re working with a child.
On the inside of the lantern, glue tissue paper over each opening.
The tissue keeps the structure solid while letting light through in color. I like to match the tissue to whatever palette I used in the decoration step, but contrasting colors can look just as good.
This step is optional.
If you skip it, the lantern still functions, you just lose the stained-glass effect where light filters through the cutouts. The choice comes down to whether you want a solid glow or patterned light.
5. Form the Cylinder and Base
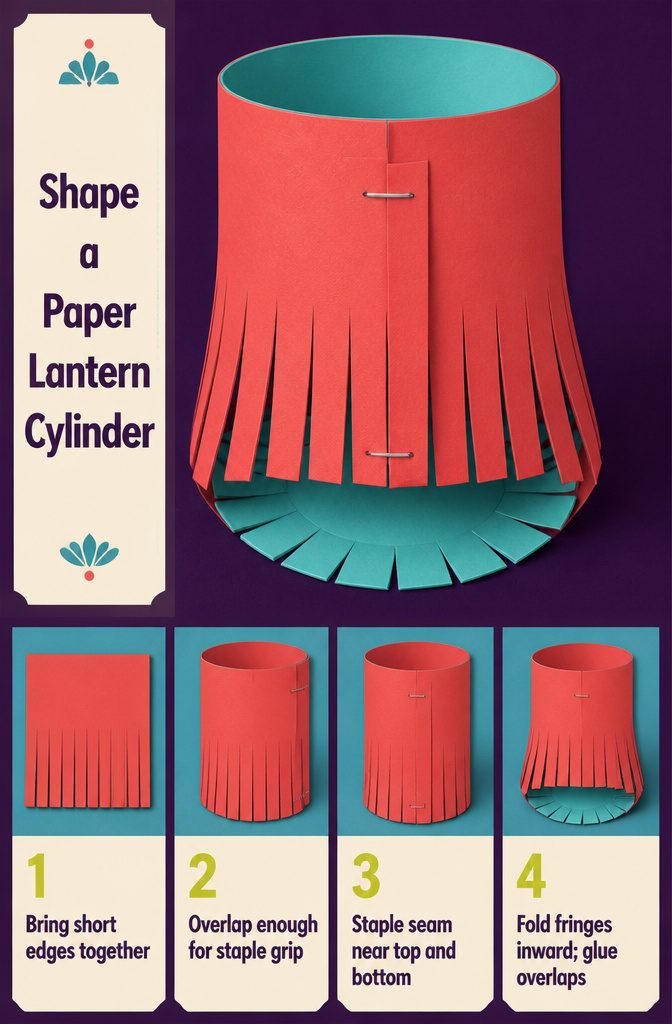
Bring the short edges together to close the paper into a cylinder, overlapping them just enough that a staple will catch both layers.
Place one staple near the top of the seam and another near the bottom to hold the shape.
The fringes at the base now hang inward like spokes. Fold each one down flat toward the center, overlapping slightly with the next, until you have formed a solid circular base.
A dab of glue between each overlapping fringe keeps them from lifting once the adhesive sets. The cylinder stands upright now, open at the top and closed at the bottom, ready for a handle and light.
6. Attach a Handle
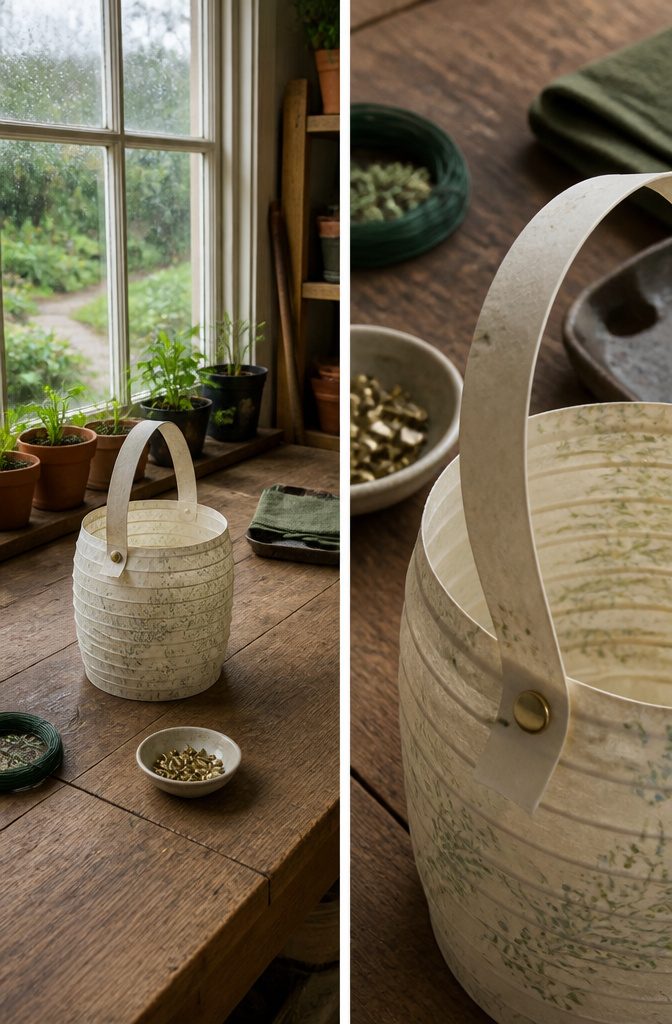
A paper strip works fastest. Cut one at least ½ inch wide and 12 to 16 inches long, and fasten each end to opposite sides of the lantern with paper brads.
The brads punch through cleanly and hold without glue drying time, which matters when you’re assembling more than one.
Wire makes a sturdier handle if the lantern will hang outdoors or hold a heavier battery candle. Floral wire around ¼ inch thick bends easily but keeps its shape once formed.
Poke the wire through one side of the lantern near the top edge, loop it over to form the handle arc, then push the end back through the opposite side.
Twist the wire tail back on itself a few times to lock it in place. The twist sits flat against the inside of the lantern, so it won’t catch if you’re reaching in to swap out a candle.
7. Add a Candle and Use Safely
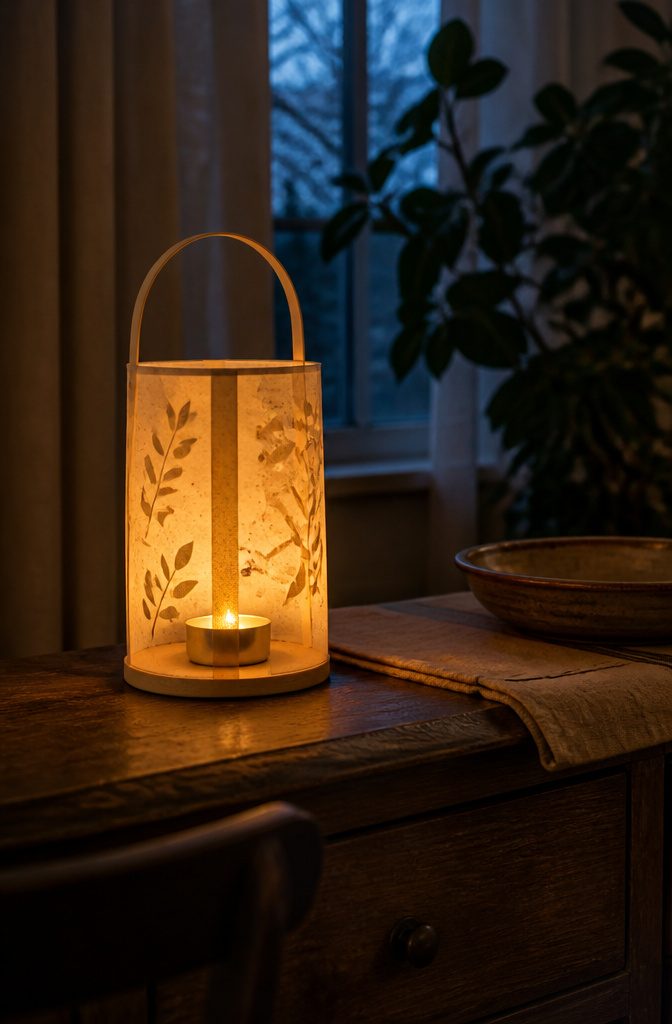
I set the candle in a small metal or plastic cup — a tea light holder works, or even a shallow jar lid — and fix it to the lantern base with a loop of masking tape underneath.
The cup catches wax and keeps the flame from touching paper directly.
Flameless LED tea lights skip the fire risk entirely and still give you that warm glow through the paper, which matters more when kids are handling the lanterns or you’re hanging several in a row.
Real candles need an adult present from the moment you light them.
No exceptions, and never leave a lit lantern alone in a room. Paper burns fast once it starts, and the fringe or any cutout near the top heats up faster than you expect.
I keep a small dish of water next to any lantern I’m using with a real flame, just in case.
Paper Choices and What They Change
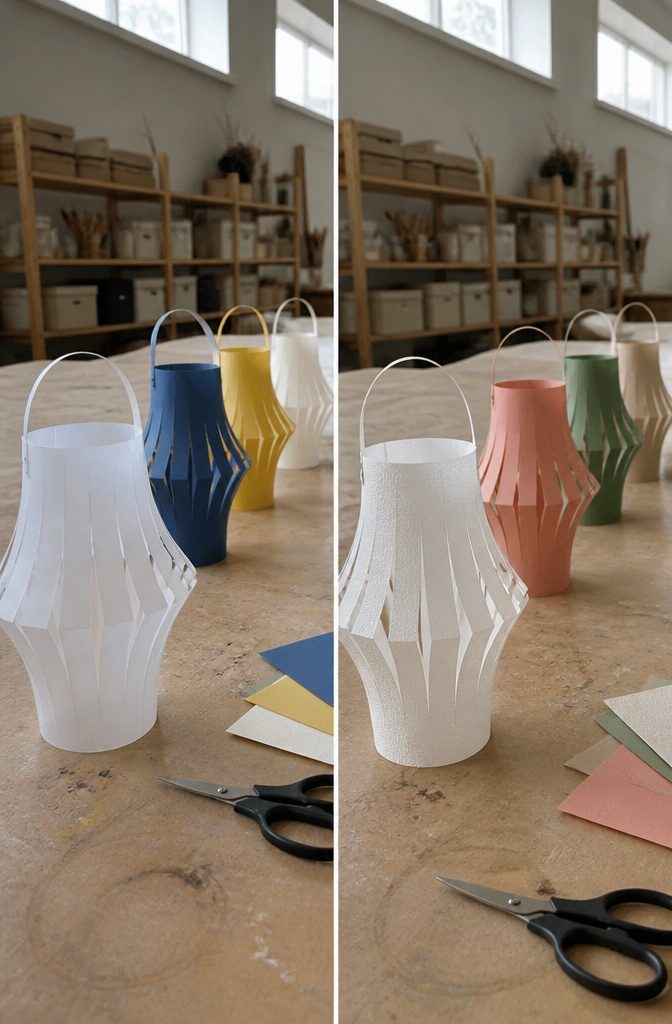
Copy paper is what most craft guides reach for: it cuts easily, folds without cracking, and an 8½ by 11-inch sheet makes a lantern just wide enough to hold a tea light.
Construction paper and cardstock both work if you want the lantern to hold its shape through a few uses rather than one evening.
Heavier paper stands up better when handled, but it also takes more effort to cut — something that matters if a child is doing the folding.
Watercolor paper is thick enough to paint on without buckling, though you’ll feel the extra weight when you crease the folds.
I tend to pick based on who’s making it: copy paper for anyone under seven, cardstock if I want the lantern to survive the week.
Variations With a Yellow Liner
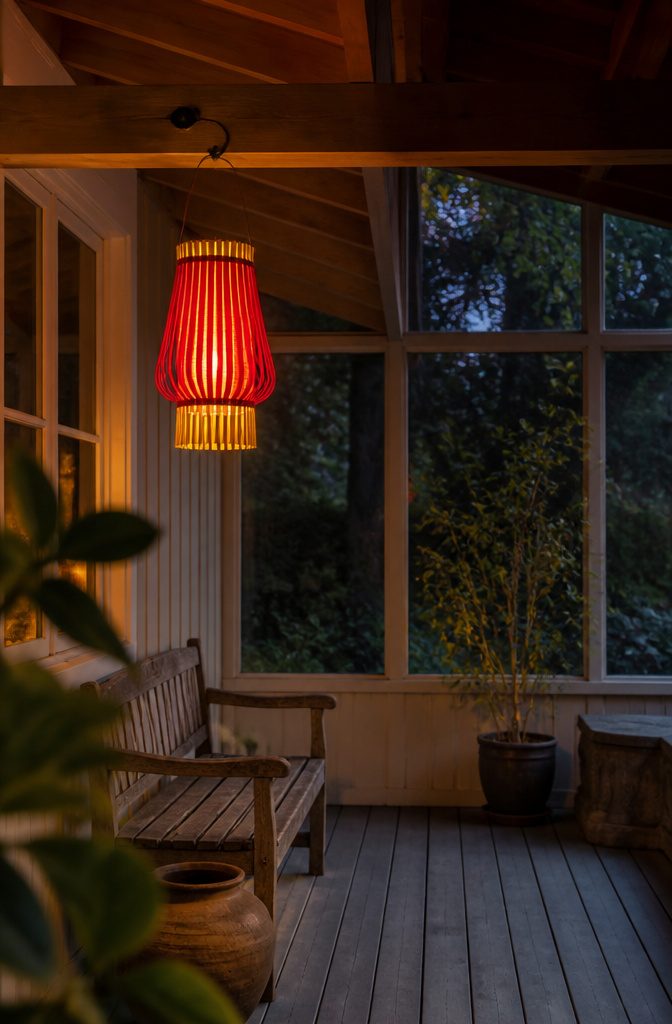
A yellow liner behind the fringe gives you a layered glow that looks lit from inside.
Cut your yellow paper into fringe about 2 inches deep, spacing the cuts about ⅛ to ¼ inch apart, then roll it into a tube with about ¾ inch overlap and glue or tape the seam.
The tube needs to slip through the bottom opening of your finished red lantern, so size the diameter to fit.
Slide the yellow tube up inside the lantern with the fringe at the bottom. Line the top edge of the tube with the top of the lantern and staple it once to hold.
Push the lantern body up so the yellow fringe shows below the red fringe, then staple again at the top to lock it in place.
The color separation reads as depth, and the double layer of fringe catches more light when you hang it.
13 Lanterns From Recycled Materials
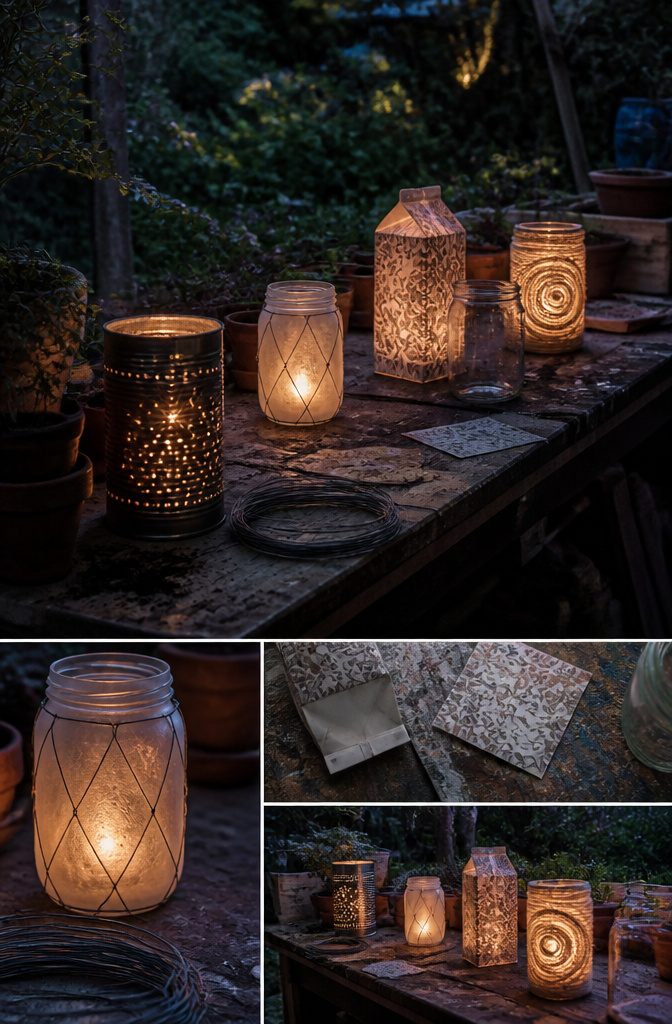
A few recycled items and basic craft supplies can be turned into working lanterns without buying anything new. The material you already have decides the approach.
- Tin cans punch into hanging lanterns with a hammer and nail, then thread with wire. Swap the ribbon seasonally for year-round use.
- Glass jars — baby food size to mason jar — become frosted garden lanterns with spray paint and wire, or sea-glass versions with rope wrapped around the outside.
- Milk cartons fold into Japanese-style paper lanterns with glue and decorative paper. Change the paper pattern for each holiday.
- Wine bottles work as candle holders when decorated with round stickers and paint, then hung with wire or set on a table.
- Cardboard soda cartons cut into party lanterns that throw soft light. Design for the season or keep it simple.
- Plastic water bottles turn into cut-paper lanterns using a free template or your own design.
- Toilet paper rolls lined with colored paper make polka-dot lanterns that string together for indoor or outdoor display.
- Yarn-wrapped jars sprayed with paint, then unwrapped, leave a relief pattern that glows when lit.
- Clay pots or baskets pair with battery-operated lights for outdoor hanging lanterns that need no wiring.
Moroccan painted jars use glass paint in small dabs to mimic market lanterns. The paint goes directly on clean glass.
Making Lanterns With Children
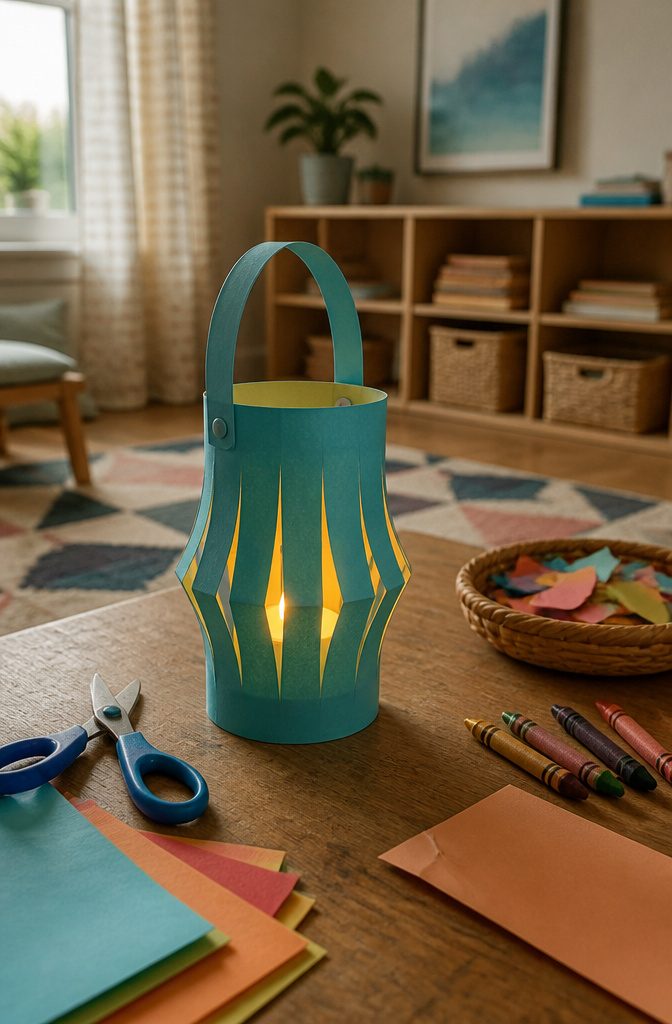
This project works well for children as young as pre-K, though you’ll want to simplify a few steps.
Wide strips — up to an inch across — are easier for small hands to cut than the narrow ones that make a delicate-looking lantern, and the cutting itself gives younger children a chance to practice fine motor skills.
An adult should handle any step that involves lighting a candle and stay in the room the entire time the lantern is lit.
You can skip the candle question altogether by using a battery-operated flameless candle instead, which makes the finished lantern safe as a nightlight.
The basic fold-and-cut structure stays the same no matter the age; you’re just adjusting strip width and supervision to match what the child can handle.
Frequently Asked Questions
How do you make your own lantern?
Cut heavy paper about 9×12 inches, decorate it with crayons or watercolor, then fold it 3 inches from the bottom edge.
Cut fringe strips from the bottom up to the fold line, bring the short edges together to form a cylinder, and staple the seam.
Fold the fringes inward to create a base, attach a handle with paper brads or wire, and place a flameless LED tea light inside.
How do you light a lantern?
Set a flameless LED tea light in a small metal or plastic cup and fix it to the lantern base with masking tape.
If using a real candle, place it in a holder to catch wax and keep the flame from touching paper directly, and never leave it unattended. An adult must be present the entire time a real candle is lit.
How to make a lamp for a school project?
A paper lantern works well for school projects and takes about 30 minutes.
Decorate a 9×12-inch sheet of construction paper, fold it 3 inches from the bottom, cut fringe strips to the fold line, then roll it into a cylinder and staple the seam.
Fold the fringes inward to form a base, add a paper handle with brads, and use a battery-operated tea light for safety.