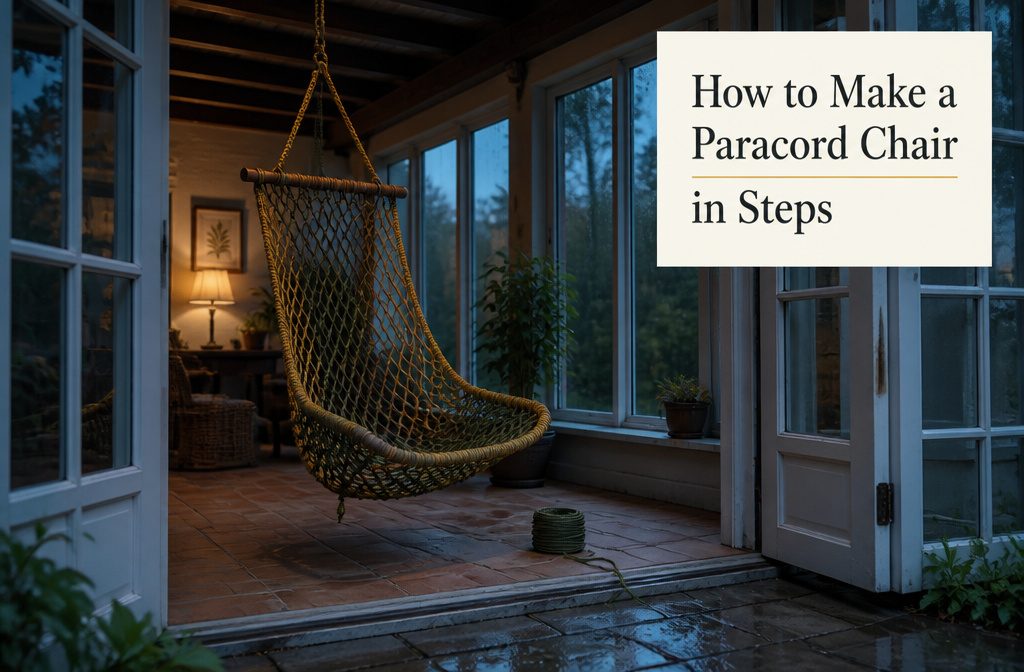
A frame reweave takes about 400 feet of paracord and four hours to complete.
A hanging net chair uses nine 8-foot cords and builds in under 30 minutes. Most people skip the stretch test and find out too late that standard 550 paracord sags enough under body weight to turn a flat seat into a hammock.
1. Strip and Wrap an Existing Chair Frame
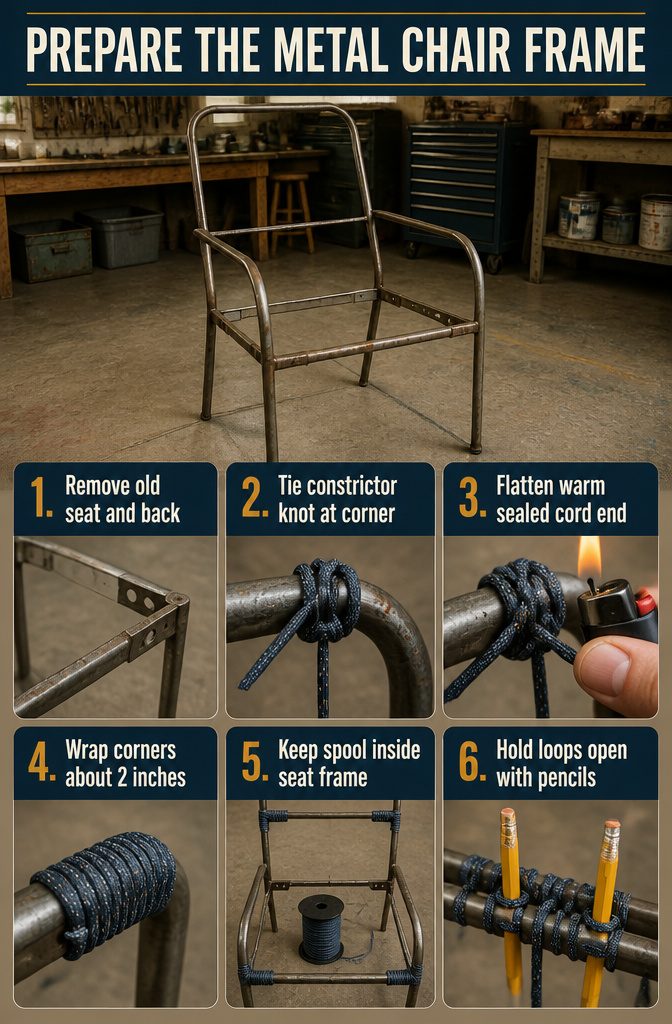
- Strip the chair down to its metal frame by cutting away the old seat and backrest material. Leave only the bare structure.
- Start with a constrictor knot at one corner of the front bar: bring the cord end over the top, around one side, cross over to the other side, loop around again on the same side, then pass it over and push it underneath the center of the twisted cord. Pull tight and cut the excess.
- Burn the cut end with a lighter to seal it, then press the melted edge against the knot while it’s still warm to flatten it.
- Wrap the cord around that corner up to about 2 inches wide, then cut, tuck the end under the wraps, and seal it with the lighter. Repeat on the other front corner and both upper corners of the backrest frame.
- Keep your paracord spool on the ground inside the seat frame throughout the weave — you’ll pull from it as you work rather than cutting lengths in advance.
- Use two pencils or crochet hooks as placeholders while weaving. Source 1 calls for a long flat wooden stick; Source 2 opts for two pencils or hooks. Either works to hold loops open while you thread the next pass through.
2. Weave the Seat and Back Bars
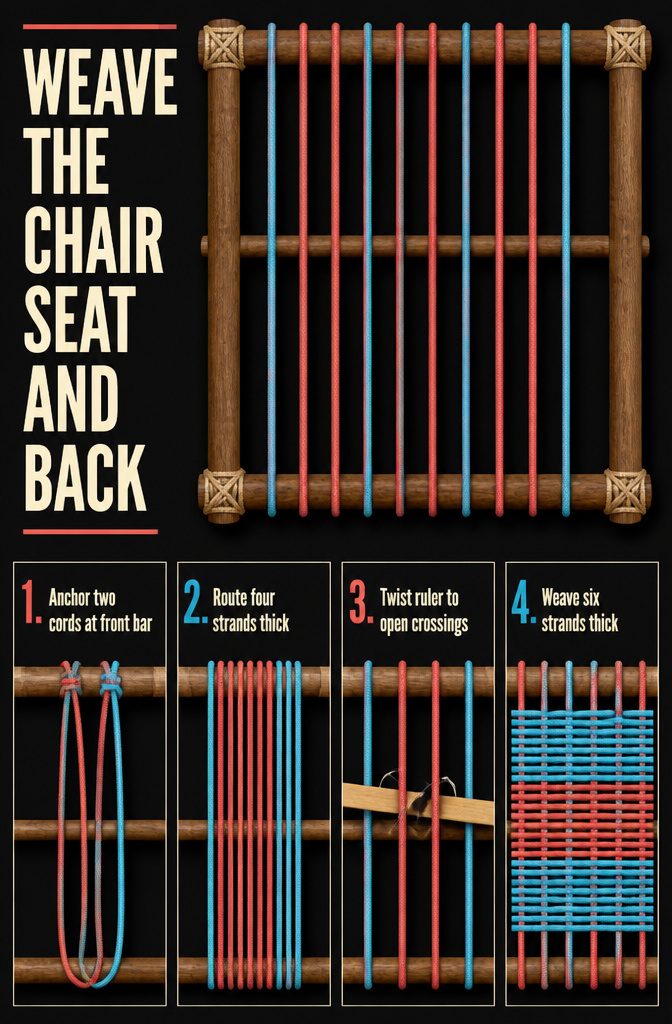
Weave the Seat and Back Bars
- Tie two cords at the top of the front bar’s wrapped corner using a constrictor knot, then pull both strands down and under the bottom middle bar. Bring them up and over the top bar, wrap once more, loop over the middle bar twice, then pull all the way through the front bar again.
- Route the cords back and forth until you reach the other side. For the vertical rows, work four strands thick; the pattern builds faster than you expect once the rhythm clicks.
- Insert a flat wooden ruler or stick through the crossings where the cords overlap, then twist it to open a gap. That twist gives you room to push the horizontal cord through without fighting every crossing.
- Start the horizontal rows the same way you began the vertical ones, but work these six strands thick. Avoid pulling so tight the chair will not open, and stop before you crowd the corners.
3. Tie Upper and Lower Suspension Lines Between Trees
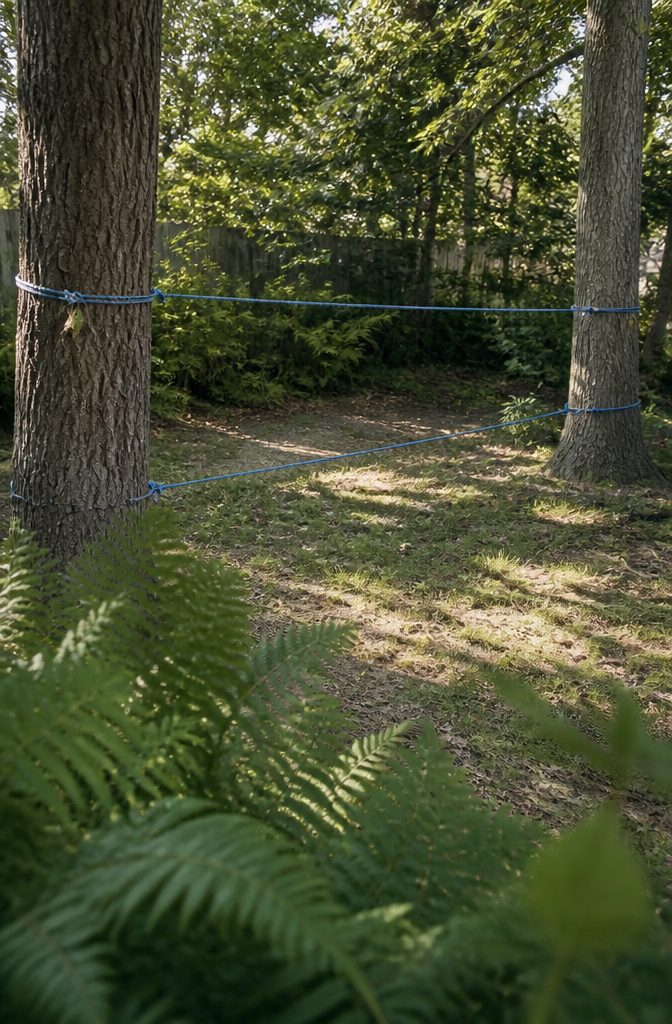
- Find two trees standing 5 to 6 feet apart. That distance gives the chair enough width to hold you comfortably without spreading the suspension too far.
- Cut two 6-foot lengths of paracord for the horizontal lines.
- Tie the first cord between the two trees at chest height or slightly above. This becomes your upper suspension line.
- Tie the second cord 4 feet below the first. Measure that gap vertically — the spacing sets how tall the net hangs and where you’ll eventually sit.
- Pull both lines taut and secure them with a bowline or two half-hitches around each tree. The lines should hold firm when you press them lightly with a finger, but they don’t need to be stretched tight.
- Check that both cords run level. Uneven lines tilt the finished chair and put unequal strain on the net.
4. Attach and Space the Dropper Lines
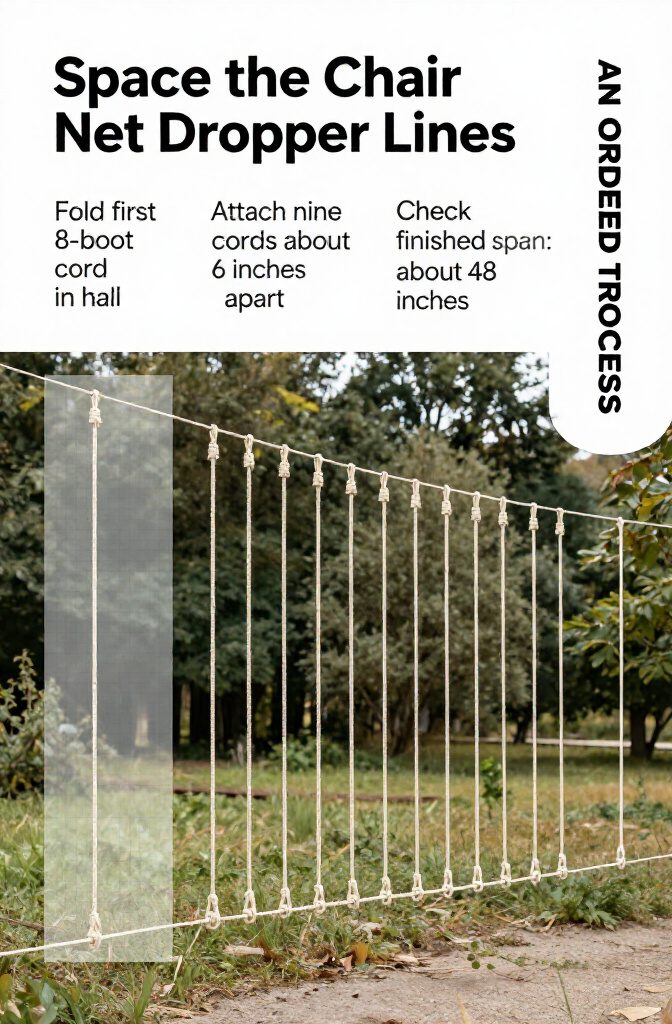
- Fold the first 8-foot cord in half and attach it to the upper line about 4 inches from the tree using a lark’s head knot: slip the folded loop over the line, then pull the two loose ends through the loop and tighten.
- Attach the remaining eight cords one at a time using the same method, spacing each approximately 6 inches apart along the line.
- When all nine cords are attached, measure end to end — the row of dropper lines should span about 48 inches total.
The spacing holds the net shape once you start knotting rows. Too tight and the diamonds bunch; too loose and the seat sags through gaps you can’t tighten later.
I aim for consistent spacing by eyeballing the distance rather than measuring each one with a tape, checking the total span at the end to confirm I’m close.
5. Knot the Net Into Diamond Rows
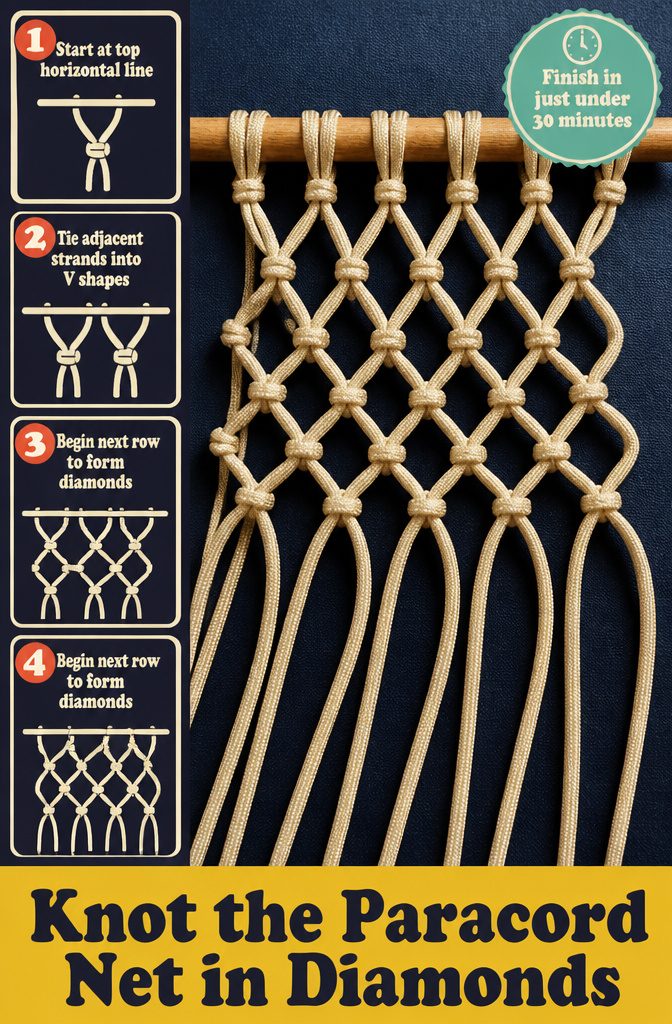
- Start at the top horizontal line and work downward, taking the inside strand of the first dropper cord and the first strand of the second cord. Pull them together into a V shape and tie them with an overhand knot.
- Move to the next pair: take the second strand of the second cord and the first strand of the third cord, then tie another overhand knot. Keep the knots in an even line so the V shapes at the top stay roughly the same size.
- Continue across the row, knotting adjacent strands together until you reach the last cord and have one strand left over.
- Begin the second row by taking the outside strand of the first cord and tying it to the first strand of the first knot in the row above. You’ll see diamond shapes forming as you work down.
- Keep tying knots in rows, maintaining the diamond pattern, until you’re a few inches from the bottom horizontal line. The whole build takes just under 30 minutes.
6. Attach the Net to the Bottom Line and Finish Corners
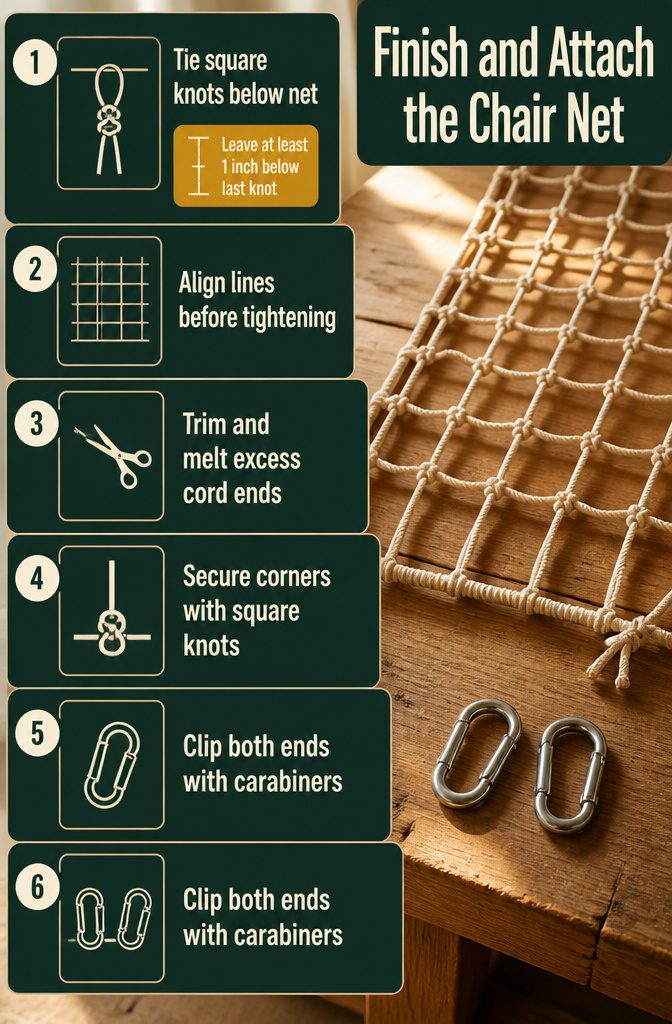
- Run the tag ends in front of the bottom line and back around, then tie a square knot on each side to lock the net in place. The bottom line should sit at least an inch below the last knot so the net hangs taut without bunching.
- Check that the lines align evenly across the width before tightening the square knots. If one side hangs lower, adjust the tension now rather than after the knots set.
- Trim any excess cord past the knots and melt the cut ends with a lighter to prevent fraying. Hold the flame just long enough to fuse the fibers without charring them.
- Secure the corners by tying off any loose dropper lines to the bottom line using the same square-knot method. This keeps the net square and prevents gaps at the edges.
- Clip the ends together by running a carabiner through each loop on the bottom line. This creates the lower attachment point for hanging.
- Flip the chair around and repeat with a second carabiner on the opposite end. Both carabiners should carry equal weight once the chair is suspended.
Frame Reweave vs. Hanging Net
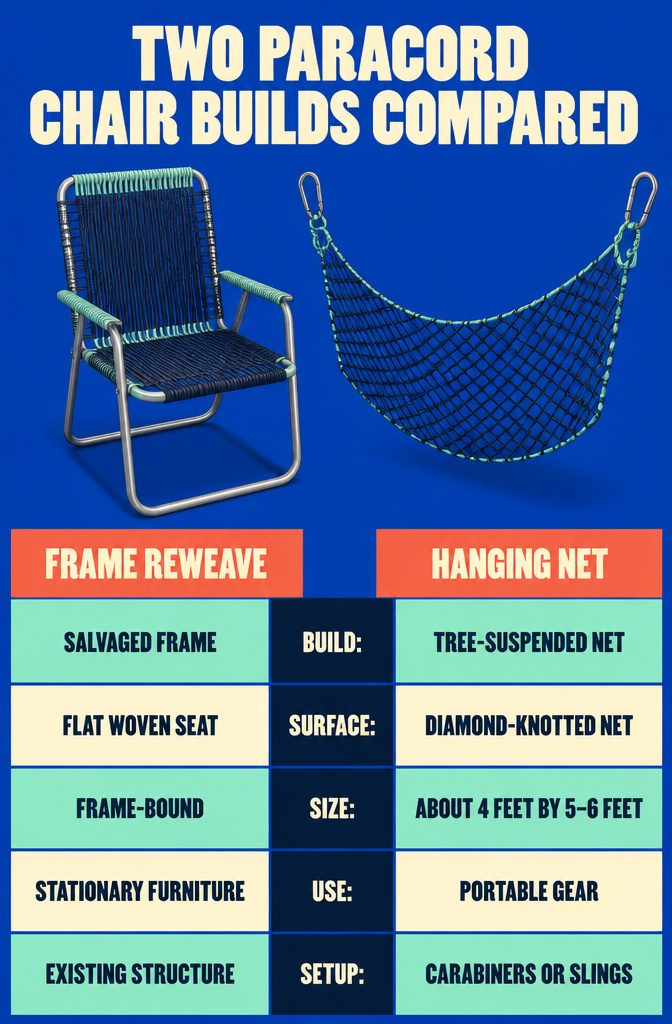
The two projects that rank under this search sit at opposite ends of the paracord chair spectrum.
Sources 1 and 2 walk through reweaving a salvaged metal lawn chair — you gut the torn fabric seat and back, wrap the frame corners, then lay vertical cords from top rail to bottom and weave horizontal cords across.
The result is a stationary chair with a flat woven surface, thickness controlled by how many strands you run in each direction.
Sources 4 through 6 describe a completely different build: a diamond-knotted net about four feet wide and five to six feet long, suspended hammock-style between two trees with carabiners or slings. One is furniture repair with structure already in place.
The other is portable gear you tie off and take down. Same material, different category.
Paracord and Utility Rope
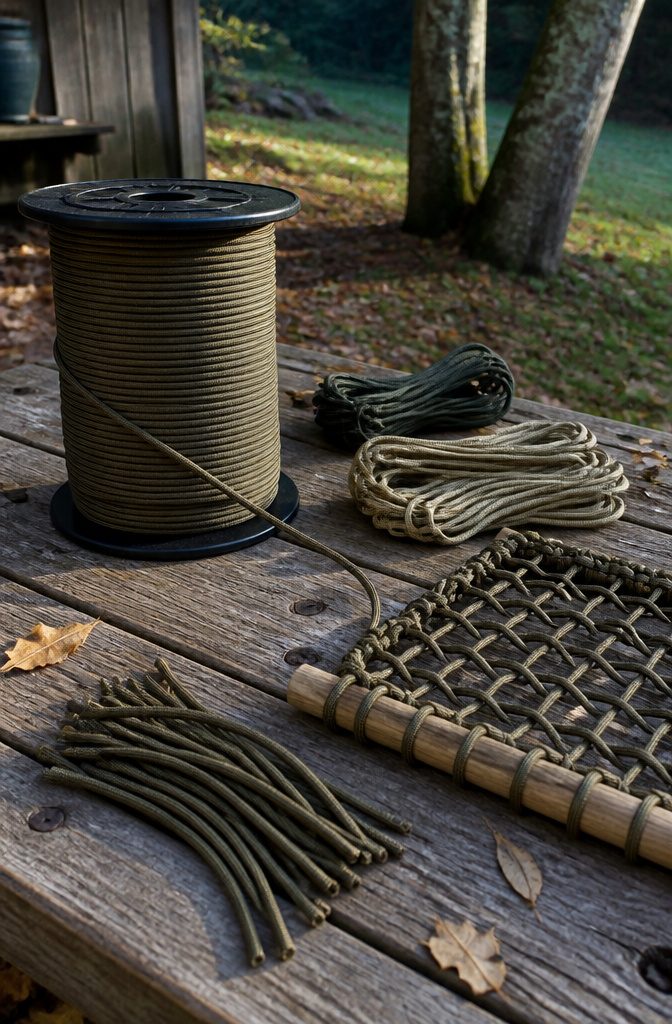
The frame reweave takes a little less than 400 feet of 3/16-inch paracord or utility rope, which is about 130 yards from a single spool. The hanging net chair builds smaller, nine 8-foot lengths and two 6-foot lengths for the whole seat.
Standard mil-spec nylon paracord has a 30% elongation design, but field testing puts a single strand around 25 pounds without noticeable stretch, which is plenty for a distributed weave.
Polyester paracord stretches less if that matters to you. Sailboat line from New England Ropes or Sampson is another option, made in low-stretch versions and meant to live outside.
Samson 5/32-inch Prestretch is one specific product that shows up in similar builds. I’d stick with 3/16-inch for the frame job because the diameter fills the space better and the extra bulk makes the weave easier to keep even.
Scissors, Lighter, and Placeholders
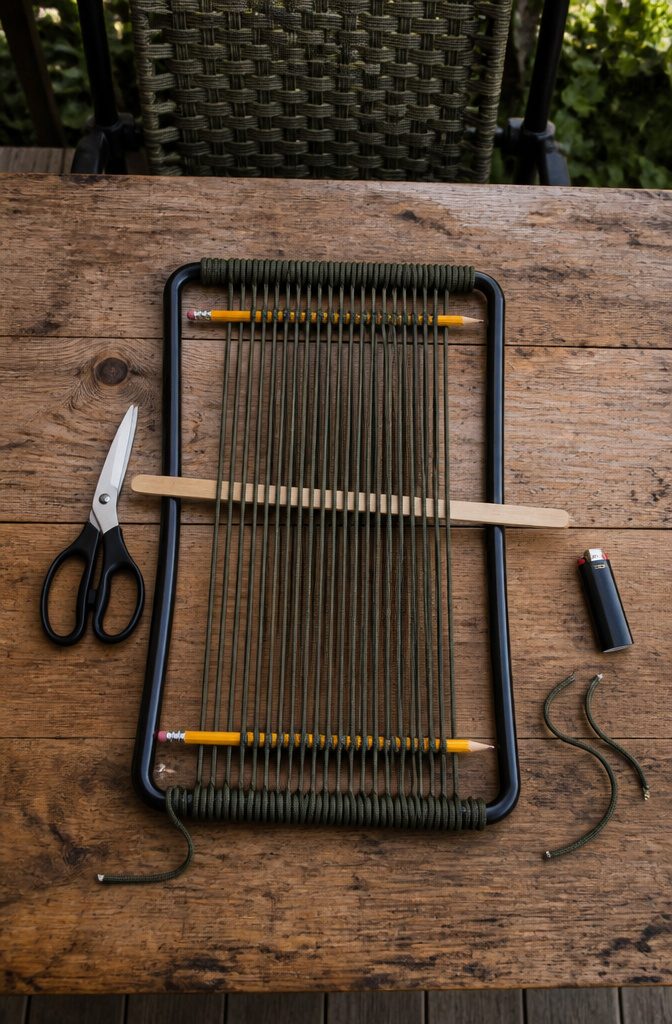
You’ll need a few basic tools plus a couple of placeholders that hold the weave steady while you work.
- Scissors and a lighter to cut and melt the cord ends after each knot — this seals paracord so it won’t fray and keeps the finish clean on both the frame reweave and the hanging-net builds.
- Two pencils or crochet hooks as placeholders during the chair-frame reweave. You slide one into each loop at the top and bottom bars, pull the cord tight around it, then move the placeholder forward into the next loop as you go. This keeps tension even without having to hold it by hand.
- A long flat wooden stick (a ruler works) for spacing during the cross-weave step. You twist it through the vertical cords to make room, then thread the horizontal cord through the gap it opens.
How Long the Build Takes
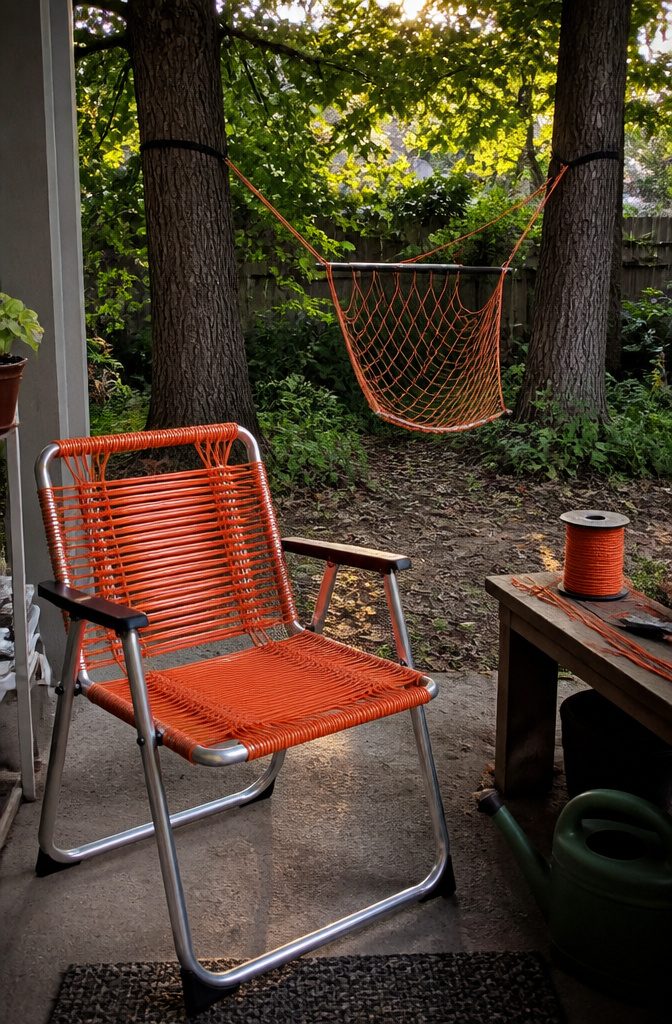
The hanging net chair between two trees runs just under 30 minutes once you have your lengths cut and your trees picked.
That timing assumes you know the knots and you’ve got two trees about five feet apart, which is easier to find in a yard or campsite than it sounds.
The frame reweave is a different animal. Plan on about four hours to strip the old material and weave fresh paracord across the seat and back bars of a lawn chair frame.
Most of that time goes to the weaving itself: wrapping each pass, threading loops, keeping tension even without pulling so tight the chair won’t fold.
The knots at the start and finish take minutes; the repetition in the middle is where the hours go.
Stretch and Testing Before You Commit
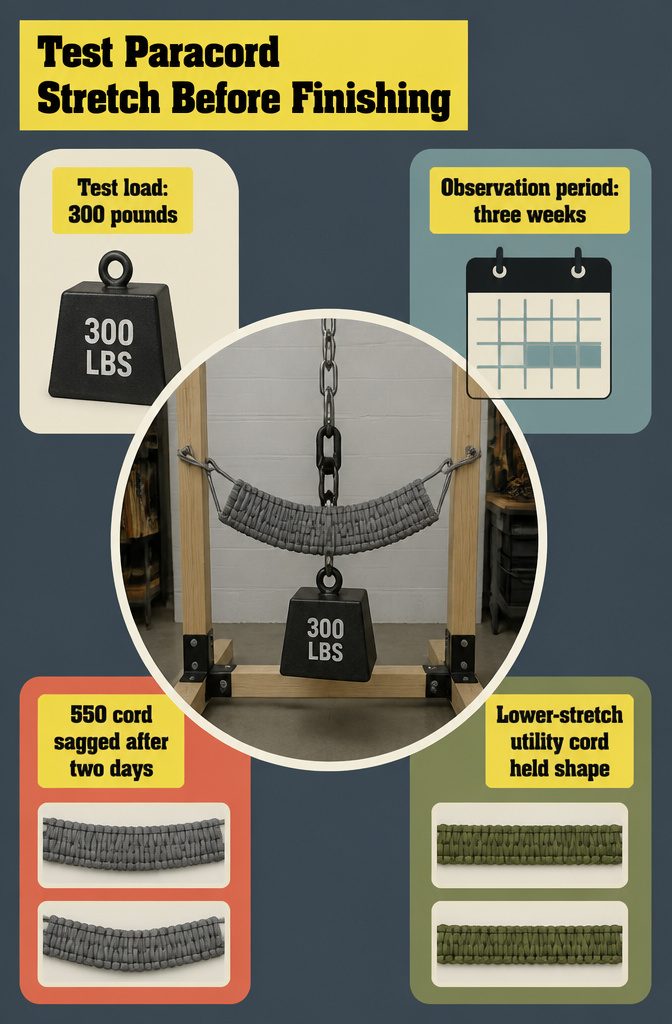
I put three hundred pounds on a test weave and let it sit for three weeks before I committed to finishing a whole seat.
Paracord stretches, and I wanted to see how much. The section I tied as a trial hung lower after two days than it did the hour I finished it, and it kept creeping.
Military-grade suspension-line cord, the kind sold as 550 paracord, stretched enough that I scrapped the first attempt and switched to a lower-stretch utility cord for the second build.
The difference showed up fast: the utility cord held its shape where the 550 would have turned into a hammock that dumped me toward the floor.
If you skip the weight test, you find out the cord was too stretchy only after you have already woven the whole thing.
Hanging and Tree Protection

The net hangs between trees using the upper and lower suspension lines you tied in an earlier step, but wrapping paracord directly around bark can make adjustments harder and may damage the tree over time.
Tree straps spread the load and protect the bark, and they give you a faster setup when you need to tighten or reposition the chair.
Once the straps are in place, carabiners hook the suspension lines to the loops without having to retie anything.
A light pair of climbing-rated carabiners weighs around 60 grams, so they add almost nothing to your pack if you’re carrying this setup into the backcountry.
If you don’t have straps on hand, you can still wrap the paracord around the tree and tie it off, but plan to spend a few extra minutes getting the tension even.
The same carabiners clip into the suspension lines either way, so switching to straps later is straightforward once you decide the chair is permanent enough to be worth the upgrade.
Frequently Asked Questions
How much paracord do I need for a chair?
A frame reweave takes just under 400 feet of 3/16-inch paracord or utility rope, which is about 130 yards from a single spool.
A hanging net chair between two trees uses much less: nine 8-foot lengths and two 6-foot lengths for the whole seat.
Is paracord good for a chair seat?
Standard 550 paracord stretches enough that a finished seat will sag lower over the first few days, and it keeps creeping after that.
Test by putting 300 pounds on a sample weave and letting it sit for 3 weeks. Lower-stretch utility cord holds its shape better and is a safer choice if you want the seat to stay flat.
How long does it take to make a paracord chair?
A hanging net chair between two trees takes just under 30 minutes once you have your lengths cut and your trees picked.
A frame reweave on a lawn chair takes about 4 hours: most of that time goes to the weaving itself, not the knots at the start and finish.
How to make a chair step by step?
Strip a metal lawn chair down to its bare frame, wrap the corners with paracord, then weave vertical cords from top rail to bottom and horizontal cords across.
For a hanging net chair, tie two suspension lines between two trees 5 to 6 feet apart, attach 9 dropper cords along the top line, knot them into diamond rows, and clip the bottom to the lower line with carabiners.