
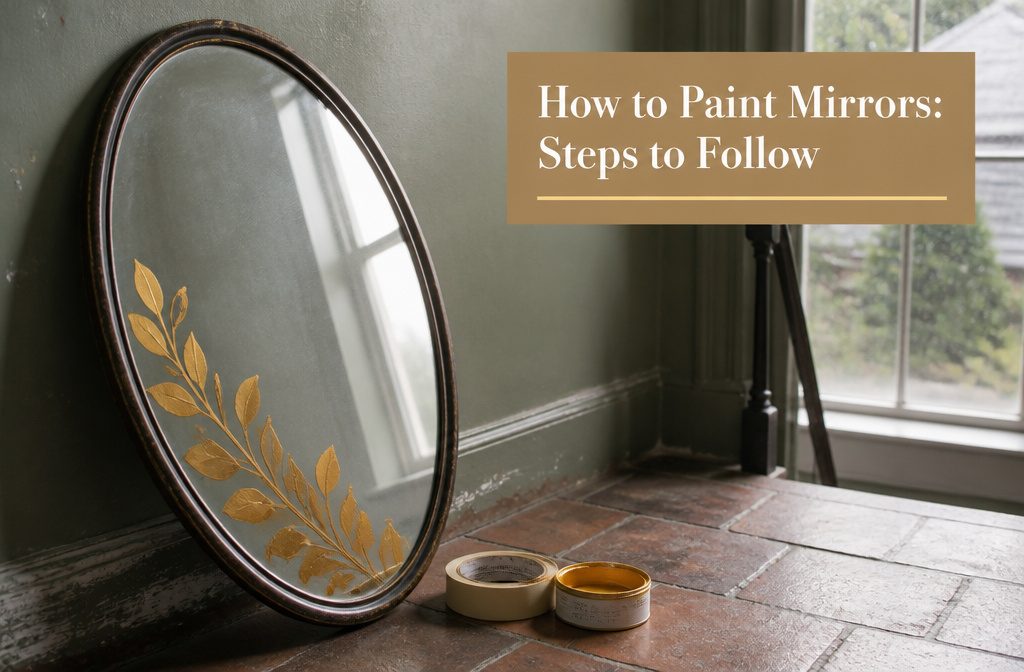
You can paint a mirror’s glass or frame in an afternoon with acrylic paint, spray paint, or chalkboard coating, but the surface decides whether the finish lasts or peels in the first week.
Most people skip the adhesion step that makes paint stick to smooth glass, or they pull masking tape after the paint fully cures and tear the edge they worked to keep sharp.
White gesso goes on glass before the color if you want designs that pop, and chalkboard paint needs 3 days of cure time before you write on it.
Decide Whether You Mean the Glass or the Frame
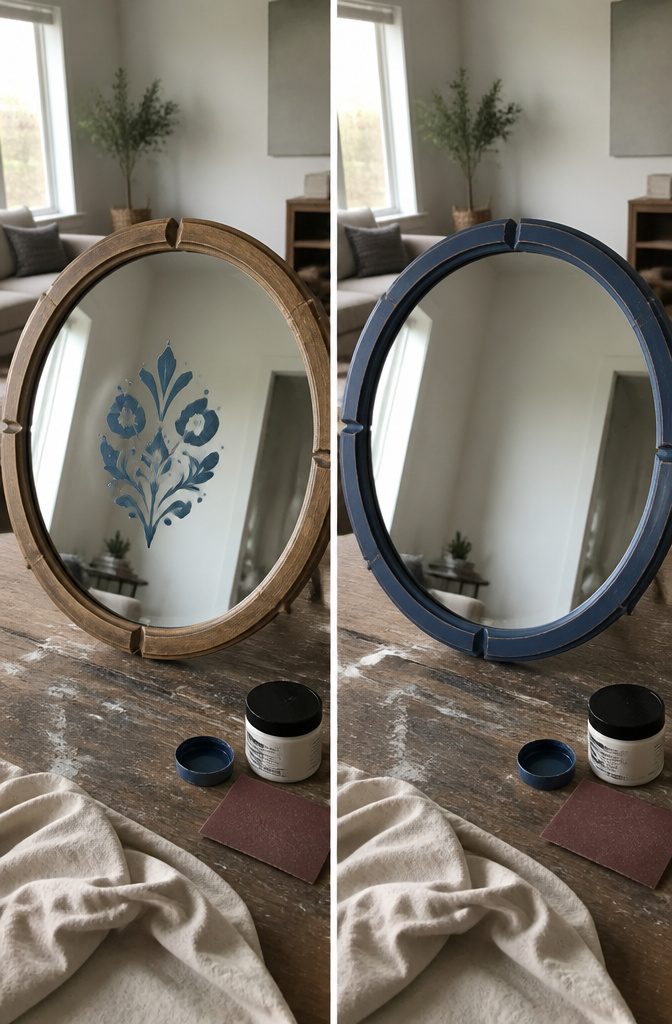
The first question to settle is what you mean by painting a mirror. One route is decorating the glass itself with designs, patterns, or even turning it into a chalkboard.
The other is painting the frame around the glass. The two take different materials and different prep.
For designs on the glass, acrylic paint or acrylic paint pens work best.
Regular wall paint won’t stick to smooth mirror surfaces. If you want a chalkboard instead, chalkboard paint in brush-on or spray form covers the glass and gives you a writable surface.
A light sanding with medium-grit sandpaper before you paint helps the coating grip, and an adhesion primer like Kilz keeps it from peeling over time.
Don’t try to cover the frame in one coat – this will likely lead to dripping and running. Do several thin coats.
— wikiHow
Frames are more forgiving.
Chalk paint, spray paint, and decorative finishes all work. If the frame has a heavy lacquer or shiny finish, you can sand it to give the paint something to hold onto, or skip sanding and use a bonding primer instead.
That means less dust and no risk of damaging the existing finish.
Gather Your Supplies
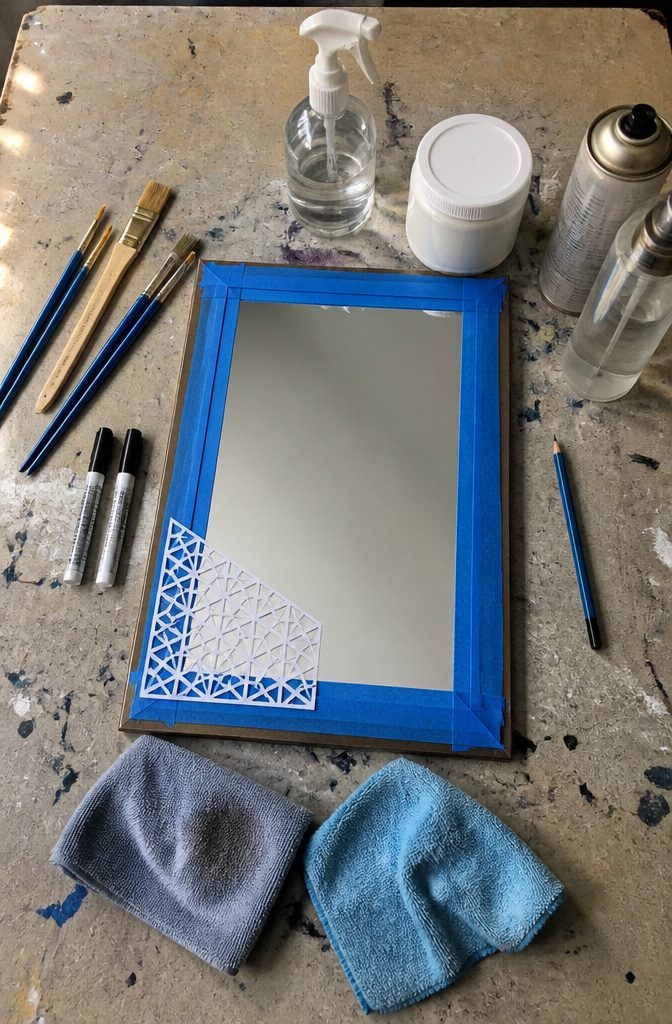
You’ll need different supplies depending on whether you’re painting the glass or the frame, but most projects start with these:
- Acrylic paint for smooth coverage on glass — it dries quickly and blends well, so you can layer colors without waiting all day
- Acrylic markers if you want fine lines, lettering, or small details without dragging a brush
- Brushes in a few sizes, from a fluffy wax brush down to something narrow enough for edges
- Painter’s tape to protect the parts that should stay clear
- Two microfiber cloths and glass cleaner to get grease off before you start
- Stencils if you’re after even patterns or text — mandalas, geometric shapes, motivational quotes all work
- Fixative spray or clear varnish to seal the design once it’s dry
- Mirrored spray paint (not silver) if you want to add a light reflective mist over the whole surface at the end
White gesso goes on first if you’re painting directly on the mirror glass, and a water-soluble pencil helps you sketch the design before committing to paint.
1. Prepare Your Work Area
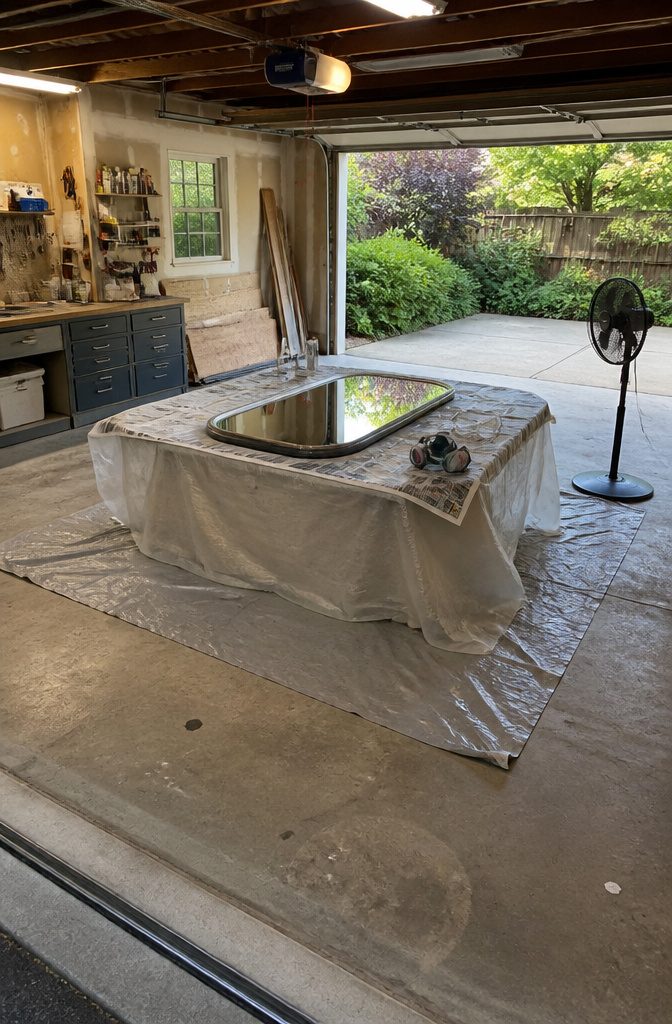
Lay the mirror flat on a completely covered surface before you start. Spray paint drips and runs on anything vertical, and a flat position keeps the finish even across the frame.
I work on newspaper or a tarp spread over a table or the garage floor — something large enough that overspray lands on the cover, not on anything you care about.
Ventilation matters more than most people expect. Spray paint fumes build up fast in enclosed spaces, so set up outdoors or in a garage with the door open and a fan running.
If you’re working inside without good airflow, a dust mask won’t cut it; upgrade to a respirator. Eye protection is worth wearing either way, since overspray has a way of drifting back toward your face on the first pass.
2. Remove or Protect the Mirror Glass
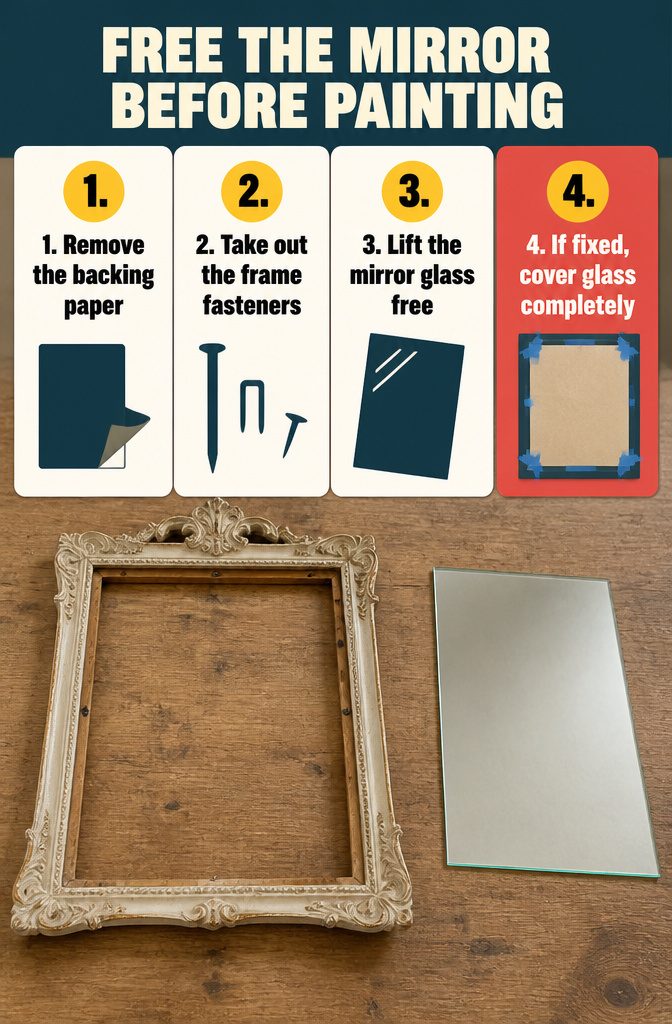
The safe play is removing the mirror from the frame entirely rather than taping around it.
Paint has a habit of slipping between glass and wood no matter how well you press the tape down, and once it gets in there it shows.
I pull the backing paper off first, then remove whatever is holding the mirror in place.
Sometimes it’s narrow staples, sometimes small nails or metal points, and older frames often use thin strips of wood nailed at the edges. All of them come out with a little patience, and the mirror lifts free.
If the mirror genuinely cannot be removed, mask the glass with heavy paper and painter’s tape instead.
Cover it completely and press the tape flat along the edge where frame meets glass. That setup works, but you’re trusting the seal every time you load the brush.
3. Clean and Prepare the Surface
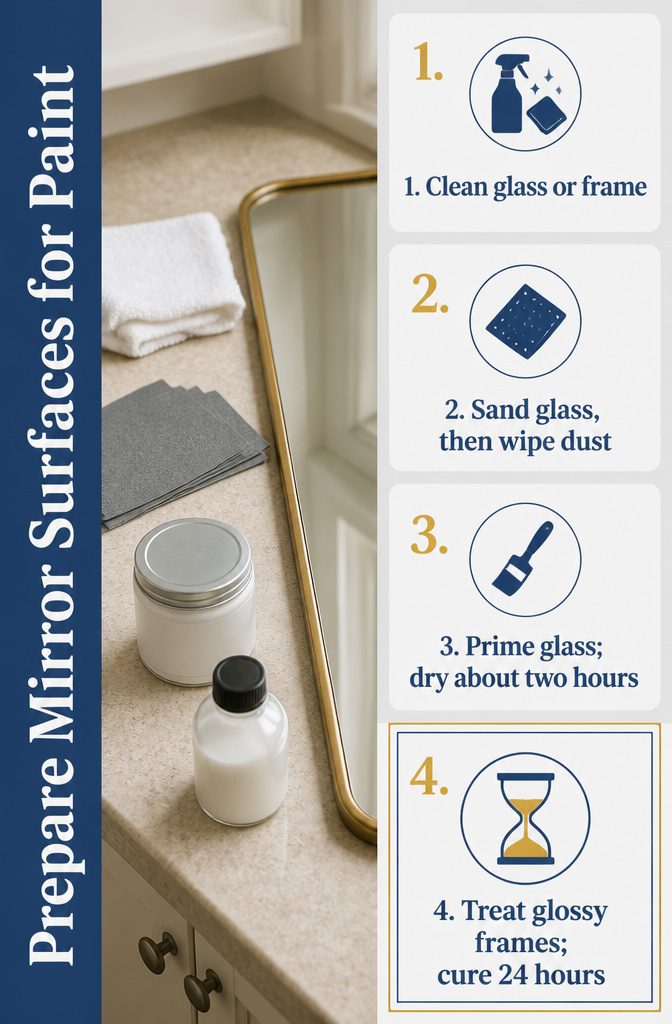
- Wipe the glass or frame down with glass cleaner, rubbing alcohol, or plain water to remove fingerprints, dust, and oils that stop paint from grabbing. A clean surface makes the difference between a finish that lasts and one that chips in the first week.
- If you’re painting the mirror glass itself rather than the frame, lightly sand the surface with fine-grit sandpaper to give the paint something to grip, then wipe away any dust with a damp cloth.
- Prime glass surfaces with a product meant for non-porous materials. Brush-on primer takes about two hours to dry before you can add paint over it.
- For glossy frames that you don’t want to sand, use an adhesion product designed for slick surfaces. One coat works, but let it cure for at least 24 hours before you paint. Skipping that wait leaves you with sticky, uneven coverage.
4. Plan and Mark Your Design
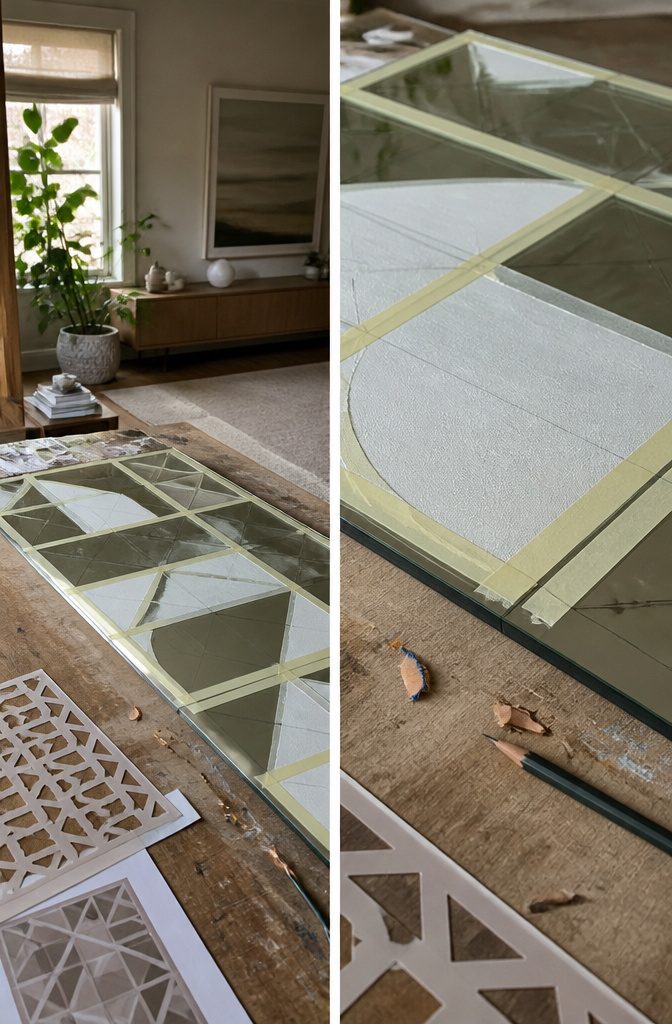
Before you lift a brush, you need to know where the paint will actually go.
Sketch your design with a water-soluble pencil directly on the glass if you trust your hand, or work it out on paper first and use that as a reference.
A pencil line on the mirror wipes off easily later, so you can adjust as you go.
Stencils work well for geometric or repeated patterns where precision matters more than spontaneity.
Painter’s tape does two jobs at once: it protects areas you want to keep clear and marks out clean edges for shapes like stripes, borders, or blocked sections.
I pay attention to how the tape sits along those edges, because any gap shows up once the paint dries.
One approach applies gesso only to the sections that will receive paint, then lets that layer dry for 24 hours before moving on. It gives you a chance to see the composition in white before committing to color.
5. Apply Paint or the Chosen Finish
Acrylic paint goes on in thin layers, each one dried fully before the next. The paint needs to grip glass, so work thin and patient rather than building up a heavy coat in one pass.
If you want a smooth finish without brushmarks, cut in the edges with a brush and use a small foam roller for the main surface. A second coat usually closes any streaks the first one left behind.
Chalkboard paint works as a brush-on or a spray. The brush-on version can be tinted to any color; HGSW Privilege Green from Lowe’s is one option that shows up on finished mirrors.
Spray chalkboard paint sticks well even without primer, but you get black or sometimes a basic green and nothing else.
For frames, spray paint covers fast. COLORSHOT Premium Spray Paint in Bubble Bath is one name that turns up on painted mirror frames.
After the spray paint dries, you can antique it by wiping a dark stain over the top. Copper spray paint works well with that technique.
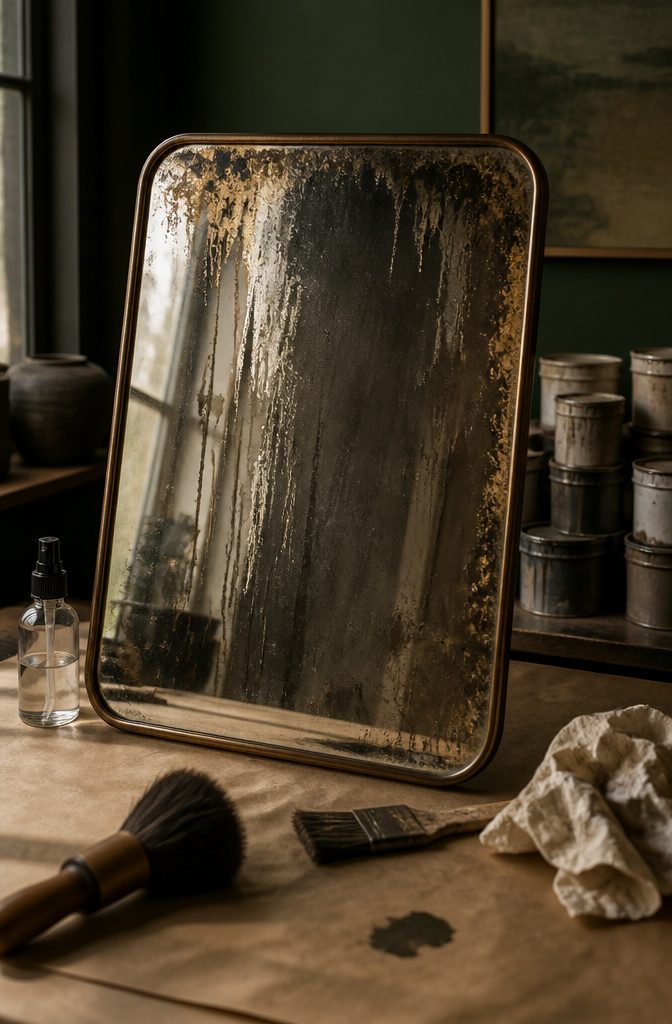
Antiquing the glass itself takes a different approach. Mix acrylic paint with water in a spray bottle, spray the mirror three or four times, and immediately dab and press with paper towels.
The result should look organic, not uniform. After five minutes, pull a textured brush downward through the almost-dry paint to create streaks.
Add warmth around the edges with a fluffy wax brush and metallic paint in chocolate, gold, and black, dabbing mostly at the corners. One mirror took twenty minutes start to finish.
6. Let Coats Dry and Add Further Layers
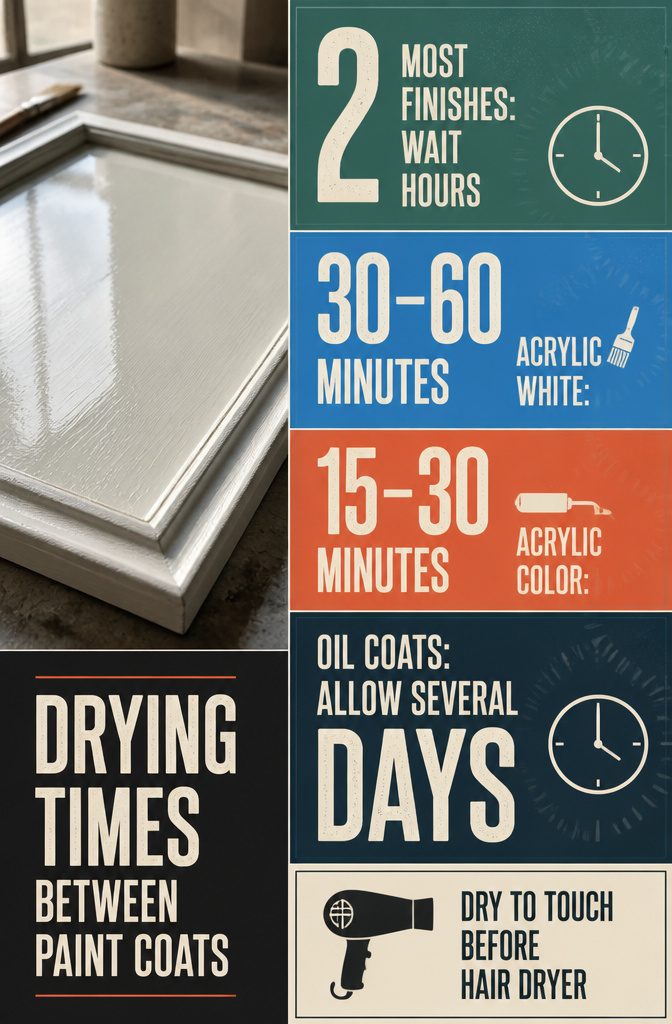
Space coats 2 hours apart if you want the paint to hold.
That timing works for most spray paints and mineral finishes — I’ve seen it hold true for Silk Mineral Paint in Oyster on frames, and chalkboard paint on glass follows roughly the same rhythm.
For acrylic on glass, the window is shorter:
- 30 to 60 minutes between layers for white base coats
- 15 to 30 minutes for colored paint, depending on how thick you laid it down and how warm the room runs
- 5 minutes before brushing if you’re working wet-on-wet to blend edges
Oil paint is a different animal. Budget several days if you went with multiple coats — the thicker the build, the longer it sits.
A hair dryer speeds things up when you’re impatient, but only once the paint is dry to the touch. Push it too soon and you’ll drag wet paint across the surface instead of setting it.
7. Add Details and Seal the Surface
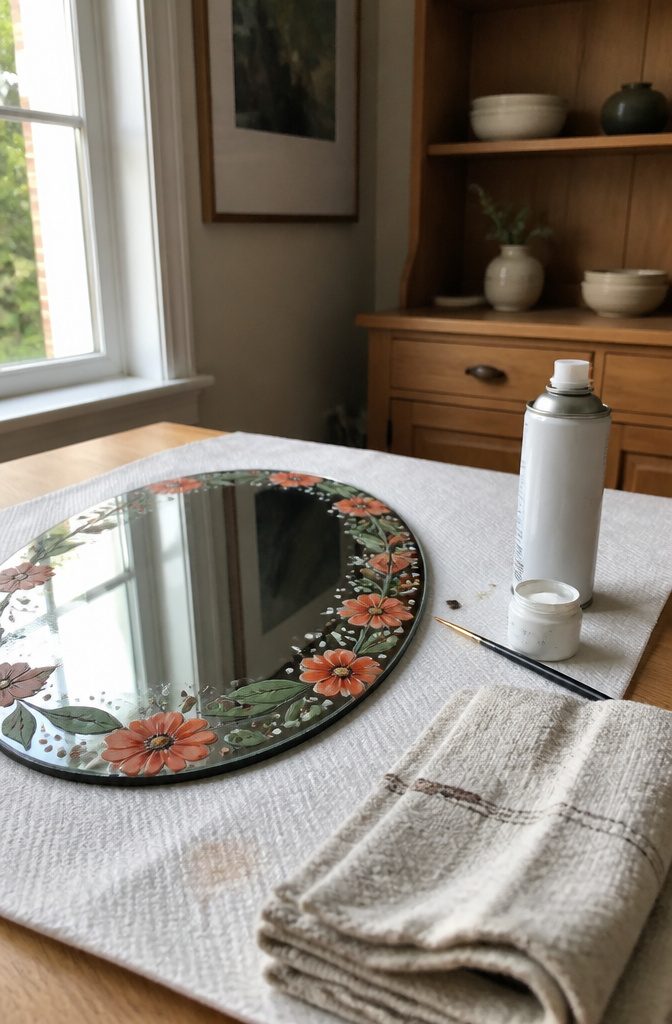
Once your painted design is finished, you can add small details like dots, lines or highlights in a contrasting color — white gesso or a white acrylic base under the colored work makes the design pop.
Hold a clear varnish or fixative spray about 8 inches away and mist it over the painted areas to make the design scratch- and water-resistant.
If you used mirrored spray paint, a light final mist is optional but adds a touch more reflectivity.
Chalkboard paint needs at least 3 days to cure before you write on it. Mineral paint with a built-in sealer can be left as is, though some people prefer an extra protective coat anyway.
The curing step decides how well the finish holds up to handling, so I wait the full time rather than rushing it.
8. Remove Masking and Reassemble
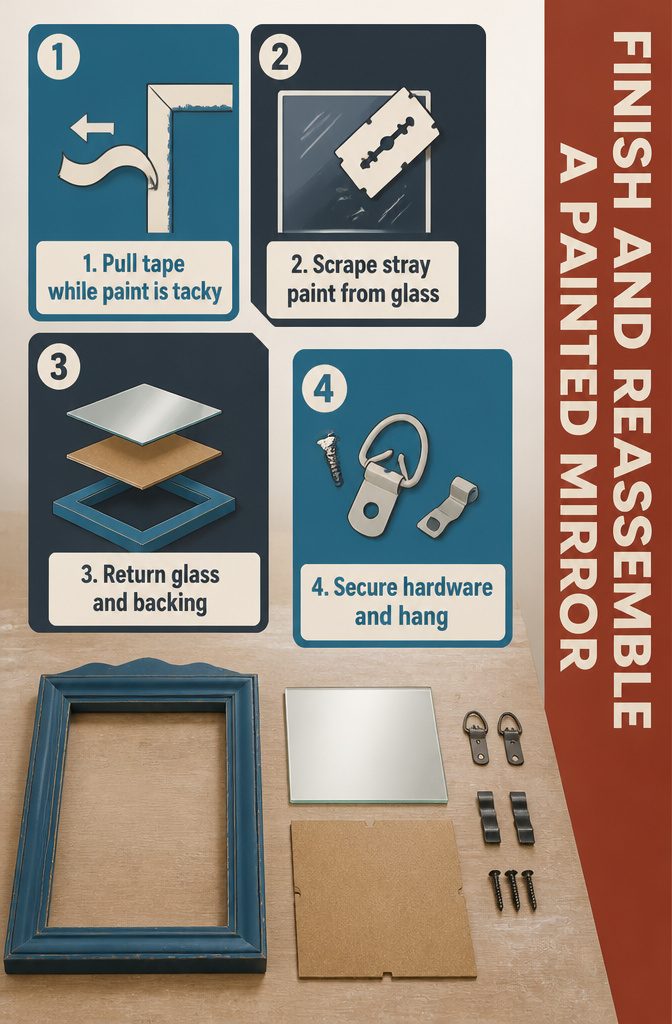
- Pull the tape while the final coat is still slightly tacky, usually within an hour of application. Waiting for complete cure bonds the tape edge to the paint, and removing it then tears the line you worked to keep sharp.
- If any paint crossed onto the mirror glass during application, use a razor blade held flat against the surface to scrape it away. Work in short, overlapping strokes and wipe the blade clean between passes.
- Place the glass back into the frame once the painted surface is fully dry to the touch.
- Secure the glass with a Logan Point Driver if the frame uses flexible points, or reattach any clips or tabs that held it originally. The cardboard backing that protected the glass before reassembly goes back in now.
- Hang the frame using D-ring hardware or the mounting system it came with. The paint needs another 24 hours of cure time before the piece gets moved or handled heavily.
Paint Choices That Stick to Glass and Frames
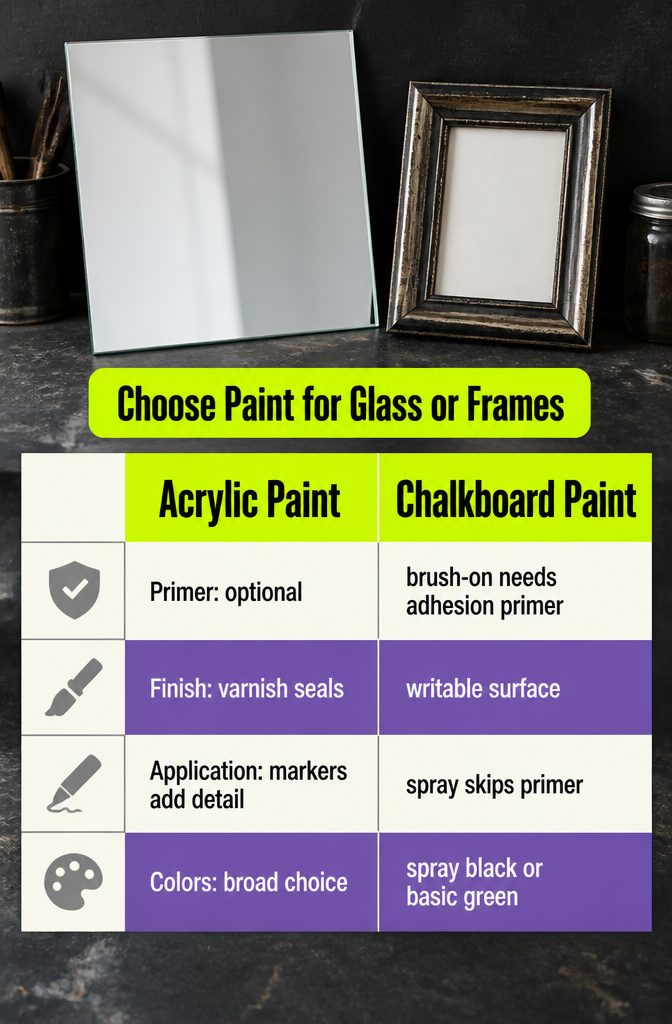
Acrylic paint sticks to glass, and it sticks even better when the surface is clean and free of grease. Acrylic markers give you the same adhesion with more control for lettering or tight detail work.
Glass primer helps if you want extra grip, though most guides treat it as optional rather than required. Once the design dries, seal it with a clear varnish to keep it from scratching or washing off.
Chalkboard paint turns the glass into a writable surface. Brush-on versions let you tint the color, but they need an adhesion primer like Kilz Original underneath to stay put.
The spray version skips the primer and sticks on its own, though you’re limited to black or basic green. Both need light sanding first to give the paint something to grab.
For frames, spray paint covers faster than brushing, and metallic finishes in black, silver, or chocolate give an aged or layered look.
If you’re painting small mosaic tiles on a mirror, enamel craft paints work well and peel off if you need to start over.
Turn a Mirror Into a Chalkboard
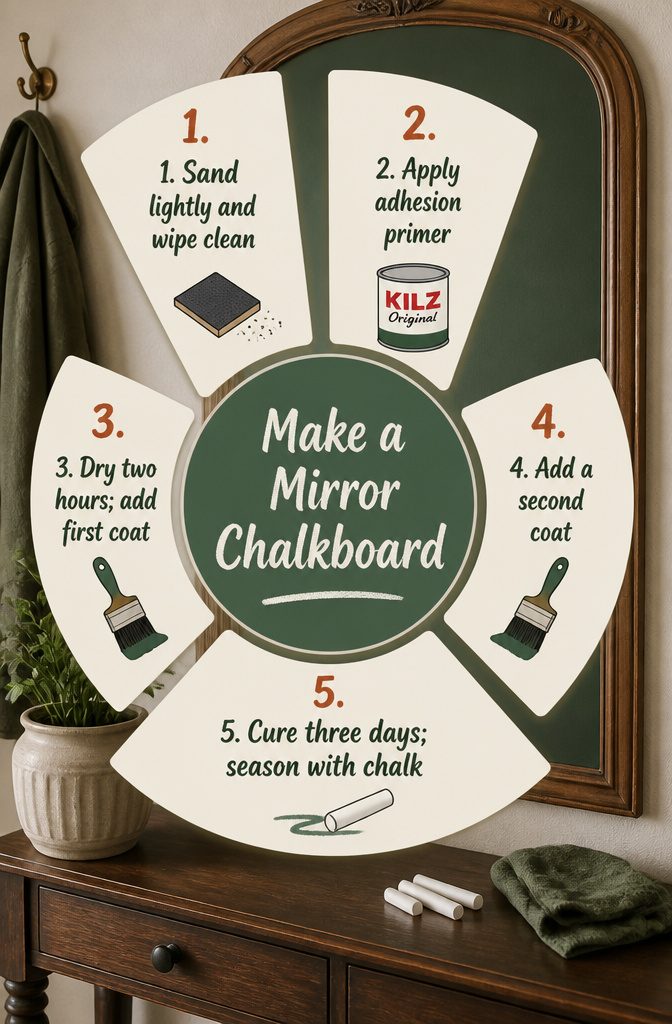
- Sand the mirror lightly with an abrasive pad or medium-grit sandpaper, then wipe the surface clean with a damp rag.
- Apply an adhesion primer. KILZ Original primer prevents the chalkboard paint from lifting later, which matters more on glass than it does on wood or drywall.
- Let the primer dry about two hours, then brush on the first coat of chalkboard paint. The brush-on version can be tinted to any color you want; I’ve seen HGSW Privilege Green from Lowe’s used for this, and the shade reads closer to sage than school-supply black.
- Apply a second coat a couple of hours after the first.
- Cure the surface for at least three days before writing on it. Then season it by rubbing the side of a piece of chalk across the entire painted area and wiping it off. This fills the tiny pores in the paint so your first real message doesn’t ghost into the surface.
Chalkboard spray paint can skip the primer step and still adhere, but you’re limited to black and sometimes a basic green, and you’ll need to mask the frame carefully to avoid overspray.
Antique the Glass From the Front
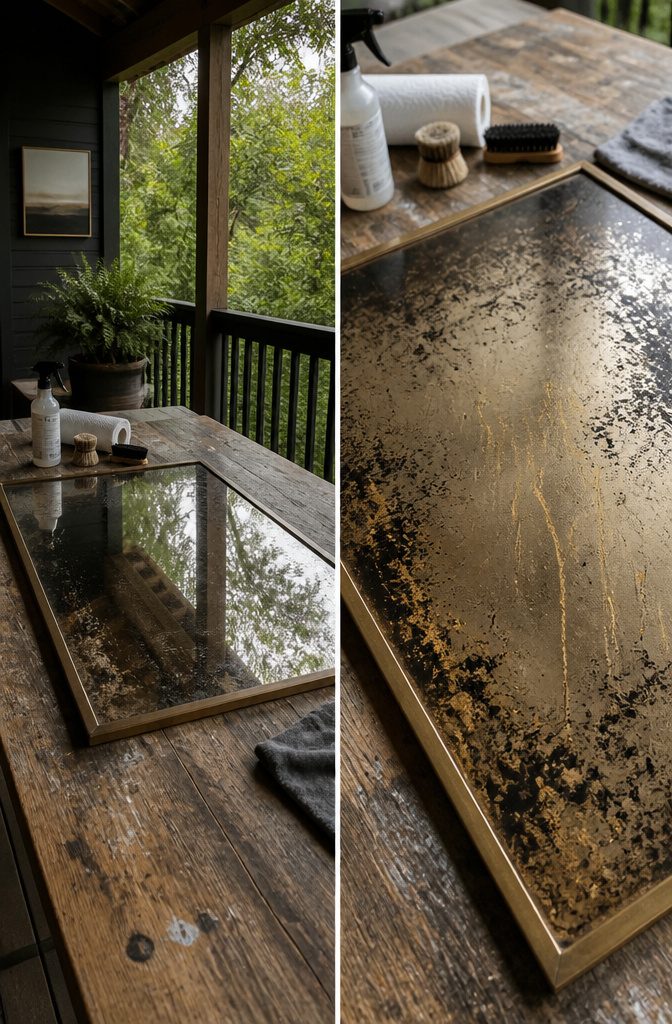
Mix paint with 4–5 tablespoons of water in a spray bottle — black, silver, chocolate, and gold metallic shades all work — and shake hard. Spray the mirror 3–4 times, then dab and press immediately with paper towels in an organic, uneven pattern.
After 5 minutes, when the paint feels almost dry, pull it downward with a textured brush dipped lightly in water; that gives the streaky patina an old mirror shows.
Mirrors age most at the edges, so I concentrate warmth there. A second mix — chocolate, a little gold, a hint of black — goes on with a fluffy wax brush in a dabbing motion, heaviest in the corners.
Keeping reference images of antique mirrors nearby helps; I adjust as I go rather than following a fixed plan.
This method suits decorative mirrors or lightly handled surfaces because the paint can scratch. Dust with a dry cloth and skip abrasive materials and harsh chemical cleaners.
Fix Mistakes or Remove Unwanted Paint
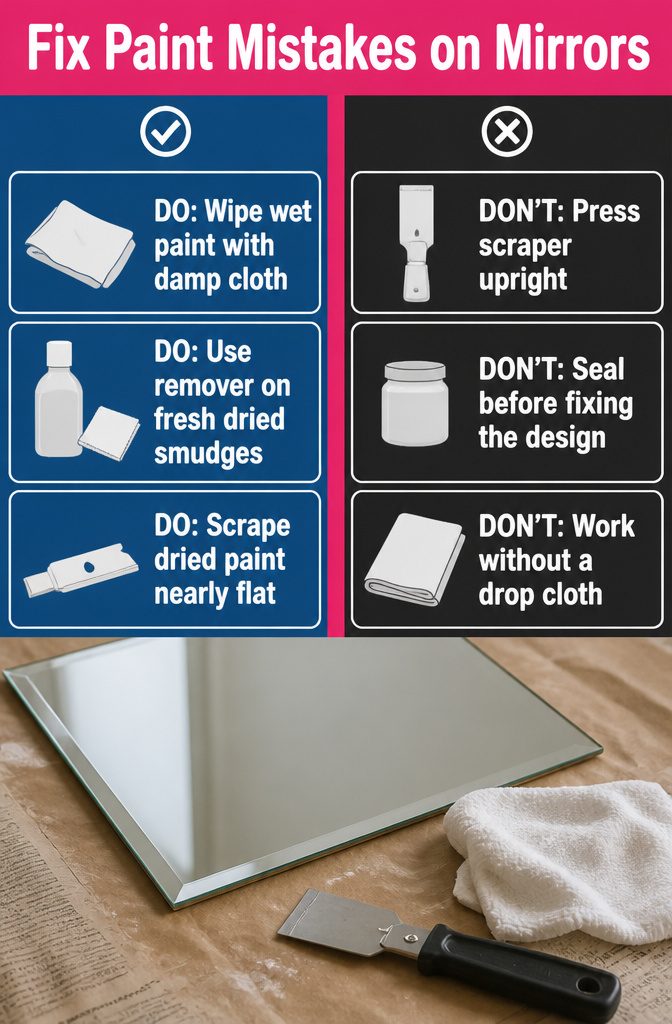
Mistakes happen fast with paint on glass, but they come off just as fast if you catch them early.
Wet paint wipes away with a damp cloth or paper towel, and nail polish remover works when the smudge has dried but the coat is still fresh.
Dried paint takes a razor blade or scraper held at a low angle so you don’t score the glass.
A few specific fixes:
- Scrape dried mistakes with a razor blade angled nearly flat against the mirror to lift paint without scratching.
- Use nail polish remover on a paper towel for small errors or fingerprints that dried before you noticed.
- Wipe off an entire design before you seal it if the layout isn’t working. Once the sealer goes on, removal gets harder.
Work over newspaper or a drop cloth so you can scrape without worrying where the paint lands.
Frequently Asked Questions
What kind of paint sticks to a mirror?
Acrylic paint sticks best to mirror glass, especially when the surface is clean and free of grease.
Acrylic markers offer the same adhesion with better control for details. Glass primer helps but isn’t required, and sealing the finished design with clear varnish prevents scratching.
Can you paint a mirror?
Yes, you can paint both the glass and the frame.
Use acrylic paint or acrylic markers on the glass itself, not regular wall paint, which won’t grip smooth surfaces. Frames accept chalk paint, spray paint, or decorative finishes without issue.
How do you make a mirror into a chalkboard?
Sand the glass lightly, apply adhesion primer like Kilz Original, then brush on 2 coats of chalkboard paint spaced 2 hours apart.
Let it cure for at least 3 days before writing, then season the surface by rubbing chalk across it and wiping it off.
How do I keep paint from dripping onto the glass when painting a mirror frame?
Remove the mirror from the frame entirely rather than taping around it, since paint slips between glass and wood no matter how well you seal the edge.
If removal isn’t possible, cover the glass completely with heavy paper and painter’s tape, then lay the mirror flat to prevent runs.
What kind of paint can I use to make mosaic mirror tiles?
Enamel craft paints work well on small mosaic tiles and peel off if you need to start over.
How do you make a mirror matte?
Matte spray paint or stick-on film will make a mirror matte, but the surface will no longer show a clear reflection.